
Gourmet and specialty mushrooms are simply the edible and functional species worth a home grower’s bench time — wine cap, enoki, beech and shimeji, pioppino, nameko, plus the oyster-and-lion’s-mane workhorses. The single decision that makes or breaks every one of them is matching the species to the right substrate, and roughly nine times out of ten a failed batch died at the grain or transfer stage, not in the fruiting chamber.
I grow this whole list in Sweden, end to end — agar plate to grain spawn to fruiting block to harvest — and I have killed enough jars to green Trichoderma over the years to take contamination seriously and to know which species forgive a sloppy step and which ones punish it. This guide is the map: what each specialty species actually wants, which substrate it lives on, how hard it is, and where it sits in the sterile chain. Every species below links to its own deep-dive grow guide. None of them are the psychoactive kind — this site is strictly gourmet and functional, and that line does not move.
What Counts as a Gourmet or Specialty Mushroom
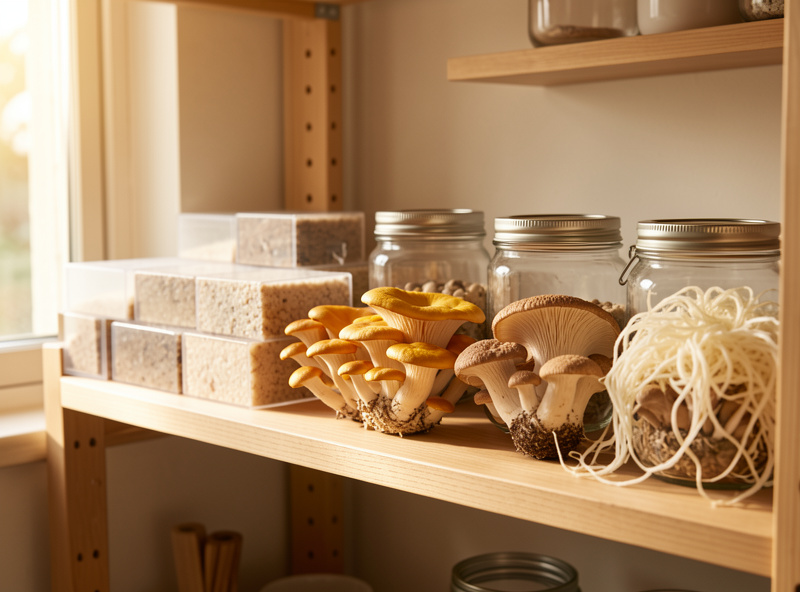
A gourmet mushroom is one you grow to eat: it has a flavour and texture a kitchen wants, and it fruits reliably enough on a managed substrate to be worth the effort. A specialty mushroom is the same idea pushed past the supermarket — species you almost never see fresh for sale because they bruise, they have short shelf lives, or they only come from growers who care. That is exactly where home cultivation wins. The enoki on my shelf looks nothing like the pale, watery clusters in a plastic sleeve, and shop-bought nameko barely exists outside of a jar.
Functional or “medicinal” species — reishi, lion’s mane, turkey tail — overlap with the gourmet list and belong here too, with one firm rule I hold to in every article: I describe what the research literature reports and nothing more. I grow reishi and lion’s mane; I do not make health claims about them, and you should be suspicious of any grow blog that does. What this site will never cover, under any circumstances, is psilocybin or any psychoactive species — no spores, no genetics, no technique, not even “for reference.” The gourmet and functional world is enormous, completely legal, and far more interesting to actually cook with.
If you are brand new to all of this, start with the broader complete beginner’s guide to growing mushrooms and the short list of the easiest mushrooms to grow at home before you chase the specialty species on this page. Oyster is the correct first species for almost everyone, and I will say why further down.
The One Thing That Decides Everything: Species to Substrate
The fastest way to waste a season is to put a species on the wrong substrate. Match it right and the mushroom does most of the work; match it wrong and you babysit a contaminated block for a month and harvest nothing. There are really only a handful of substrate families, and each specialty species has a clear home base.
Oyster mushrooms are the great forgivers. They will fruit on pasteurised straw, on CVG (coir, vermiculite, gypsum), on coffee grounds, on garden waste — their aggressive mycelium outruns competitors so reliably that they tolerate non-sterile bulk methods. Wine cap is the outdoor equivalent: it eats hardwood wood chips and straw in a garden bed with no sterilisation at all. At the other end of the scale, lion’s mane and king oyster want a rich, sterilised Masters Mix (50/50 hardwood sawdust and soy hull) or a supplemented sawdust block — more food, but more food means more for a contaminant to eat too, so the whole substrate has to be sterilised in a pressure canner rather than just pasteurised.
The specialty wood-lovers on this page — beech and shimeji, pioppino, nameko, enoki — all sit in that second camp. They are sawdust-block species. They want a supplemented hardwood substrate, sterilisation rather than pasteurisation, and patience while the block colonises and, for some of them, browns or matures before it will pin. Shiitake is the patience champion of the group; it needs a fully colonised block to go through a brown, leathery skin before it fruits, which is why so many people grow it on hardwood logs instead. The full breakdown of every substrate family lives in the complete substrate guide, and if you only read one supporting article, read that one.
There is a logic to the supplementation, too. The more nutrition you add to a sawdust block — bran, soy hull, the rich stuff that pushes yields up — the faster a contaminant grows if it gets in, which is why supplemented blocks must be sterilised and why a clean transfer matters so much more on them than on straw. Oyster on plain straw is forgiving precisely because there is less easy food for a mould to exploit. As you move down the table from oyster toward maitake, you are trading forgiveness for nutrition and flavour, and buying that trade with better technique. That single relationship — richer food demands cleaner work — explains most of the difficulty differences between the species on this page.
The Sterile Chain: Where Batches Actually Die
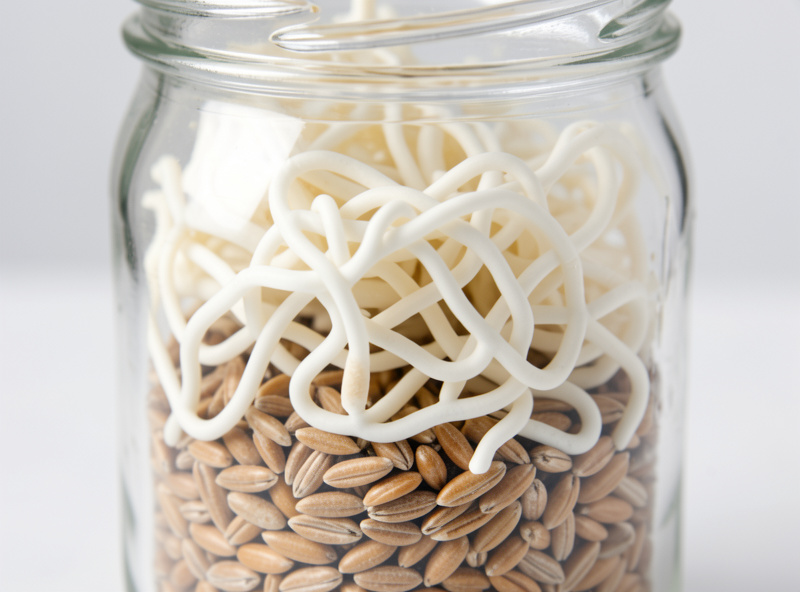
Every cultivated mushroom travels the same path from a clean culture to your kitchen, and understanding that chain is what separates a grower from someone buying kits. The chain runs: agar plate, then liquid culture or a grain-to-grain transfer, then grain spawn, then bulk or block substrate, then fruiting. Each link multiplies the living mycelium and each link is a chance to let a contaminant in.
Here is the part most beginners get backwards: the fruiting chamber is rarely where things go wrong. By the time a block is fully colonised, the mycelium owns the food and is hard to displace. The losses happen earlier — almost always at grain spawn or at a transfer. Grain is a perfect food for bacteria and mould as well as mushrooms, so any grain step that is not properly sterilised and handled cleanly is a coin flip. I run grain spawn through a pressure canner and I do transfers in front of a laminar flow hood for agar work, or in a still-air box for routine grain-to-grain. Knowing when the still-air box is enough and when only the flow hood will save the plate is one of those judgement calls you develop after killing a few cultures.
You do not need the full lab to grow the species on this page. Plenty of these can be done from a bag of ready-made sterilised grain spawn or a pre-colonised block — skip straight to fruiting and you remove the riskiest links entirely. But if you want to run your own genetics, you will eventually pour agar plates and decide between liquid culture, spore syringe, or grain spawn as your starting point. The deeper you go up the chain, the more control and the more failure points you take on.
Gourmet and Specialty Species at a Glance
This table is the quick-reference I wish I had when I started — every specialty species on this site, the substrate it lives on, a realistic difficulty read, the rough fruiting temperature range, and the trait that defines it. Difficulty assumes you are starting from spawn or a colonised block, not from a spore print.
| Species | Best Substrate | Difficulty | Fruiting Temp | Defining Trait |
|---|---|---|---|---|
| Oyster (pearl, blue, pink, gold) | Straw, CVG, coffee | Easiest | 10–24°C (by strain) | Fast, forgiving, non-sterile friendly |
| Wine cap | Hardwood chips + straw (outdoor) | Easy | 15–25°C | Garden bed, no sterilising |
| Lion’s mane | Masters Mix block | Moderate | 15–21°C | Toothed, no cap; loves humidity |
| King oyster | Masters Mix block | Moderate | 15–18°C | Thick stem; high FAE for shape |
| Shiitake | Supplemented sawdust block or logs | Moderate | 10–18°C | Long colonise-and-brown phase |
| Enoki | Supplemented sawdust (jars) | Moderate | 8–13°C | Cold + high CO2 for long stems |
| Beech / shimeji | Supplemented sawdust block | Harder | 13–18°C | Long maturation before pinning |
| Pioppino | Supplemented sawdust block | Moderate | 15–20°C | Clustered; firm, nutty caps |
| Nameko | Supplemented sawdust block or logs | Moderate | 10–16°C | Cold-loving; gelatinous glossy cap |
| Maitake | Sterilised supplemented sawdust | Hardest | 13–18°C | Slow; demands clean technique |
| Reishi | Supplemented hardwood block | Moderate | 21–27°C | Warm; antler vs conk by CO2 |
The Specialty Species, One by One
Each of these has its own full grow guide. Here is the short version of what makes each one worth growing and what to watch for, with the deep dive a click away.
Wine Cap (Stropharia rugosoannulata)
Wine cap is the species I send everyone with a garden to first. It is an outdoor crop — you build a bed of hardwood wood chips and straw, mix in spawn, keep it damp, and it does the rest with no sterile work whatsoever. The burgundy caps can get genuinely huge, and the flush timing follows rain and warmth rather than a chamber. My full guide to growing wine cap mushrooms covers spawn rates, wood-chip choice, and harvest. If your interest is specifically weaving the bed into garden paths and beds for landscaping, I have a separate piece on building an outdoor wine cap bed along garden pathways — same species, different angle.
Enoki (Flammulina velutipes)
Home-grown enoki is a different animal from the supermarket version. Left in normal air it makes a small, brown, perfectly edible cap; restrict the fresh air so CO2 builds up, keep it cold, and it stretches into those long pale clusters everyone recognises. It is the one specialty species where you deliberately starve the mushroom of air to shape it. The technique is all in the guide to growing enoki at home.
Beech and Shimeji (Hypsizygus)
Brown beech (buna-shimeji) and white beech (bunapi-shimeji) are the patience test of the gourmet world. The block colonises, then it sits and matures — sometimes for weeks longer than you think it should — before it will pin, and rushing it gets you nothing. The reward is a firm, nutty, never-slimy mushroom that holds up beautifully in a pan. Full method in the beech and shimeji grow guide.
Pioppino (Cyclocybe aegerita)
Pioppino — the black poplar mushroom — is one of my favourites to cook: clustered, firm-stemmed, with a deep nutty flavour that survives long cooking. It fruits in tidy bouquets off a supplemented sawdust block and is more forgiving than its looks suggest. The pioppino grow guide walks through spawn, block prep, and how to get a clean cluster.
Nameko (Pholiota microspora)
Nameko is the cold-lover, prized in Japan for the glossy, faintly gelatinous coating on its small amber caps that makes miso soup silky. It wants cooler fruiting than most and a long, patient colonisation, and it rewards you with a mushroom you will almost never find fresh anywhere. See the nameko grow guide for the temperature triggers and block handling.
Maitake (Grifola frondosa)
Maitake — hen of the woods — is the hardest mushroom on this list to fruit indoors. It is slow, it demands genuinely clean technique, and it tests your sterile chain harder than anything else here. It is also one of the most prized in the kitchen and the research literature. Because it leans functional as much as gourmet, its full write-up lives with the medicinal cluster: how to grow maitake (hen of the woods) at home.
The Workhorses: Oyster, Lion’s Mane, King Oyster, Shiitake, Reishi
The specialty species above are more rewarding once you have your technique dialled, but the backbone of any home grow room is the reliable five. Oyster is the gateway and the one I keep on weekly rotation; lion’s mane is the showpiece, a cascade of white teeth with a crab-like texture; king oyster gives you the thick, scallop-stem mushroom; shiitake rewards patience; and reishi is the functional one I grow for the tea shelf, never for a health claim. If you are choosing what to grow first, the turkey tail vs reishi comparison is a good tie-breaker for the functional shelf.
Dialing the Fruiting Environment
Once a block is colonised, four things decide whether you get mushrooms: humidity, fresh-air exchange, light, and temperature. They pull against each other, and the art is balancing them. High humidity keeps pins from drying out, but stagnant humid air invites bacterial blotch and cobweb mould; lots of fresh air keeps things healthy and shapes species like king oyster, but too much dries the pins before they can form. This is the FAE and CO2 balance, and every species sits at a slightly different point on it.
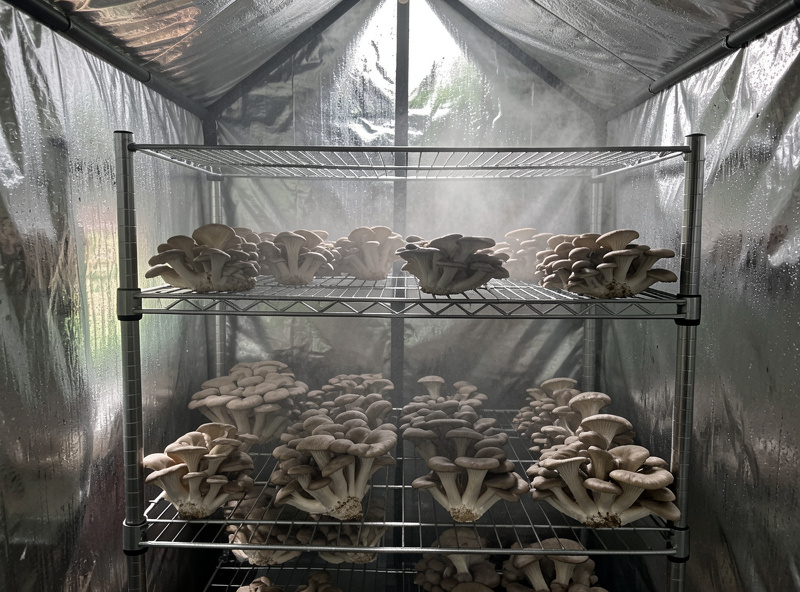
For most of the specialty species here I run a Martha-style fruiting tent with an ultrasonic humidifier on a humidistat, a small fan for circulation, and a hygrometer I check far too often. The single biggest beginner mistake is opening the chamber constantly to “check on it” — every time you do, you dump the humidity and dry the developing pins. Light matters less than people think; mushrooms are not plants, and a few hours of indirect daylight or a cheap LED is plenty to trigger and orient fruiting. When and how to pick is its own skill: the flushes and harvest guide covers reading the moment before the caps flatten and spores drop.
Temperature is where the specialty species get particular. Enoki and nameko want it genuinely cold — a cool cellar or a fridge-adjacent spot — while reishi wants it warm. Trying to fruit a cold-lover in a warm room is a common reason a perfectly colonised block just sits there. Match the temperature to the table above and most of the battle is won.
Contamination: The Skill That Separates Growers
If there is one capability that defines a real cultivator, it is reading contamination — knowing at a glance whether that fuzz is healthy mycelium or the start of a problem, and knowing which jars to toss and which to save. Healthy mycelium is bright white and either cottony or rhizomorphic (rope-like strands); it smells faintly of fresh mushroom or damp wood. The trouble signs are different and learnable.
Green, dusty patches are Trichoderma — the green mould — and a grain jar showing it goes in the bin without negotiation; it is the single most common batch-killer I see. Fine, grey, fast-spreading wisps that look like a spider web are cobweb mould, which moves shockingly fast but is sometimes recoverable on bulk. Slimy, wet, sour-smelling patches are bacterial contamination — wet spot — usually from under-sterilised or over-hydrated grain. The full visual breakdown, with the difference between healthy and contaminated growth, is in what healthy mycelium looks like and the complete contamination guide. This is the same clean-process discipline that protects my sourdough starter and my salami curing chamber — clean technique is one habit applied across every microbial hobby in the house.
Prevention beats triage every time. Correct sterilisation times, correct grain hydration, clean transfers, and not over-supplementing your substrate will prevent the large majority of contamination before it starts. The pressure-cooker sterilisation guide and the pasteurisation methods guide cover getting those foundations right.
Realistic Yields and Where to Start
A quick reality check, because the grow-kit marketing oversells this badly. A well-run fruiting block of a gourmet species typically returns somewhere around its own substrate weight in mushrooms across its full run, spread over two or three flushes, with the first flush the biggest and each subsequent one smaller. The biological efficiency varies a lot by species and strain, and anyone promising you a fixed multiple is guessing. What I can tell you from running these is that the first flush is reliably worth it and the third is often barely worth the chamber space.
If you are starting out, do not start with the specialty species on this page. Start with oyster on straw or a pre-made kit, get one clean harvest, and learn what healthy colonisation and good pinning actually look like with your own eyes. Then move to a Masters Mix block species like lion’s mane or king oyster, which adds the sterilisation step. Only then take on the slow, particular ones — beech and shimeji, nameko, maitake — where patience and clean technique are non-negotiable. The common beginner mistakes guide will save you a season or two of the errors I made first.
On time, be honest with yourself before you start. A sterilised block species from inoculation to first harvest is typically a one-to-two month commitment — a few weeks of colonisation, sometimes a maturation wait on top of that for the slow species, then the fruiting window. The active hands-on time is small, but the calendar time is real, and the block is quietly vulnerable to contamination the whole way. This is why I tell people to run their first grow on a fast, forgiving species: you want the feedback loop of a clean success in weeks, not a two-month wait that ends in a green jar and no idea what went wrong. Build the instinct on easy species, then spend it on the particular ones.
The gear scales with ambition. A windowsill and a kit need almost nothing. A real grow room means a still-air box for clean transfers, a large stovetop pressure canner for grain and sterilised blocks, and a humidity-controlled fruiting space. Buy in that order — there is no point owning a fancy fruiting tent if your grain jars keep coming out contaminated. As an Amazon Associate I earn from qualifying purchases.
From Block to Plate: Handling, Storing, and Cooking
The reason to grow specialty mushrooms instead of buying them is that they reach the pan at a freshness the supermarket cannot match — but that freshness is also fragile, so handling matters. Harvest by twisting or cutting the whole cluster at the base just before the caps fully flatten; a mushroom picked at its peak and cooked the same day is a different ingredient from one that has sat in a fridge drawer for a week. Most gourmet species keep three to seven days in a paper bag in the fridge — never a sealed plastic one, which traps moisture and turns them slimy. The exception is the specialty crowd’s whole point: enoki, nameko, and beech bruise and decline fast, which is exactly why you rarely see them fresh for sale and exactly why growing your own is worth it.
In the kitchen, the rule across nearly every species is heat and patience: get the pan hot, give the mushrooms room, and let the water cook off before you crowd or season them. Searing oyster mushrooms properly is the technique that transfers to most of this list. Firmer species reward longer cooking — pioppino and king oyster hold their texture through a braise, and king oyster makes a genuinely good chewy mushroom jerky. Shiitake brings the deepest umami of the group, and lion’s mane cooks up with a crab-cake texture that surprises people who have only had it as a powder.
When a flush gives you more than you can eat fresh — and a good first flush often will — preservation is the next skill. Drying is the simplest and concentrates flavour beautifully; the complete preservation guide covers drying, freezing, and the methods that actually hold texture. And the spent block is not waste: there are half a dozen genuine uses for old substrate, from garden mulch to a second, smaller outdoor flush.
Building the Grow Room as You Scale
Almost no one starts with a full lab, and you should not try to. The smart path is to add capability only when your current setup is the thing holding you back. A windowsill kit needs nothing. Your first real upgrade is usually a clean way to work — a still-air box — followed by reliable sterilisation, because once you are doing your own grain you live or die by it. Only later does it make sense to invest in a dedicated fruiting environment and, eventually, a laminar flow hood for serious culture work.
The fruiting space is where most people over-spend too early. A Martha-style tent with a humidifier and a small fan handles a surprising amount of production, and it is far cheaper than the climate-controlled rooms commercial operators run. If you want to take the manual fiddling out of it, climate sensors and simple automation can hold humidity and trigger fresh-air cycles for you — useful, but not where a beginner’s money should go first. For growers off the grid or worried about power, I have run the numbers on battery-sizing a mushroom lab for sterilisation, incubation, and fruiting.
If you have outdoor space, the cheapest scaling of all is to take species outside. Wine cap belongs in a garden bed, oyster will fruit on logs and garden waste, and a greenhouse can be converted into a seasonal fruiting space for a fraction of the cost of indoor climate control. Understanding the full mushroom life cycle — spore to mycelium to fruiting body — is what lets you read any new species and place it correctly in whatever space you have.
The Polymath Crossover
One last thing that shapes how I grow. Mushroom cultivation is not an isolated hobby in my house — it is one of four fermentations of patience running under one roof. Lion’s mane colonising in the grow tent, sourdough rising in the kitchen, salami losing weight in the curing chamber, koji working on rice: four different microbial processes, one shared discipline. The contamination instinct that keeps a grain jar clean is the same instinct that keeps the curing chamber free of the wrong moulds, and the patience that lets a beech block mature is the same patience a starter demands. If you already ferment anything, you are further along the mushroom-growing curve than you think — the clean-process muscle memory transfers directly.
Frequently Asked Questions
What is the easiest gourmet mushroom to grow at home?
Oyster mushrooms are the easiest by a wide margin. Their aggressive mycelium outruns competitors, so they fruit on non-sterile substrates like pasteurised straw, coffee grounds, or CVG. Most growers get a clean first harvest within four to six weeks of starting from spawn.
Do I need a pressure canner for specialty mushrooms?
For the wood-loving block species like beech, pioppino, nameko, and maitake, yes. They grow on nutritious supplemented sawdust that must be sterilised, not just pasteurised, and reliable sterilisation needs a pressure canner. Oyster and wine cap are the exceptions and can be grown without one.
Which specialty mushroom is the hardest to grow?
Maitake (hen of the woods) is the hardest on this list. It colonises slowly, demands genuinely clean sterile technique, and is unforgiving of contamination. Beech and shimeji are next, mostly because they need a long maturation period before they will pin.
Can I grow gourmet mushrooms without a sterile lab?
Yes, for many of them. Buying ready-made sterilised grain spawn or a pre-colonised block lets you skip straight to fruiting, which removes the riskiest links in the chain. You only need agar and flow-hood work if you want to run your own genetics or clone cultures.
Why does my colonised block refuse to fruit?
The most common reasons are wrong temperature and not enough fresh air. Cold-loving species like enoki and nameko will sit dormant in a warm room, and a block kept in stagnant high humidity without fresh-air exchange often will not pin. Match the temperature to the species and increase air exchange.
Are functional mushrooms like reishi and lion’s mane safe to grow and eat?
Lion’s mane is a culinary mushroom eaten widely as food. Reishi is typically used as a tea or extract rather than eaten whole because it is woody. Any health effects of functional mushrooms are reported in the research literature, not claims I make. Grow them as food and wellness ingredients, and consult a professional for medical questions.
Related Guides
- Mushroom Substrates: The Complete Home Cultivation Guide
- Growing Oyster Mushrooms: The Complete Home Cultivation Guide
- Growing Lion’s Mane: The Complete Home Cultivation Guide
- Mushroom Contamination: The Complete Home Grower Guide
- Mushroom Growing for Beginners: The Complete First-Year Guide
- Easiest Mushrooms to Grow at Home for Beginners