
Oyster mushrooms are the species to start with: they colonize aggressively, forgive substrate mistakes that would kill a fussier fungus, and fruit on pasteurized straw or even spent coffee grounds. A single 5 lb bag of pasteurized straw will routinely throw 1 to 1.5 lb of fresh oysters across two flushes in 10 to 14 days from full colonization.
I grow oysters on the weekly rotation here in Sweden, and after years of running everything from agar plates to outdoor beds I still treat oyster as the workhorse of the grow room. This guide is the whole chain the way I actually run it — species selection, substrate, the sterile steps where batches really die, fruiting, harvest, and the contamination calls you have to make without flinching. It links out to the deep-dive on each oyster type and method so you can go as far down the rabbit hole as you want.
Why Oyster Is the Species You Start With
Oyster (genus Pleurotus) is the correct gateway species because its mycelium runs faster than almost anything a contaminant can throw at it. On a fresh CVG or straw substrate, a healthy oyster culture races edge-to-edge in 7 to 14 days, often outcompeting mold spores before they establish. That speed is your safety margin as a beginner.
It also tolerates a wide fruiting range — most oyster strains pin anywhere from 10°C to 24°C depending on the species — so you do not need a precisely controlled fruiting room to get a harvest. Compare that to a slow colonizer like reishi, where one lapse in sterile technique hands the whole jar to Trichoderma. If you have never fruited a mushroom, oyster is where the odds are stacked in your favor. The companion piece on the easiest mushrooms to grow at home ranks oyster first for exactly this reason.
The Oyster Species Worth Growing
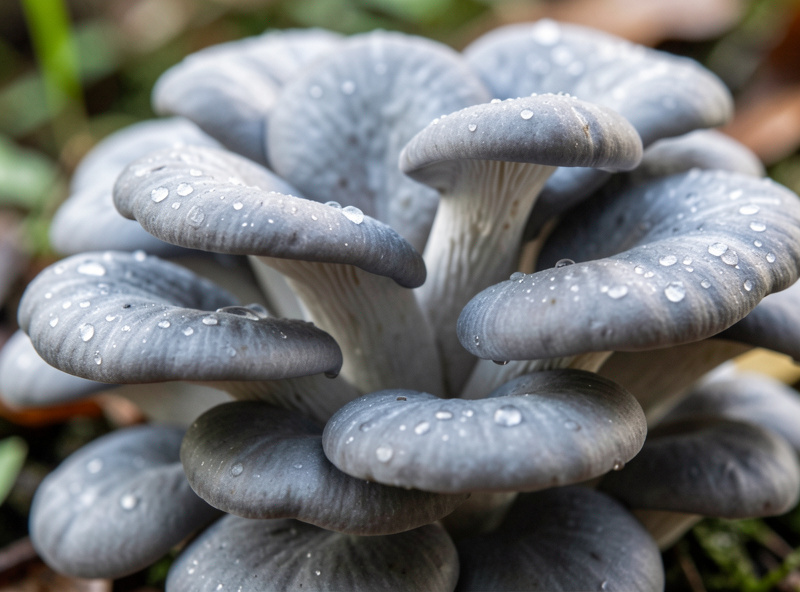
“Oyster mushroom” is not one thing — it is a cluster of Pleurotus species that behave differently in the tent. Blue and pearl are the cool-weather workhorses, pink is a summer heat-lover, golden wants warmth and bright light, and king oyster is the odd cousin that fruits more like a fruiting block than a shelf cluster. Picking the right one for your room temperature is half the battle.
Here is how the species I keep in rotation actually compare on the bench. Each row links to the full grow-out for that type.
| Species | Fruiting temp | Color / form | Best for | Difficulty |
|---|---|---|---|---|
| Blue / Pearl (P. ostreatus) | 10–20°C | Grey-blue to tan, broad shelves | Beginners, cool rooms, year-round | Easiest |
| Pink (P. djamor) | 20–30°C | Vivid pink, ruffled, fast | Warm climates, summer, color | Easy but short shelf life |
| Golden (P. citrinopileatus) | 20–30°C | Bright yellow clusters | Warmth, light, kitchen flavor | Easy, fragile |
| King (P. eryngii) | 15–18°C | Thick white stems, small caps | Meaty texture, supplemented blocks | Moderate |
For most first-timers I point them at blue and pearl oyster — they are the most forgiving and fruit in the temperature range a normal home sits at. If your grow space runs warm, jump to pink oyster or golden oyster instead. And if you want the steakhouse texture, king oyster is a different beast that earns its own method.
Substrate: What Oyster Will and Won’t Eat
Oyster is the least picky gourmet mushroom about substrate — it will fruit on pasteurized wheat straw, CVG (coir, vermiculite, gypsum), supplemented hardwood sawdust, spent coffee grounds, cardboard, and even paper. The practical winner for home growers is pasteurized straw or CVG: cheap, high-yielding, and no pressure canner required at the bulk stage.
The substrate I run most for oyster is CVG when I want a clean, repeatable bulk, and pasteurized straw when I want volume for cheap. Both work because oyster is a primary decomposer that thrives on low-nutrient lignocellulose — which is exactly why it does not need the heavily supplemented, fully sterilized blocks that lion’s mane or king oyster prefer. If you want the full breakdown of mixes and moisture, the complete substrate guide and the field-capacity moisture test are the two references I lean on most. For the coffee-grounds route specifically — a genuinely good beginner substrate — I wrote a full walk-through on growing oyster mushrooms on coffee grounds.
One honest caveat: spent coffee grounds and fresh straw are nutrient-rich and wet, which means they sour fast if your pasteurization is sloppy. Get the straw pasteurization right and oyster rewards you; get it wrong and you grow bacteria.
The Sterile Chain, Honestly — Where Batches Actually Die
The single most useful thing I can tell a new grower: oyster batches almost never die at the fruiting stage. They die earlier, at grain spawn or at a transfer, where a contaminant gets a foothold while the mycelium is still establishing. Fix your grain game and your success rate jumps from frustrating to boring-reliable.
The full chain is agar → liquid culture or grain-to-grain → grain spawn → bulk substrate → fruiting. You do not need all of it to grow oysters — plenty of people start with a syringe or a slice of live tissue straight into grain. But understanding where the weak links are matters. Grain spawn is sterilized in a pressure canner (90 minutes at 15 PSI is my standard for quart jars), and that is the step most beginners under-cook. If you want to run cultures yourself, the agar plate guide and the liquid culture vs spore syringe comparison cover the front of the pipeline, and the grain spawn sterilization guide covers the step that fails most.
For transfers I use a still-air box for routine grain work and a laminar flow hood when I am pouring agar or doing anything fussy. A SAB is genuinely enough for oyster grain work — the species colonizes so fast it usually wins the race even with imperfect technique. That is another reason it is the beginner’s species.
Spawn: Grain, and Getting It to Substrate
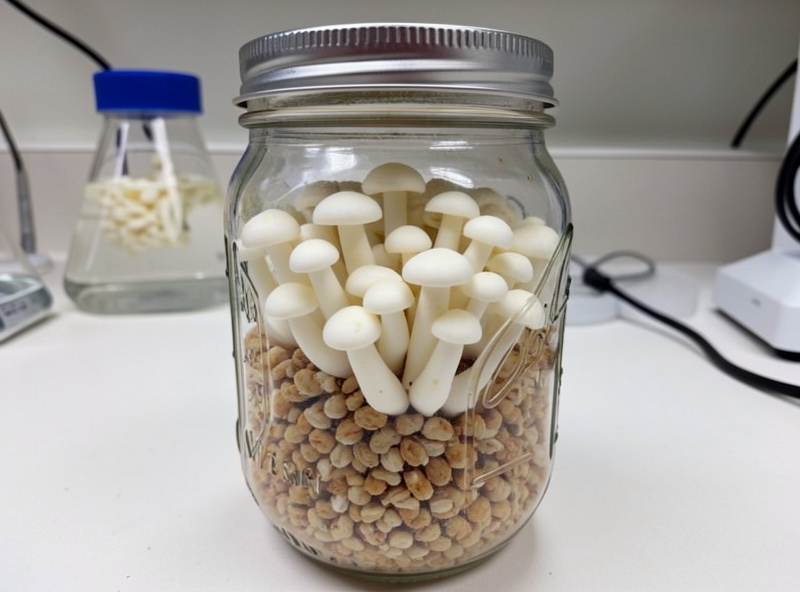
Grain spawn is colonized cereal grain — rye, milo, or wild bird seed — that carries the mycelium into your bulk substrate. The standard ratio I run for oyster is 1 part spawn to 4 or 5 parts bulk by volume; a higher spawn rate colonizes faster and shrugs off contamination, which is worth the extra grain when you are learning. The spawn-to-bulk ratio guide works the numbers in detail.
Hydrate grain to roughly field capacity — grains plump but no free water pooling — load jars, sterilize 90 minutes at 15 PSI, cool, then inoculate from liquid culture or do a grain-to-grain transfer. Once a jar is fully myceliated and white edge to edge, shake it to redistribute, let it recover for a day or two, then mix into pasteurized bulk. For oyster, that bulk goes into bags, buckets, or a tub. The bucket method for oyster mushrooms is the cheapest, most beginner-proof way to fruit a bulk batch with zero specialized gear.
Pasteurization vs Sterilization for Oyster Bulk
Bulk oyster substrate is pasteurized, not sterilized — a critical distinction that saves you a pressure canner. Pasteurization (holding straw or CVG at 65–80°C for 1 to 2 hours, or cold-lime soaking) knocks back competitor organisms while leaving beneficial microbes that actually help oyster establish. Full sterilization is only needed for nutrient-dense, supplemented blocks.
I run hot-water bath pasteurization for straw and the cooler tek (pour near-boiling water over substrate in an insulated cooler and hold overnight) when I want it hands-off. Cold pasteurization with hydrated lime is the other option and it is genuinely effective for oyster on straw. The trade-offs are laid out in the cold vs hot pasteurization comparison and the bulk substrate prep guide. The thing to internalize: oyster’s whole advantage is that it does not demand a sterile substrate, so do not over-engineer this step.
Fruiting: FAE, Humidity, and Pinning
Once your bulk is fully colonized — white throughout, often with the start of primordia — oyster needs three things to fruit: fresh air exchange, high humidity, and light. Oyster is a heavy CO2 producer and the most common beginner failure at this stage is too little fresh air, which gives you long, leggy stems and tiny caps instead of broad shelves.
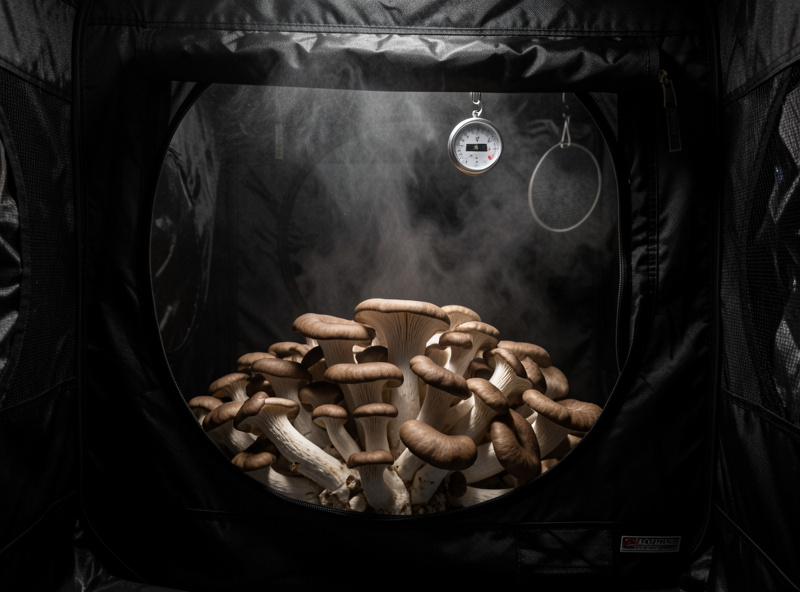
I aim for 85–95% relative humidity and several air exchanges per hour during fruiting — a small fan on a timer plus a humidifier on a humidistat in a Martha-style tent does it. Oyster needs light to fruit (it will not pin in the dark), but ordinary indirect room light or a cheap LED on a 12-hour cycle is plenty; you are triggering fruiting, not photosynthesis. The balance between airflow and humidity is the whole game, and I go deep on it in the FAE and CO2 guide. For the gear, the fruiting chamber humidifier and grow tent setup walk-throughs cover what I actually run.
Resist the urge to open the chamber constantly to admire the pins — every time you do, you dry the primordia and abort them. Pins are fragile. Mist the air, not the mushrooms, and let them work.
Harvest, Flushes, and What to Expect
Harvest oyster just before the caps flatten out and the edges start to turn up — pick the whole cluster by twisting it free at the base rather than cutting, which leaves less stub to rot. A well-run bag or bucket gives 2 to 3 flushes, with the first flush being the biggest (often half the total yield) and each subsequent flush smaller. Total biological efficiency on straw runs around 75–100% — meaning roughly 0.75 to 1 lb of fresh mushrooms per pound of dry substrate.
Between flushes, give the block a rest; some growers soak the block in cold water for a few hours to rehydrate it before the next flush. When yields drop off and the block starts looking tired or contamination creeps in, it is done — and the spent block still has uses, from the garden to a second grow, covered in the spent substrate guide. The full picking-and-resetting routine is in the flushes and harvest guide. Once you have a pile of fresh oysters, the cooking guide covers searing them properly, and king oyster makes a genuinely good mushroom jerky.
Contamination on Oyster — the Usual Suspects
Oyster’s speed protects it, but it is not immune. The contaminants I watch for are green Trichoderma mold (forest-green patches — toss the block, do not try to save it), cobweb mold (fast, grey, wispy — sometimes treatable but usually a sign of poor air hygiene), and bacterial blotch (slimy, smelly wet patches on the caps from misting directly or too much standing water). Healthy oyster mycelium is bright white and often distinctly rhizomorphic or fluffy — anything green, grey-fuzzy, or wet-slimy is not your mushroom.
The judgment call of save-versus-toss is the skill that separates growers from kit-followers, and I keep a full visual reference in the contamination guide and the bulk contamination triage piece. The same clean-process discipline that protects an oyster block protects the sourdough starter and the salami curing chamber down the hall — contamination control is one habit pointed at four different fermentations.
Growing Oyster Mushrooms Outdoors
Oyster is one of the few gourmet species that grows well outdoors with almost no equipment — it will colonize hardwood logs, stumps, totems, and straw beds in a shaded corner of the garden. The trade-off is patience: an outdoor log can take 6 to 12 months to colonize before it fruits, but then it produces seasonally for several years with zero further input.
The two outdoor methods I have run are inoculated hardwood logs (drilled, plugged with spawn dowels, and sealed with wax) and straw-bed beds spawned directly into a shaded trench. Logs are the slow-and-steady option; a straw bed fruits the same season but burns out faster. The full drilling-and-waxing routine is in the log inoculation guide. Outdoor oyster fruits when the weather triggers it — typically after a temperature drop and rain in spring and autumn — so you trade control for convenience. If you want a permanent garden patch, oyster pairs well with the same outdoor logic in the backyard growing guide.
Storing and Preserving Your Harvest
Fresh oysters keep only 5 to 7 days refrigerated in a paper bag — never a sealed plastic bag, which traps moisture and turns them slimy within a day or two. Because flushes come in waves, you will usually harvest more than you can eat fresh, so preserving is part of the workflow, not an afterthought.
The methods I use, in order of how often: dehydrating (dried oysters rehydrate well and keep for a year in a jar), sautéing-then-freezing (raw frozen oysters go mushy; cooked-then-frozen hold texture), and the occasional batch of king-oyster jerky. Pink and golden oyster have the shortest fresh shelf life of the bunch, so I dry or cook those almost immediately. For the cooking side of things — getting a proper sear instead of a steamed, watery pan — the oyster cooking guide is the one to read, and there is a chewy mushroom jerky recipe built around king oyster.
The Most Common Oyster Mistakes
After years of doing this and helping other growers troubleshoot, the failures cluster into the same handful of mistakes — and none of them happen at the part beginners worry about. The biggest single cause of a failed oyster grow is under-sterilized grain spawn, not anything that happens in the fruiting tent.
The recurring ones I see: too little fresh air during fruiting (leggy stems, aborted pins); misting the mushrooms directly instead of the air (bacterial blotch and slimy caps); opening the chamber constantly to check on pins (drying them out); using too low a spawn rate so the substrate colonizes slowly and a contaminant wins the race; and trying to “save” a green Trichoderma block instead of bagging it and starting over. Almost every one of these is a process fix, not a gear problem. Oyster is forgiving enough that getting these five right puts you ahead of most home growers. When a grow does go wrong, the contamination guide and the cost math in the cost comparison help you decide whether to troubleshoot or simply restart.
Picking Your First Method
If you want the lowest-effort path to your first oyster harvest, start with the bucket method on pasteurized straw, or grow on spent coffee grounds if you drink a lot of coffee and want a near-free substrate. Both skip the pressure canner entirely and get you fruiting fast.
From there the natural progression is: master one oyster species and method, then branch. Run blue or pearl through a bucket first, then try pink in summer, then graduate to supplemented blocks for king oyster and lion’s mane. The beginner’s first-year guide and the month-by-month calendar lay out a realistic learning curve, and the equipment guide tells you what you actually need versus what you can skip at the start. For tight spaces, the apartment setup guide shows it can be done on a shelf.
As an Amazon Associate I earn from qualifying purchases. If you want to skip culturing and start from clean genetics, a bag of oyster mushroom grain spawn is the fastest on-ramp, and filter-patch grow bags make bulk colonization clean and simple.
Understanding Oyster Mushroom Yields and Biological Efficiency
Biological efficiency (BE) is the yield metric every grower eventually obsesses over, and it trips up more beginners than anything else. BE is the weight of fresh mushrooms harvested divided by the dry weight of the substrate, written as a percentage — so 100% BE means 1 lb of fresh oysters from 1 lb of dry straw, not a one-to-one conversion of the soaked block, which weighs several times more once hydrated. On well-run pasteurized straw I see oyster land between 75% and 100% across all flushes, and the first flush alone often delivers half of that total.
Three levers move BE in a home grow: spawn rate, substrate freshness, and how cleanly you manage fruiting. A generous 1:4 spawn rate, straw pasteurized properly at 65–80°C, and disciplined fresh-air exchange push a bag toward the top of that range; a stingy spawn rate or a soured substrate drags it down fast. Supplementing straw with a few percent wheat bran, or stepping up to a richer Masters Mix, can lift BE further — but it forces you back to full sterilization rather than pasteurization, a trade-off oyster rarely justifies when plain straw already yields this well.
One honest caveat on the numbers: the research literature reports commercial oyster strains exceeding 100% BE on optimized substrate, but those figures come from climate-controlled production rooms, not a grow tent in a Swedish spare room. Treat 75–100% as the realistic home target, weigh your own flushes to learn what your setup actually returns, and bank anything above that as a good day rather than the baseline.
Frequently Asked Questions
How long does it take to grow oyster mushrooms?
From inoculated bulk substrate, oyster mushrooms typically take 7 to 14 days to fully colonize and another 7 to 14 days to pin and fruit. Start to first harvest is usually 3 to 5 weeks, with the first flush being the largest.
What is the easiest substrate for oyster mushrooms?
Pasteurized wheat straw and spent coffee grounds are the easiest beginner substrates because they need only pasteurization, not full sterilization. CVG (coir, vermiculite, gypsum) is the cleanest and most repeatable option if you want consistency.
Do oyster mushrooms need light to grow?
Yes. Oyster mycelium colonizes in the dark, but the mushrooms will not pin or fruit without light. Ordinary indirect room light or a cheap LED on a 12-hour cycle is enough, since you are triggering fruiting, not feeding photosynthesis.
Why are my oyster mushrooms growing long stems and tiny caps?
Long, leggy stems with small caps almost always mean too little fresh air exchange. Oyster mushrooms produce a lot of CO2, and high CO2 forces stem growth over cap development. Increase airflow with a fan and the caps will broaden.
How many times will an oyster mushroom block fruit?
A well-run bag or bucket typically gives 2 to 3 flushes, with the first being the biggest. Soaking the block in cold water between flushes helps rehydrate it. When yields drop off or contamination appears, the block is spent.
Are oyster mushrooms safe for total beginners to grow?
Yes. Oyster is the recommended first species because its mycelium colonizes faster than most contaminants can establish, it tolerates a wide temperature range, and it fruits on simple pasteurized substrate without a pressure canner. The odds favor a successful first grow.
Related Guides
Work through the full oyster cluster and the supporting references: