
Grain spawn is where most home grows are won or lost. Not fruiting, not substrate — grain. It is the richest, most nutrient-dense link in the whole chain, which makes it the favorite target of every bacterium and mold in the room, and it is the one step where “close enough” sterilization quietly fails you a week later. I have run rye, milo, and wheat-berry spawn through hundreds of jars, and I can tell you that once your grain prep is dialed, your contamination rate falls off a cliff. Get it wrong and you will chase phantom problems in the fruiting tent that were really born in the canner.
This is the exact grain-spawn sterilization routine I run, with the numbers that matter and the reasons behind them — because the “why” is what lets you adapt when your grain, your jars, or your canner are not identical to mine.
Sterilization vs. pasteurization — and why grain demands the former
First, the line that confuses a lot of beginners: grain spawn must be sterilized, not pasteurized. Pasteurization (hot water, 65–80 °C) is for nutrient-poor bulk substrates like straw, where you only need to knock back competitors enough to give the mycelium a head start. Grain is far too rich for that — any surviving organism will explode in it. Grain needs true sterilization: 121 °C under 15 PSI of steam pressure, which is the only home-accessible way to kill the heat-resistant bacterial endospores that ride in on the grain itself. A boiling-water bath tops out at 100 °C and will not kill Bacillus spores. That single distinction is why a pressure canner, not a stockpot, is non-negotiable for grain.
Choosing and prepping the grain
My workhorse grains are rye berries and milo (sorghum), with whole oats and wheat berries as backups. Rye is forgiving, holds shape, and resists clumping; milo is small, cheap, and gives a ton of inoculation points per jar. Whatever you run, the prep before the canner does half the work.
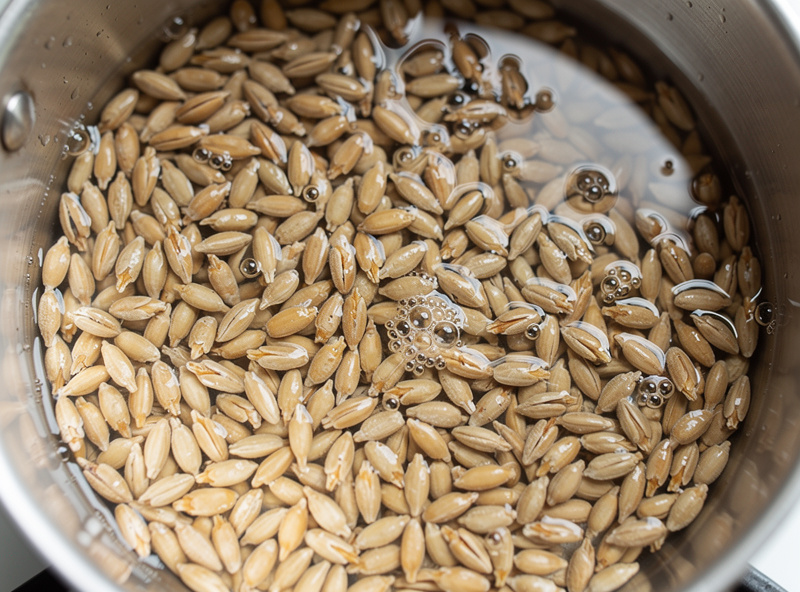
Soak. I soak grain 12–24 hours in plain water at room temperature. Two things happen: the grain hydrates evenly toward field capacity, and dormant Bacillus endospores are coaxed into germinating into vegetative cells — which the pressure cook then kills outright. Skipping the soak leaves more heat-resistant spores intact, and that is a leading cause of jars that fail despite a “long enough” cook. This is the same endospore problem I dug into in the guide on bacterial wet-spot contamination.
Simmer (optional but useful). Some growers simmer 10–15 minutes after the soak to finish hydration. I do this with harder grains; with rye the long soak usually suffices.
Drain and surface-dry. This is the step people rush and regret. After soaking, drain the grain thoroughly and let the surface moisture evaporate — spread it on a towel for 30–60 minutes until the kernels are dry to the touch but plump inside. The target is field capacity: fully imbibed grain with no free water. Tilt a jar of finished grain and nothing should run to the bottom. Standing water is the single biggest invitation to a bacterial wet spot.
Jarring up the right way
I fill jars (quart/liter mason jars work well) about two-thirds full, never packed. The lids are modified with a breathable filter — a synthetic micropore filter disc or micropore tape over a hole — plus a self-healing injection port if I plan to inoculate with liquid culture. The filter lets the jar exchange gas without letting contaminants in, and it must survive the canner without melting or clogging.
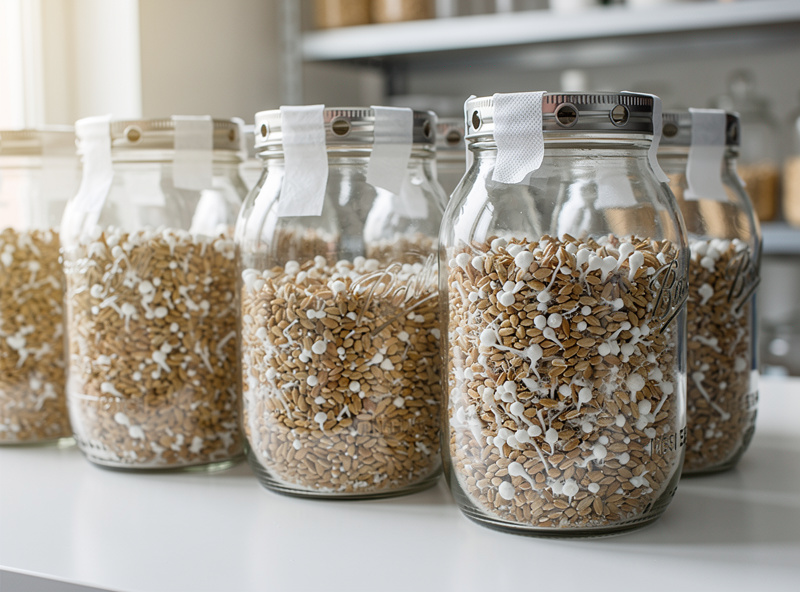
Do not over-tighten the rings — finger-tight is right. Bands cranked down hard can prevent the jars from venting and, worse, can cause a vacuum that sucks in unfiltered air as they cool. A loose band, or a band backed off a quarter turn, lets steam move and the jar breathe through its filter.
The pressure-canner run: PSI and time
Here is the part that has to be right. For grain spawn I run 15 PSI for 90 minutes, and the timing rule is the one most people get wrong:
- Time from full pressure, not from the burner. Bring the canner up, let it vent steam steadily for several minutes to purge air (trapped air lowers the real temperature even if the gauge reads 15), then seal the vent, and only start your 90-minute clock once it is holding a steady 15 PSI.
- Hold a steady 15 PSI the whole time — 15 PSI corresponds to roughly 121 °C, the temperature that actually kills bacterial endospores. Dropping pressure mid-run resets the effective sterilization.
- Bigger or denser loads get the full 90 minutes, no shortcuts. A jam-packed canner where steam cannot circulate, or jars packed so tight the center never heats, is a classic silent failure. If anything, I lean longer rather than shorter on a heavy load.
- Cool naturally. Let the canner depressurize on its own — do not crack it to rush it, which can pull contaminated air through the filters as pressure drops.
One safety note worth stating plainly: a true pressure canner rated to hold 15 PSI is what you want. Many electric “pressure cookers” top out lower and cannot reliably reach sterilizing temperature for grain. Know your unit’s actual pressure rating before you trust it with a batch.
Cooling, inoculation, and the shake test
Let the jars cool completely to room temperature before you inoculate — inoculating hot grain cooks your culture. I cool them in still, clean air (in front of the flow hood or inside the still-air box), never out in the open kitchen. Then inoculate through the port with liquid culture, or do a grain-to-grain transfer from a fully colonized master jar, in front of the flow hood or in the SAB.
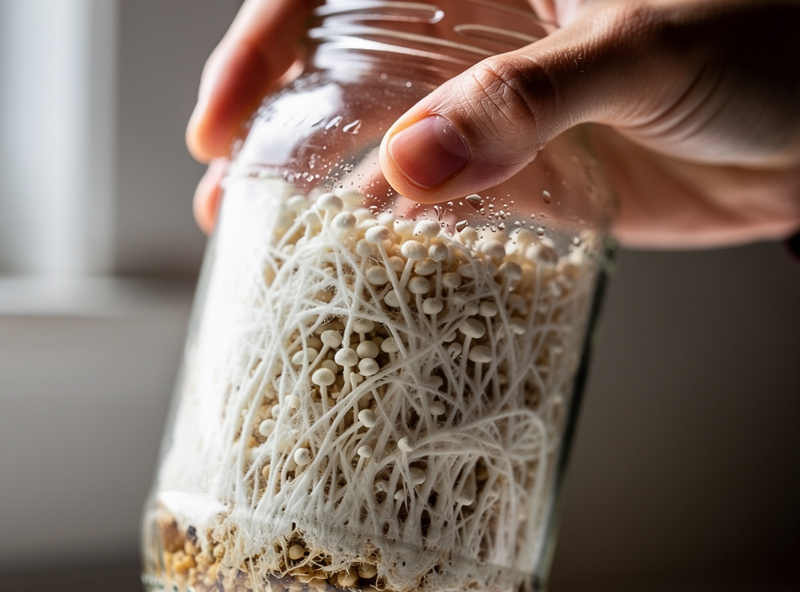
Once colonization reaches about 20–30%, give the jar a firm shake to break up the colonized grain and spread the mycelium throughout. Done at the right time, this can cut days off full colonization. Shake too early (before the mycelium has a foothold) and you may stall it; shake too late and the grain has fused into a solid cake. Watch each jar and decide individually — this is where reading your own grain beats following a fixed schedule.
Where grain sterilization actually fails
When a grain jar goes bad, the cause is almost always one of these four, in rough order of frequency: timing from the burner instead of full pressure; over-hydrated grain with free water pooling; a packed canner where steam never reached the center; or skipping the soak so endospores survived. Notice that none of these is bad luck — every one is a process control you can fix. That is the encouraging part. Grain is the hardest link to keep clean, but it is also the most deterministic: cook it right, to field capacity, and clean grain becomes the norm rather than the lottery. If you want the full map of what each contaminant looks like when prevention slips, the contamination guide covers the whole rogues’ gallery, and the liquid culture vs. spore syringe breakdown covers what you actually inoculate that clean grain with.
Frequently Asked Questions
How long do you pressure cook grain spawn?
Run grain spawn at 15 PSI for 90 minutes, timed from when the canner reaches and holds full pressure, not from when you turned on the burner. Vent steam first to purge air, then start the clock. Bigger or denser loads still get the full 90 minutes with no shortcuts.
Can I use a pressure cooker instead of a pressure canner?
Only if it genuinely holds 15 PSI and reaches about 121 degrees Celsius. Many electric pressure cookers top out lower and cannot reliably kill heat-resistant bacterial endospores in grain. Check your unit’s actual pressure rating before trusting it with a batch; a true pressure canner is the safe choice.
Why do I soak grain before sterilizing?
Soaking 12 to 24 hours hydrates the grain evenly toward field capacity and coaxes dormant Bacillus endospores into vegetative cells the pressure cook can kill. Skipping the soak leaves more heat-resistant spores intact, a leading reason a cook that looks long enough still fails days later.
How do I know if my grain has the right moisture?
Aim for field capacity: grain fully imbibed with water but with no free liquid in the jar. After draining, surface-dry the kernels until they are dry to the touch but plump inside. Tilt a finished jar and nothing should run to the bottom. Pooled water invites bacterial wet spot.
When should I shake my grain jars?
Shake once colonization reaches roughly 20 to 30 percent, to redistribute the mycelium and speed full colonization. Shaking too early, before the mycelium has a foothold, can stall it; too late and the grain fuses into a solid cake. Judge each jar individually rather than on a fixed schedule.
Do I need to sterilize grain if I pasteurize my substrate?
Yes. Pasteurization at 65 to 80 degrees Celsius only knocks back competitors in nutrient-poor bulk substrates like straw. Grain is far too rich and must be fully sterilized at 15 PSI, because any organism that survives will outcompete the mycelium in that nutrient-dense environment.