
You do not buy your way into a clean grow room — you build it, one station at a time. A complete DIY mushroom fruiting chamber and lab build runs from a $25 still air box to a humidity-controlled fruiting tent, and the whole chain can be assembled for under $400 if you stage it in the right order. Build sterile-first, fruiting-last, and almost nothing contaminates.
I run my own lab end to end — agar plates to fruiting blocks to harvest — and every piece of it is fabricated, not mail-ordered as a kit. This guide is the master plan: the seven builds that turn a corner of a room into a working cultivation lab, what each one is actually for, and the order to build them in so you are never blocked waiting on the next station. Each build has its own step-by-step guide linked below; this page is the map that ties them together.
The Build Order That Actually Works
Build in the direction your spawn travels: sterile work first, incubation second, fruiting last. The reason is simple — most home grows die at the grain or transfer stage, not in the fruiting chamber, so the stations that protect a culture earn their place before the ones that fruit it. A grower who buys a fancy fruiting tent before owning a still air box has spent money in exactly the wrong sequence.
The chain is: a sterile workspace to make transfers (still air box, then a flow hood if you scale), a pressure canner to sterilize grain, a dead-stable incubation shelf to colonize it, and finally a fruiting chamber — shotgun, monotub, Martha tent, or a converted greenhouse — to pin and flush. The same clean-process discipline that protects my sourdough starter and my salami curing chamber runs the whole thing: clean surfaces, still air, flame on the transfer, and patience. Build the stations in that order and you will never be stuck with colonized spawn and nowhere clean to put it.
If you are still deciding what gear genuinely earns shelf space before you start fabricating, my complete home setup guide covers the buy-versus-build calls for every station on this page.
Station One: A Sterile Workspace
Every transfer you make — liquid culture into grain, grain to grain, agar to grain — happens in still, filtered, or flame-protected air, and for 90% of home work a still air box is enough. A still air box (SAB) is a clear tote with two arm holes; it kills the air currents that carry contaminant spores onto your open jars. It costs about $25 and takes twenty minutes to build, and it is the single highest-leverage station in the lab.
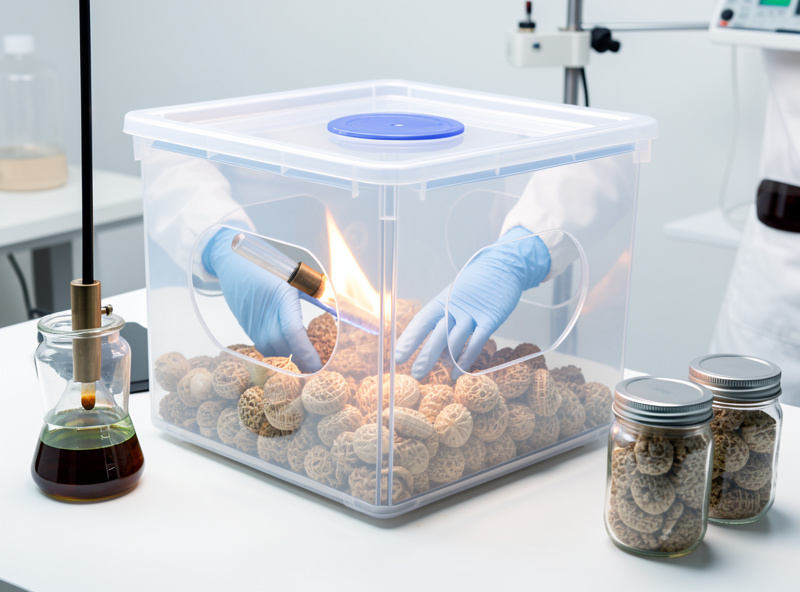
The SAB handles routine transfers. The moment you start pouring agar plates or working a large grain run, still air stops being enough and you want moving filtered air instead — a laminar flow hood that pushes HEPA-filtered air across the work so nothing can settle on it. I run both and I know exactly when each one is the right tool: the SAB for a few jars, the hood for plate work and bulk grain. If you are not sure which you need yet, I broke down the decision in still air box vs flow hood, and there is a full DIY laminar flow hood build for when you outgrow the box. Start with the 20-minute still air box build — it is the first thing I tell every new grower to make.
Whatever you transfer in, the habits matter more than the box: 70% isopropyl on every surface, gloves wiped down, jars opened for the shortest possible moment, and a flame or still air between the open culture and the room. Those habits are the real sterile technique; the box just makes them easier to keep.
Station Two: Sterilizing and Colonizing
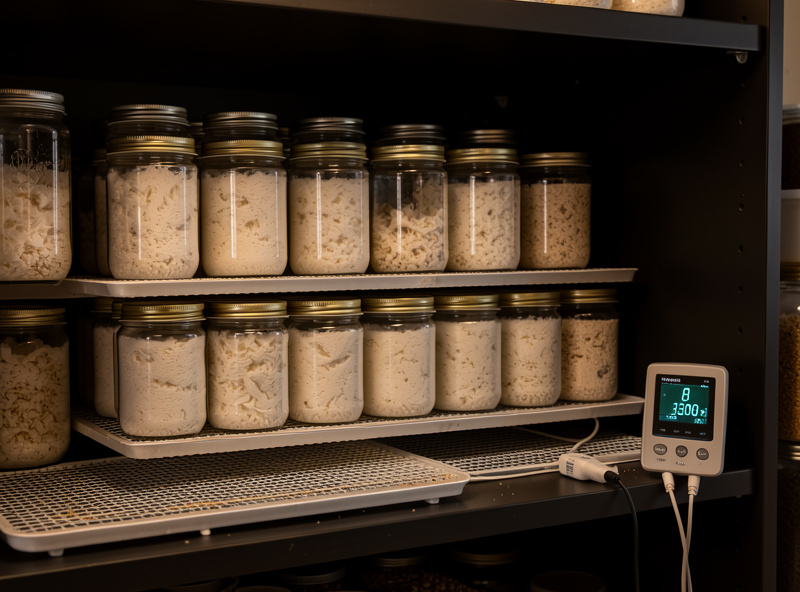
Grain spawn has to be sterilized at 15 PSI for 90 minutes in a pressure canner, then colonized at a dead-stable temperature — and that incubation stability is its own build. Sterilization is non-negotiable: only a pressure canner reaches the 250°F that kills the bacterial endospores living in grain, which is why a boiling-water bath alone will not do it. I run a large stovetop canner for grain and supplemented sawdust both.
Once the grain is sterile, inoculated, and cooling, it needs to colonize somewhere warm, dark, and steady — ideally 75–80°F for most gourmet species, held without swings. A cold garage or a fluctuating windowsill stalls colonization and gives contaminants the opening they need. The fix is a dedicated incubation chamber: a heat mat under a thermostat probe, inside an insulated tote or cabinet, holding the set temperature within a degree or two. My DIY incubation chamber build walks the wiring and the dead-stable temperature setup; for the sterilization side, see pressure cooker sterilization PSI and times and how I sterilize grain spawn without wasting a batch. Good grain spawn and culture work is where most grows are won or lost.
Pasteurizing Bulk Substrate
Not everything gets sterilized — bulk substrate like straw and CVG gets pasteurized at 150–170°F (65–75°C) for an hour or two, which knocks back competitor molds and bacteria without rendering the material dead-sterile. The distinction is the one most new growers miss: nutrient-dense grain must be fully sterilized at 15 PSI because anything alive in it will outrun your mycelium, but a bulky, low-nutrient substrate colonizes fine after a gentler pasteurization that leaves a few beneficial microbes in place to crowd out invaders. Boil straw outright and you actually strip it too clean, opening an empty niche that contamination races into.
There are two methods I run depending on volume. For straw and larger batches I use a hot-water bath: submerge the substrate in a drum or large pot held at 160–170°F for an hour, then drain and cool. For coir-based CVG I use the cooler tek — pour near-boiling water over the coir in an insulated cooler, seal the lid, and let it coast down overnight, which pasteurizes by held heat rather than a steady flame. Both land in the same window; the cooler tek just trades precision for not babysitting a thermometer.
The failure modes are temperature on both ends. Below about 140°F you do not actually pasteurize — survivors sail through and contaminate the grow. Above 180°F you sterilize the substrate dead and lose the protective microbial community, so a hot-water bath that slips into a rolling boil is worse than one held correctly. A cheap probe thermometer in the drum is all it takes to stay in band, the same dead-simple instrument discipline that runs the incubation shelf and the fruiting tent.
Whatever method you use, the substrate has to come out of pasteurization at field capacity — damp enough that a hard squeeze yields a few drops, never standing in water — or it sours instead of colonizing. My CVG substrate recipe walks the coir, vermiculite, and gypsum mix I run for oyster, and the field capacity guide covers how to hit that moisture target every time. Pasteurization is the cheap, low-tech station that sits between the canner and the fruiting chamber — no build required, just a drum, a thermometer, and the right temperature held steady.
Station Three: The Fruiting Chamber
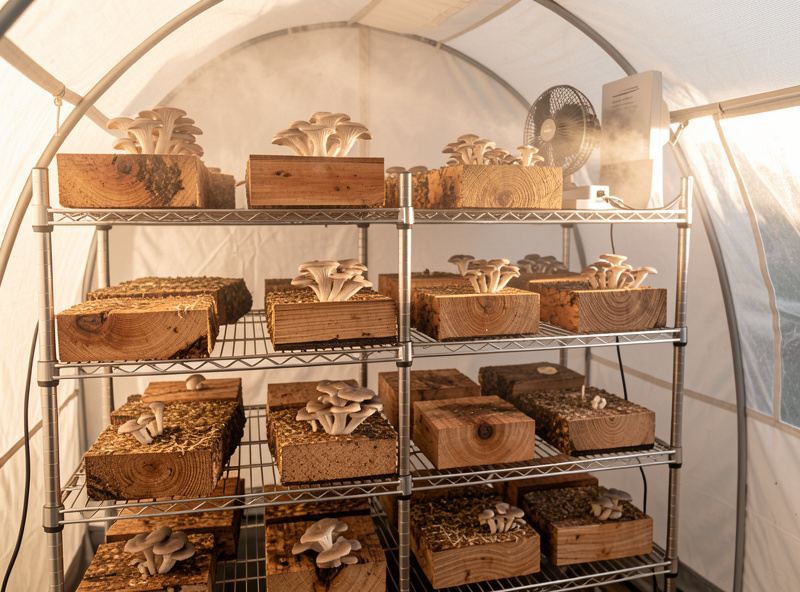
Colonized substrate fruits when you give it high humidity, fresh air, and a temperature drop — and there are four ways to build the box that delivers all three. A shotgun fruiting chamber (SGFC) is the cheap entry point; a monotub is the high-yield workhorse; a Martha-style tent is the multi-shelf scale-up; and a converted mini greenhouse is the room-sized version. Which you build depends on how much you grow and how much hands-off control you want.
The trade-off across all four is the same balance: humidity versus fresh-air exchange (FAE). Mushrooms need both, and the two fight each other — every time you open a chamber to add air you lose humidity, and a sealed humid box starves the pins of oxygen and grows leggy, aborted fruit. The cheaper builds (shotgun, monotub) solve this by hand — misting and fanning. The bigger builds (Martha, greenhouse) solve it with a humidifier on a humidistat and a fan on a timer, which is the whole point of automating. Read FAE and CO2 for fruiting and pinning conditions before you pick a chamber — the environment you can hold determines what you can fruit.
Comparing the Four Fruiting Builds
Pick the chamber that matches your batch size, not the one with the best photos online. A shotgun chamber fruits a few cakes for the cost of a tote and a drill; a Martha tent fruits a dozen blocks at once but needs power and a humidistat. Here is how the four builds compare on the things that actually decide it.
| Build | Rough Cost | Capacity | Humidity Control | Best For |
|---|---|---|---|---|
| Shotgun chamber (SGFC) | $20–35 | 1–3 small tubs/cakes | Manual mist + perlite | First fruiting, oyster, low cost |
| Monotub | $25–45 | 1 bulk tub, big flush | Self-regulating, polyfill ports | High yield per box, bulk grows |
| Martha tent | $120–250 | 8–15 blocks/tubs | Humidifier + humidistat | Multiple species, scaling up |
| Mini greenhouse room | $80–200 | Room-scale | Humidifier + fan, automated | Continuous production, garage/spare room |
Each of these has a full build guide of its own. The shotgun fruiting chamber build is where most growers start — the trick is getting it to actually hold humidity instead of swinging dry. The monotub build is all about hole placement, polyfill, and tape — get those wrong and you either suffocate the cake or invite contamination. The Martha grow tent build covers the shelves, humidifier, and wiring for a multi-block setup, and the mini greenhouse conversion turns a $40 plastic-shelf greenhouse into a fruiting room. If you are torn between buying a kit and building a tub, I compared them in grow kit vs DIY monotub, and the full monotub and bulk growing guide covers everything downstream of the build.
Automating Humidity and Fresh Air
The difference between a chamber you babysit and one that runs itself is a humidity controller and an FAE fan on timers — a $40 wiring job that holds 85–95% humidity hands-off. A humidistat-controlled outlet switches an ultrasonic humidifier on when humidity drops below your setpoint; a repeat-cycle timer pulses a small fan to exchange air every few hours. Wire those two together and a Martha tent or greenhouse holds its own climate while you are at work.
This is the build that separates a hobby setup from a reliable one. I run an ultrasonic humidifier on a humidistat in my fruiting tent and watch the hygrometer obsessively until I trust the controller, then I stop opening the door — because every time you open a fruiting chamber to “check,” you dry the pins and reset the humidity. The full humidity and FAE controller wiring guide covers the parts, the outlet wiring, and the safe way to put a humidistat on a mushroom chamber. For the off-the-shelf side, see choosing a fruiting chamber humidifier, grow room automation and fail-safes, and smart sensors for climate logging. A reliable hygrometer is what makes any of it trustworthy.
As an Amazon Associate I earn from qualifying purchases. The two parts most home builds need are an ultrasonic humidifier with a humidistat outlet and a heat mat with a temperature controller for the incubation side.
Scaling Up: The Mini Greenhouse Fruiting Room
When a Martha tent fills up, the next build is a room — and the cheapest path to one is a $40 plastic-zip mini greenhouse. The four- or five-shelf greenhouses sold for seedlings are nearly perfect mushroom fruiting rooms: enclosed, shelved, and made of a wipeable plastic skin that holds humidity. Drop in a humidifier and an FAE fan on the same controller logic as the tent, and you have room-scale fruiting for a fraction of the cost of a commercial chamber.
The conversion is mostly about controlling humidity in a bigger volume and keeping airflow even so you do not get dead, CO2-pooled corners. I cover the full conversion — sealing, shelving, humidifier sizing, and fan placement — in the mini greenhouse build guide, and there is a broader greenhouse mushroom growing guide for outdoor and four-season setups. If you are working in a flat or a small space, the apartment setup guide shows how to fit a lab into a closet.
What Each Build Costs and When to Skip It
You do not need all seven stations to grow mushrooms — you need the right three for your scale. A first-timer fruiting oyster on straw needs a still air box, a way to pasteurize, and a shotgun chamber, and that is it; the Martha tent and the greenhouse are scale-up purchases you make once you are fruiting reliably and want more. Building everything at once is how people spend $400 before their first successful flush.
My honest sequencing: build the still air box and a shotgun chamber first ($50 total), get one clean grain-to-bulk grow to fruit, then add the incubation chamber when temperature swings start costing you batches, then the humidity controller and Martha tent when you are running multiple species. The greenhouse comes last, when a tent is no longer enough. Spend on the station that is currently your bottleneck, not the one that looks most impressive. The cost comparison breaks down whether building your own actually saves money over kits and store-bought — it does, but only past the first year.
Power, Placement, and Running the Lab
A working lab draws less power than people expect — the heat mat, humidifier, and fans together pull well under 200 watts most of the day — but where you put it matters as much as what it draws. The two jobs that spike load are sterilizing (a stovetop canner runs off the hob, not the lab circuit) and humidifying a large fruiting room. Everything else sips power, which is why a Martha tent and incubation shelf run happily off a single outlet with a power strip.
Site the lab somewhere with stable ambient temperature, a nearby water source for refilling the humidifier, and enough separation from living space that fan noise and spent-substrate smell are not in your bedroom. A spare room, a heated garage, or a basement corner all work. Keep the sterile station (still air box or flow hood) physically away from the fruiting chamber — fruiting bodies release clouds of spores, and you do not want those drifting onto open agar plates or cooling grain jars across the room. In my setup the transfer bench and the fruiting tent are on opposite sides of the space for exactly that reason.
If you are building somewhere without reliable mains — an outbuilding, a cabin, off-grid — the sizing math changes, because the canner and the humidifier are the loads that bite. I worked through battery and inverter sizing for a remote lab in off-grid mushroom lab power. And once the stations are built, the thing that actually keeps a lab productive is rhythm: starting grain, colonizing, and fruiting on a rolling schedule so something is always coming off the shelf. The first-year growing calendar lays out that rhythm month by month so the builds you fabricated here never sit idle.
Contamination-Proofing Every Build
The best-built chamber in the world still fails if it is dirty, so every station gets designed for cleaning, not just for function. Smooth wipeable surfaces, no fabric or bare wood where mold can colonize, polyfill or micropore filters sized to let air pass but not spores, and a habit of wiping everything with isopropyl before and after use. The build and the sterile habit are one system; neither works without the other.
This is the discipline I carry across every microbial hobby in the house — the same clean-process instinct that protects the substrate protects the salami in the curing chamber, the koji on the rice, and the sourdough starter on the counter. When a build does fail, knowing whether you are looking at green Trichoderma, cobweb mold, or healthy mycelium is what tells you whether to toss a tub or save it — see the full contamination guide and bulk contamination triage. Design clean, work clean, and these builds will run for years.
Frequently Asked Questions
What do I need to build first to grow mushrooms at home?
Build a still air box and a shotgun fruiting chamber first, about $50 total. The SAB protects your transfers and the shotgun chamber fruits your first grow. Add an incubation chamber, humidity controller, and Martha tent later as you scale, not all at once.
How much does a complete DIY mushroom lab cost to build?
A full DIY lab from still air box to humidity-controlled fruiting tent runs about $300 to $400 if you stage it over time. A minimal first setup of a still air box, a way to pasteurize, and a shotgun chamber costs around $50 and grows oyster mushrooms successfully.
Do I need a flow hood or is a still air box enough?
A still air box handles about 90% of home transfers for under $30. You only need a laminar flow hood when you pour agar plates or run large grain batches, where moving HEPA-filtered air outperforms still air. Most growers start with the box and build a hood later.
What is the difference between a shotgun chamber and a monotub?
A shotgun fruiting chamber is an open perlite-humidified tub for fruiting a few cakes, controlled by hand misting. A monotub is a sealed bulk tub with polyfill-filtered holes that self-regulates humidity and fruits one large flush. Monotubs yield more per box; shotgun chambers are cheaper and more forgiving to start.
How do I keep humidity stable in a DIY fruiting chamber?
Wire an ultrasonic humidifier to a humidistat-controlled outlet set to switch on below 85 to 90% humidity, and pulse an FAE fan on a repeat-cycle timer. This holds humidity hands-off so you stop opening the door, which dries the pins every time you check.
Why does opening my fruiting chamber to check hurt the mushrooms?
Every time you open a fruiting chamber the humidity crashes and the surface of forming pins dries out, which aborts them. Build in a hygrometer you can read from outside and a controller you trust, then leave the door shut and observe through the plastic instead.
Related Build Guides
- Building a Still Air Box: The 20-Minute Tote That Saves Your Transfers
- Building a Shotgun Fruiting Chamber That Actually Holds Humidity
- Drilling and Filtering a Monotub: Hole Placement, Polyfill, Tape
- How I Built My Martha Grow Tent: Shelf, Humidifier, Wiring
- A DIY Incubation Chamber: Heat Mat, Thermostat, Dead-Stable Temps
- Wiring a Humidity and FAE Controller for a Home Fruiting Chamber
- Converting a Mini Greenhouse Into a Mushroom Fruiting Room