
A Martha grow tent is a wire shelving unit wrapped in plastic with a humidifier inside — and you can build a good one for about $150 in an afternoon. Mine fruits eight to twelve hardwood blocks at once, holds 90% humidity off a single humidistat, and replaced three separate shotgun tubs that I was tired of misting by hand. Here is exactly how I built it.
The name comes from the wire “Martha Stewart” greenhouse shelving people first used for this. The concept is dead simple: an enclosed, shelved volume you can keep humid and lightly ventilated without opening it. What makes or breaks the build is not the shelf — it is the humidifier sizing, the wiring, and the airflow. I got two of those wrong on my first version, so this is the build that actually works.
What a Martha Tent Solves
A Martha tent fixes the core problem of scaling past one or two fruiting tubs: you cannot hand-mist a dozen blocks several times a day without either drying them out or drowning them. By enclosing the shelves and putting an ultrasonic humidifier on a humidistat inside, the tent holds 85–95% humidity automatically, and a small fan on a timer handles fresh air. You open it to harvest, not to mist.
It is the natural next build after a shotgun fruiting chamber stops keeping up. Where the shotgun chamber is manual and holds a few cakes, the Martha tent is semi-automated and holds blocks of several species at once — the step up to a real fruiting room. If you are weighing whether to buy a grow tent off the shelf instead, I compared the common options in Martha vs Vivosun vs Gorilla tents — but building the wire-shelf version is cheaper and easier to clean.
The Shelf: Picking the Frame
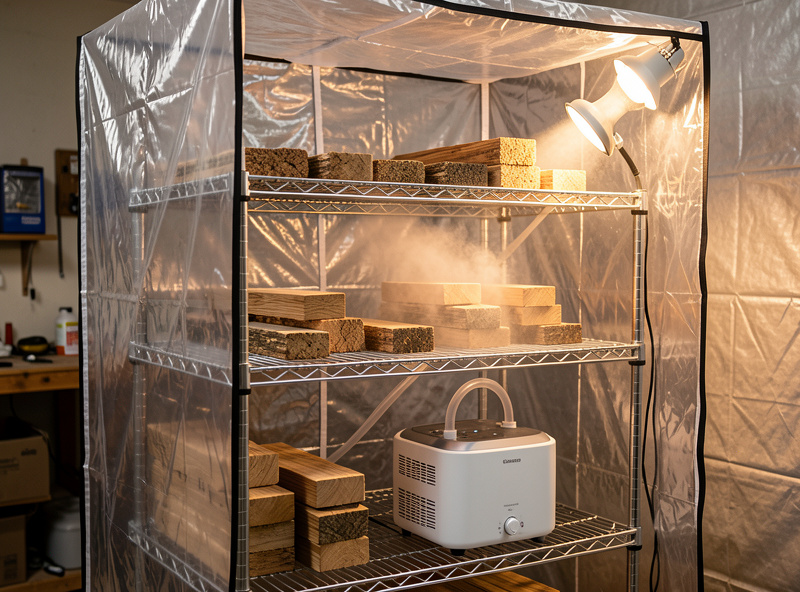
Start with a five-tier wire shelving unit, ideally one that comes with a clear zippered greenhouse cover. The cheap plastic-zip “mini greenhouse” shelving sold for seedlings is the perfect Martha frame — it is enclosed, the shelves are wire so air and water pass through, and the cover wipes clean. A four- or five-shelf unit gives you room for the humidifier on the bottom and three or four fruiting shelves above.
Wire shelves matter for two reasons: they let the humidifier mist rise through the whole stack, and they let condensation drain instead of pooling under your blocks. If you build on solid shelves, water collects, goes stagnant, and grows bacteria. I line each wire shelf with nothing — bare wire, so everything drains to a towel on the floor of the tent that I swap out. Leave the bottom shelf clear for the humidifier and a catch tray.
The Humidifier: Sizing and Mounting
The single most important part is the humidifier, and most people undersize it. For a five-shelf tent you want an ultrasonic humidifier with at least a 4–6 liter tank and an output you can run continuously — a tiny desktop unit will cycle dry and never hold humidity in that volume. I run a mid-size ultrasonic unit on the bottom shelf with the mist directed up into the open center of the tent, not straight at a block, which would soak it.
Two details that took me a version to learn. First, raise the humidifier off the tent floor on a small stand so its intake is not sitting in the puddle it creates. Second, never put a fogger or humidifier mist directly onto fruiting bodies — concentrated mist waterlogs caps and invites bacterial blotch. You want a fine, diffuse fog filling the volume, which is why output and placement matter more than the brand. For the full rundown on choosing one, see picking a fruiting chamber humidifier.
Wiring: Humidistat, Timer, and Fan
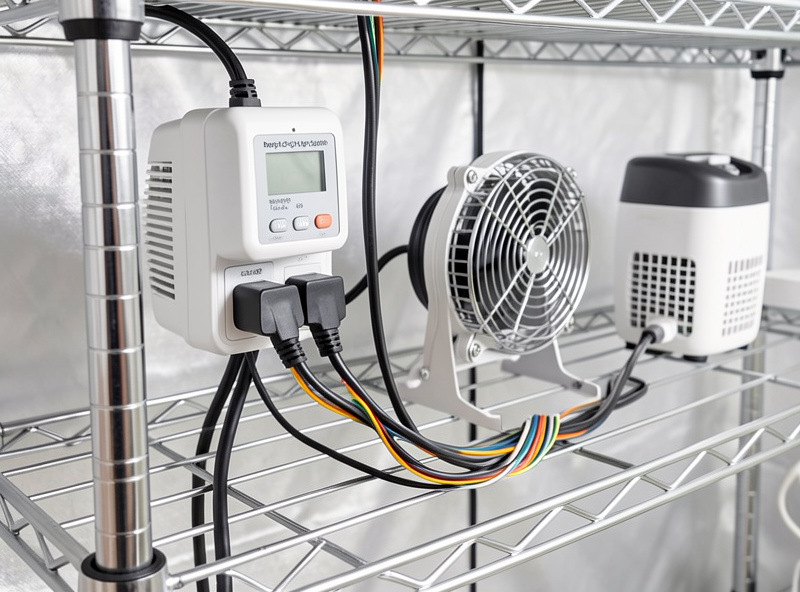
The humidifier does not run constantly — it runs on a humidistat that switches it on below your setpoint and off above it, which is the whole point of the build. A plug-in humidistat controller with a probe inside the tent is the simplest, safest way to do this: set it to kick the humidifier on below about 90% and off above 95%, and it holds the band on its own. No mains wiring, no risk — everything plugs into standard outlets.
Fresh air is the second circuit. Mushrooms exhale CO2, and a sealed humid tent grows leggy, aborted fruit if you do not exchange the air. I run a small computer fan or clip fan through the tent wall on a repeat-cycle timer — a few minutes on, then off, every hour or two — to flush stale air and nudge gentle circulation. The balance between humidity and fresh air is the thing to dial; I cover the logic in FAE and CO2 for fruiting. If you want to build the controller side properly rather than buy plug-in units, the full humidity and FAE controller wiring guide walks the outlets and timers, and grow room automation covers fail-safes for when a part dies.
| Part | Spec I Use | Rough Cost |
|---|---|---|
| Wire shelf + zip cover | 5-tier, clear plastic greenhouse cover | $45–70 |
| Ultrasonic humidifier | 4–6 L tank, continuous output | $35–55 |
| Humidistat controller | Plug-in, probe, on/off setpoint | $30–40 |
| FAE fan + cycle timer | Small clip/PC fan, repeat-cycle timer | $15–25 |
| Hygrometer | Digital, readable through the cover | $10–15 |
As an Amazon Associate I earn from qualifying purchases. The two parts worth getting right are a large-tank ultrasonic humidifier and a plug-in humidistat controller.
Shelf Spacing, Drainage, and Cleaning
Space your fruiting shelves far enough apart that blocks on a lower shelf are not dripped on by condensation from above, and leave the very bottom for the humidifier and a catch towel. I keep roughly 30–40 cm between fruiting shelves, which gives oyster and lion’s mane room to fruit out sideways without crowding into the shelf above. Crowded fruit grows misshapen and traps moisture against caps.
Cleaning is designed in, not added on. The wipeable plastic cover, bare wire shelves, and a swappable floor towel mean I can wipe the whole tent with diluted isopropyl between grows and never have fabric or wood holding mold. This is the same clean-process habit that protects every microbial project in the house — the substrate, the curing chamber, the sourdough starter all live or die on it. A good hygrometer you can read through the cover lets you watch the climate without unzipping and dumping your humidity.
Dialing In the First Run
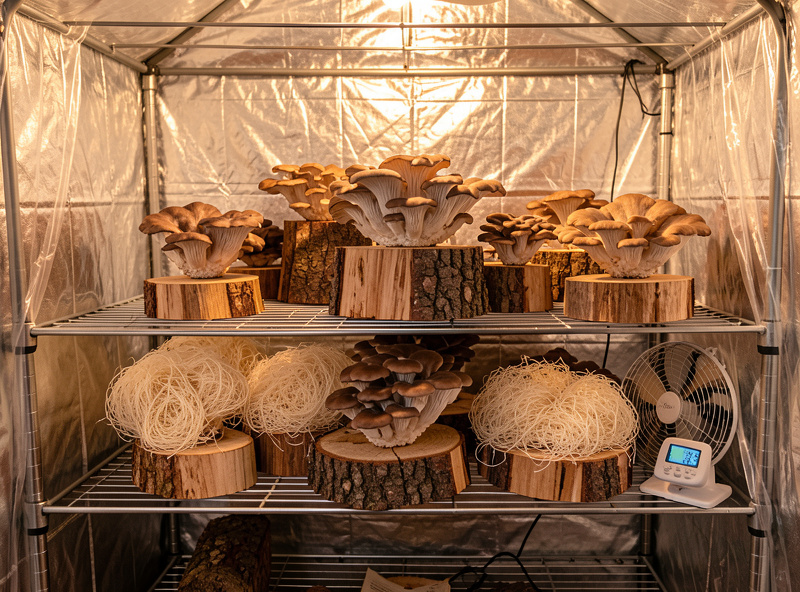
Run the empty tent for a day before you load it — set the humidistat, watch the hygrometer, and confirm it holds the band without your blocks in there acting as moisture buffers. An empty tent is the worst case for holding humidity, so if it holds empty it will hold loaded. Once it is stable, load colonized blocks, introduce the light grow light schedule the species needs, and resist the urge to open it.
That last part is the discipline that separates a tent that works from one that frustrates: every time you unzip to “check,” humidity crashes and forming pins dry out and abort. Read the hygrometer through the cover, watch the pins set behind the plastic, and only open to harvest. Dialed in like this, my tent runs a rolling rotation of lion’s mane and oyster blocks with nothing more than refilling the humidifier every couple of days. When you outgrow even this, the next build is converting a mini greenhouse into a fruiting room.
Frequently Asked Questions
How much does it cost to build a Martha grow tent?
A DIY Martha tent costs about $135 to $200: roughly $45 to $70 for a wire shelf with a zip cover, $35 to $55 for an ultrasonic humidifier, $30 to $40 for a humidistat controller, and $25 or so for a fan, timer, and hygrometer. It replaces several hand-misted tubs.
What size humidifier do I need for a Martha tent?
For a five-shelf tent use an ultrasonic humidifier with at least a 4 to 6 liter tank and continuous output. Small desktop units cycle dry and cannot hold humidity in that volume. Direct the mist up into the open center, never straight at a block, and raise it off the floor.
How do I control humidity in a Martha tent?
Plug the humidifier into a humidistat controller with its probe inside the tent, set to switch on below about 90% and off above 95%. It holds the band automatically. Pair it with a small fan on a repeat-cycle timer for fresh air, since a sealed humid tent grows leggy, aborted mushrooms.
Why are wire shelves better than solid shelves for a Martha tent?
Wire shelves let the humidifier mist rise through the whole stack and let condensation drain instead of pooling. Solid shelves collect water that goes stagnant and breeds bacteria under your blocks. Bare wire plus a swappable floor towel keeps the tent draining and easy to wipe clean.
How far apart should Martha tent shelves be?
Keep roughly 30 to 40 cm between fruiting shelves so oyster and lion’s mane can fruit out sideways without crowding into the shelf above, and so condensation from an upper shelf does not drip on blocks below. Leave the bottom shelf clear for the humidifier and a catch tray.
Related Build Guides
- DIY Mushroom Fruiting Chamber Build Plans: The Whole Lab
- Building a Shotgun Fruiting Chamber That Actually Holds Humidity
- Wiring a Humidity and FAE Controller for a Home Fruiting Chamber
- Converting a Mini Greenhouse Into a Mushroom Fruiting Room
- Mushroom Grow Tent Setup: Martha vs Vivosun vs Gorilla