
For mushroom incubation you want a seedling-style heat mat paired with an external thermostat that has a probe — never a heat mat on its own. Most gourmet species colonize fastest around 24–27 °C, and a bare mat with no control routinely pushes spawn past 30 °C, which stalls or kills mycelium and favors thermophilic contaminants. The thermostat cycles the mat to hold your target temperature, turning a crude heater into a stable, dark, controlled colonization environment.
My grow space runs cold through a Swedish winter, so a heated, thermostatically controlled colonization shelf is one of the highest-return setups I have. Warm, steady incubation is the difference between grain jars that colonize in a couple of weeks and jars that crawl along for a month, growing anything that likes the cold better than your mycelium does. This guide covers mat sizing, thermostat choice, and safe target temperatures — the incubation link in the chain laid out in the lab equipment buying guide.
Why Temperature Control Matters for Colonization
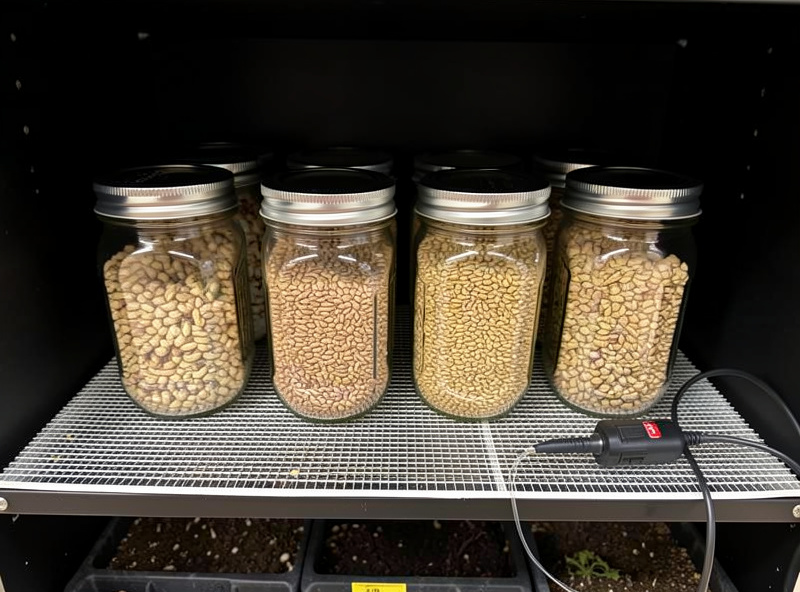
Mycelium is a living organism with a preferred temperature band, and colonization speed climbs as you approach the top of that band — then falls off a cliff if you overshoot it. For most gourmet species, the sweet spot sits around 24–27 °C; these colonization bands are well documented by university mushroom programs such as Penn State Extension. Warm spawn colonizes fast and outcompetes contaminants; cold spawn crawls, giving mold and bacteria a longer window to take hold. Speed is a form of contamination defense.
The danger of overshooting is real and often overlooked. Push past roughly 30 °C and many gourmet mycelia slow, stress, or die, while heat-loving bacteria and molds thrive — the exact opposite of what you want. That is why an uncontrolled heat mat is arguably worse than no heat at all: it can cook the jars sitting directly on it. I learned that early on: I left a tray of rye jars on an uncontrolled reptile mat overnight, and by morning the glass was warm to the touch and the surface grain had gone slimy and sour-smelling — bacterial blotch had taken hold exactly where the heat ran away, and every one of those jars went in the bin. A cheap probe thermostat would have saved the whole batch. Controlled warmth helps; runaway warmth kills. The whole game is holding a steady target, not simply adding heat.
Sizing the Heat Mat to Your Shelf
Match the mat to the footprint you are heating. A small seedling mat warms a few jars or a single shelf; a larger mat or a couple of them covers a tub or a wider colonization shelf. The goal is gentle, even warmth under or beside your spawn, not a hotspot. I favor covering more area at lower intensity over blasting a small mat — even, mild heat that the thermostat trims is kinder to the jars than a concentrated source.
Placement matters as much as size. Jars sitting directly on a mat can develop a hot base while the top stays cool, so I like a little air gap or a mat on the side of an insulated space rather than pressed against the glass. Think of the mat as raising the ambient temperature of a small enclosure, not as a hotplate. That is also why the probe placement, covered next, is what actually keeps things safe — the mat provides heat, the probe and thermostat provide the brains.
The Thermostat Is the Real Purchase
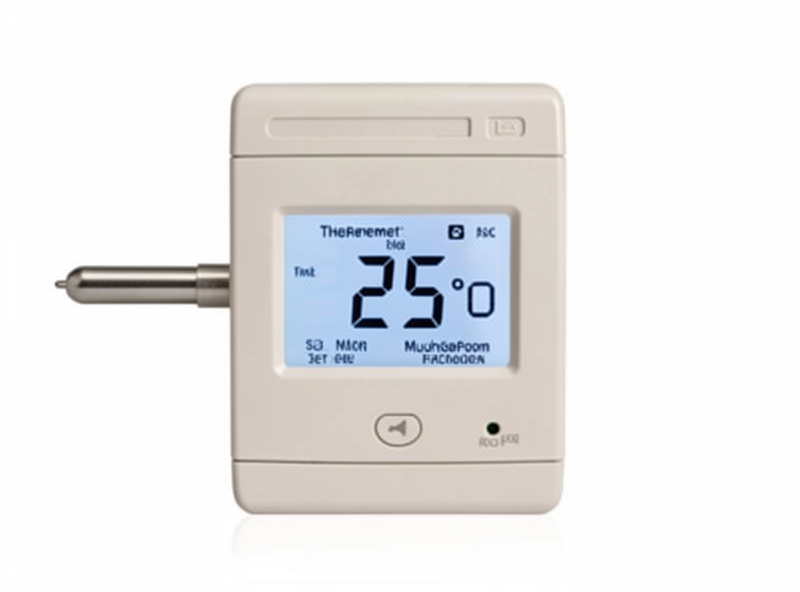
An inexpensive plug-in thermostat with a probe is the component that makes the whole setup safe and effective. You set your target — say 25 °C — and the thermostat switches the mat on and off to hold it, reading actual temperature from the probe rather than guessing. This is the piece that prevents the overshoot that kills spawn, and it costs very little relative to how much grief it saves. If budget forces a choice, the thermostat is not the place to cut.
Two features matter. First, probe placement: put the probe where the jars actually sit, at spawn level, not dangling in open air far from the heat — it should read what the spawn feels. Second, a sensible dead-band (hysteresis), the small gap between switch-off and switch-on temperatures, so the mat is not rapidly cycling. A degree or two of dead-band around your target keeps temperatures stable without the relay chattering. Calibrating the probe against a known-good thermometer once is worth the minute it takes, the same trust-your-instrument habit that keeps a canner’s pressure honest.
Target Temperatures and Mat/Thermostat Pairings
| Setup | Heat source | Control | Notes |
|---|---|---|---|
| Few jars | Small seedling mat | Plug-in thermostat, probe at jar level | Simplest reliable rig |
| Colonization shelf | Larger or multiple mats | Thermostat with good dead-band | Even warmth, air gap to jars |
| Insulated tub/tent | Mat on the side wall | Thermostat holding ~24–27 C | Heats ambient, not the glass |
| Warm room already | None needed | Thermometer to confirm | Do not add heat if you are in band |
Notice the last row: if your room already sits in the colonization band, you do not need a heat mat at all — a thermometer to confirm is enough. Heating gear is a cold-climate solution, not a universal requirement, which is why the equipment guide lists it as climate-dependent rather than mandatory. Buy it if your space runs cold; skip it if it does not.
What I Recommend Buying
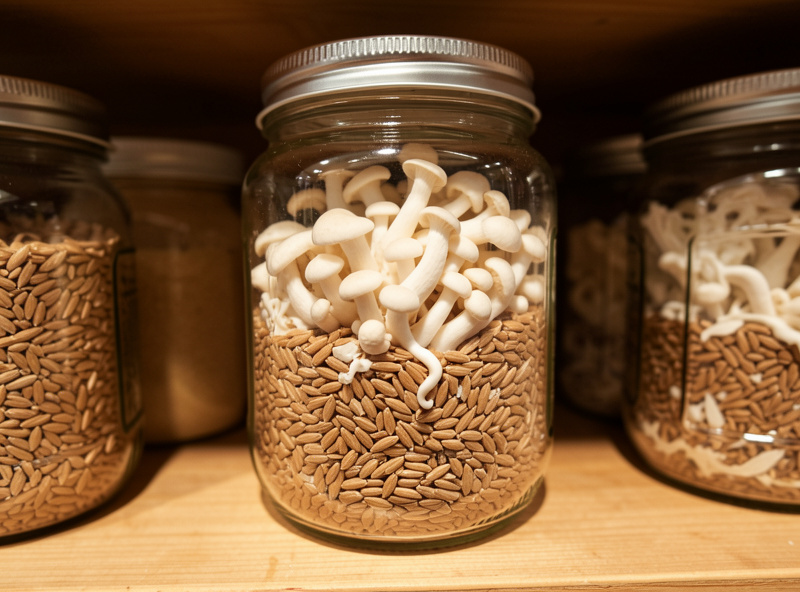
For most growers who need heat, I recommend a seedling heat mat sized to your shelf plus a separate plug-in thermostat with a probe — two cheap parts that together make a proper incubator. Avoid the all-in-one reptile mats with a built-in dial but no probe feedback; the external-probe thermostat is what keeps you out of the overshoot zone. To compare options, start with a search for heat mats with thermostat controllers.
As an Amazon Associate I earn from qualifying purchases.
A stable, dark, clean colonization shelf held near 25 °C rewards you with fast, even colonization and fewer contamination surprises — and it is inexpensive to build. It pairs naturally with the scale you use to weigh spawn ratios in the scales guide, and it sits alongside the other genuinely useful early purchases in the starter gear list. Control the temperature and you control the timeline.
Frequently Asked Questions
What temperature should mushroom spawn colonize at?
Most gourmet species colonize fastest around 24 to 27 C. Warm spawn colonizes quickly and outcompetes contaminants, while cold spawn crawls and gives mold and bacteria a longer window. Overshooting past about 30 C stalls or kills many gourmet mycelia.
Do I need a thermostat with a mushroom heat mat?
Yes. A bare heat mat can push spawn past 30 C and cook it. An external plug-in thermostat with a probe cycles the mat on and off to hold your target, which is what prevents the overshoot that kills spawn and favors thermophilic contaminants.
Where should the thermostat probe go for incubation?
At spawn level, where the jars actually sit, not dangling in open air away from the heat. The probe should read the temperature the spawn feels. Calibrating it once against a known-good thermometer keeps the readings honest.
How big should my heat mat be?
Match it to the footprint you are heating: a small seedling mat for a few jars, a larger or multiple mats for a shelf or tub. Aim for gentle, even warmth over a wider area rather than a concentrated hotspot pressed against the glass.
Can I put spawn jars directly on the heat mat?
It is better to leave a small air gap or place the mat on the side of an insulated space. Jars pressed directly on a mat can develop a hot base while the top stays cool. Treat the mat as raising ambient temperature, not as a hotplate.
Do I need a heat mat if my room is already warm?
No. If your room already sits around 24 to 27 C, a thermometer to confirm is enough and you should not add heat. Heating gear is a cold-climate solution, not a universal requirement for incubation.