
A shotgun fruiting chamber holds humidity because of the perlite in the bottom, not the holes in the sides — and almost everyone gets that backwards. It is a clear tote drilled with a grid of quarter-inch holes, sitting on a deep bed of wet perlite that evaporates moisture into the air all day. Build it right and it sits at 90% humidity between mistings instead of crashing dry in an hour.
The shotgun fruiting chamber, or SGFC, is the classic first fruiting build for good reason: it costs about $25, takes half an hour, and fruits oyster mushrooms beautifully. But the version most people build dries out constantly because they treat it as “a tote with holes” and skip the part that actually does the work. This is how I build one that holds.
What a Shotgun Fruiting Chamber Is
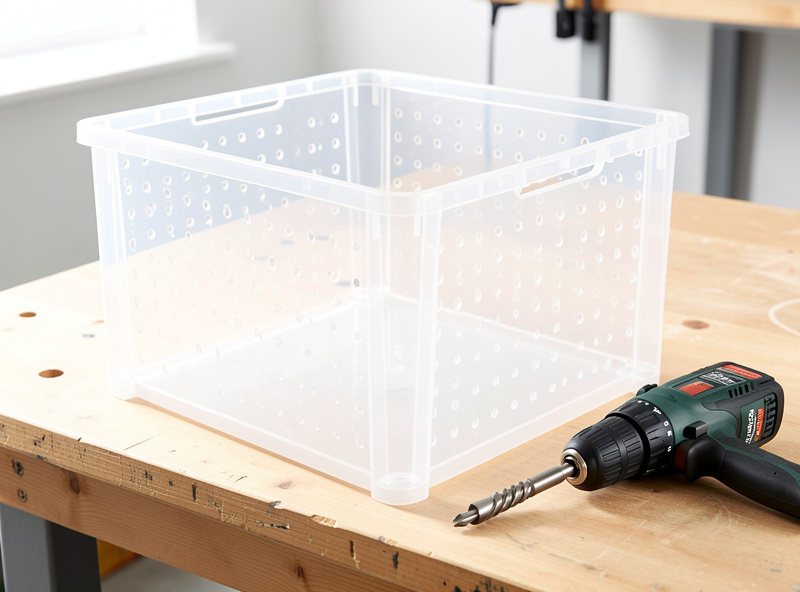
An SGFC is a translucent storage tote perforated with a regular grid of holes on all six surfaces, raised on a thick layer of moist perlite. The holes provide passive fresh-air exchange; the perlite is a giant evaporative surface that keeps the air inside humid. Mushrooms inside sit on a rack above the perlite, and you mist the walls a few times a day to top up humidity. It is fully manual — no humidifier, no electricity — which is exactly why it is the cheapest way to start fruiting.
It is the build directly below a Martha grow tent in scale: a shotgun chamber fruits a few cakes or small tubs by hand, while the tent automates humidity for a dozen blocks. If you are mapping out where it fits in a full lab, the DIY fruiting chamber build plans hub lays out the whole sequence.
Why Most Shotgun Chambers Swing Dry
The number one complaint about shotgun chambers — humidity crashing minutes after you mist — comes from too little perlite and too much hole. People drill an aggressive grid for “fresh air” and run a thin scatter of perlite, so there is far more ventilation than evaporation, and the box behaves like a colander. The fix is the opposite balance: a deep, genuinely wet perlite bed and a moderate hole grid.
Think of it as a tug-of-war between evaporation (humidity in) and the holes (humidity out). A two-to-three inch bed of properly soaked perlite puts a large wet surface area to work, while a 2-inch hole spacing gives enough air to keep mushrooms healthy without bleeding moisture faster than the perlite can replace it. Get that ratio right and the chamber self-buffers between mistings instead of nose-diving. Understanding the underlying FAE and CO2 balance is what makes the build click — fresh air and humidity always trade against each other.
Drilling: Hole Size and Spacing
Drill quarter-inch holes on a 2-inch grid across all four sides, the lid, and the bottom — every face, so air can move through rather than stagnate. A quarter-inch (6 mm) bit and a 2-inch spacing is the proven combination: small enough that the perlite can keep up, frequent enough for even airflow. Mark a grid with a ruler so the pattern is regular; ragged spacing gives you dead, CO2-pooled corners where fruit grows leggy.
Do the bottom holes too, even though they sit in the perlite — they let excess water drain so the perlite stays damp rather than flooded. Deburr the holes with a quick pass of the drill bit or a knife so they do not snag or shed plastic burrs into your chamber. The whole job takes one tote, a cordless drill, and twenty minutes. If you are also drilling and filtering a sealed tub rather than a vented one, that is a different build entirely — see the monotub holes and filters guide.
The Perlite Bed: The Part People Skip
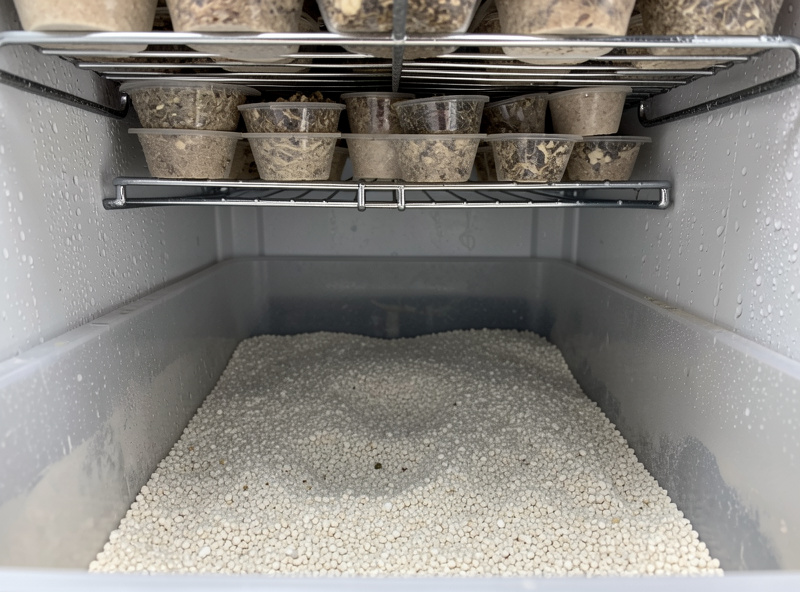
Soak the perlite until it is dripping, then drain it so it is wet but not standing in a puddle — this is field capacity, the same moisture target you use for substrate. Pour two to three inches of horticultural perlite into a colander, run it under water until saturated, let it drain, and bed it across the bottom of the tote. That damp bed is your humidity engine; everything else is plumbing around it.
Use plain horticultural perlite with no added fertilizer — anything enriched will feed contaminants in that warm, wet box. Set your substrate tubs or cakes on a wire rack or a few jar lids so they sit above the perlite, not in it, or the bottom of the substrate wicks water and rots. Re-wet the perlite whenever it starts to dry, which in a warm room is every few days. This evaporative trick is the same principle behind a casing layer holding surface moisture, and it pairs with substrate prepped to the right field capacity.
Misting and Fanning: The Manual Rhythm
A shotgun chamber is hands-on: mist the walls two to four times a day and fan fresh air through it each time, which together hold humidity high and CO2 low. Use a spray bottle to fog the inside walls and lid — not the mushrooms directly, which waterlogs caps — then fan the box with the lid for a few seconds to flush stale air. Watch a hygrometer inside until you learn your room’s rhythm.
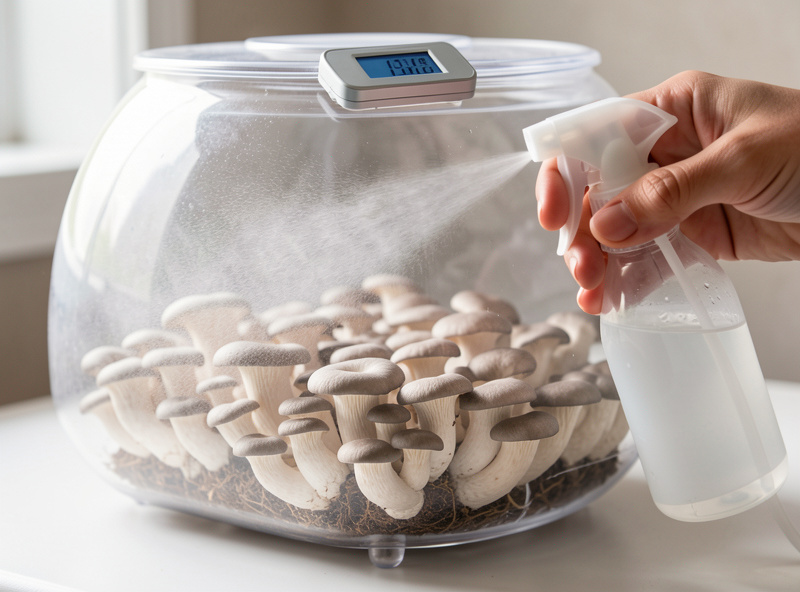
The two failure modes are opposite and both common: too little fresh air gives you long stems and tiny caps (CO2 too high), while too much misting onto the fruit invites bacterial blotch. The dialed-in rhythm sits between them — humid air, frequent gentle fanning, and water on the walls rather than the mushrooms. Getting your first pins to set is mostly about holding that balance steady for a few days. This manual misting is exactly what a Martha tent automates away once you scale.
When to Graduate to a Monotub or Tent
The shotgun chamber’s ceiling is labor: once you are misting more cakes than you want to babysit, it is time to move up. For bulk grows, a sealed monotub self-regulates humidity from the substrate itself and needs almost no misting; for multiple species at once, a humidistat-controlled tent runs hands-off. The shotgun chamber never stops being useful, though — I still keep one for small test grows and for fruiting the odd cake of CVG-grown oyster.
Treat it as the build that teaches you what fruiting mushrooms actually want — humidity, fresh air, and a stable surface — by making you provide all three by hand. Once those instincts are wired in, every automated build afterward makes sense, because you understand what the humidistat and fan are standing in for. That is why I tell every new grower to start here, even if they plan to build a tent next week.
Frequently Asked Questions
Why does my shotgun fruiting chamber keep drying out?
Almost always too little perlite and too many holes. The perlite bed is the humidity engine, not the holes. Run a deep 2 to 3 inch bed of genuinely wet perlite and a moderate 2-inch hole grid, so evaporation keeps up with ventilation and the box self-buffers between mistings.
What size holes should a shotgun fruiting chamber have?
Drill quarter-inch (6 mm) holes on a 2-inch grid across all four sides, the lid, and the bottom. That size and spacing gives even fresh-air exchange without bleeding humidity faster than the perlite can replace it. Mark a regular grid so you do not get dead, CO2-pooled corners.
How much perlite goes in a shotgun fruiting chamber?
Use a 2 to 3 inch deep bed of plain horticultural perlite, soaked until dripping then drained to field capacity. That damp bed is the evaporative surface that keeps the air humid. Avoid any fertilizer-enriched perlite, which feeds contaminants in the warm wet chamber.
How often do I mist a shotgun fruiting chamber?
Mist the inside walls two to four times a day and fan fresh air through each time. Spray the walls and lid, not the mushrooms directly, which waterlogs caps and invites bacterial blotch. Watch a hygrometer until you learn your room, since dry rooms need more frequent misting.
Should I put mushrooms directly on the perlite?
No. Set your substrate tubs or cakes on a wire rack or a few jar lids so they sit above the perlite. If substrate sits in the wet perlite it wicks water and the base rots. Keep the fruiting block above the bed and let only the air carry the moisture up.
When should I move from a shotgun chamber to a monotub?
When hand-misting more cakes than you want to babysit becomes the bottleneck. A sealed monotub self-regulates humidity from the substrate and needs almost no misting, and a humidistat tent runs multiple species hands-off. Keep the shotgun chamber for small test grows though.