
A monotub fruits a big flush with almost no babysitting because its drilled-and-filtered holes do two jobs at once: they let the colonized substrate breathe and they hold humidity in. Get the hole placement, polyfill, and tape right and the tub self-regulates at 90% humidity. Get them wrong and you either suffocate the cake into a contaminated mush or dry it into a desert. The build is all in the holes.
A monotub is a sealed bulk-substrate tub — no perlite bed, no daily misting — that relies entirely on how it is ventilated. Unlike a shotgun chamber, where you mist by hand, the monotub’s substrate holds the moisture and the filtered holes manage gas exchange. That makes hole placement and filtering the whole ballgame. Here is exactly how I drill and filter mine.
What the Holes and Filters Actually Do
The holes in a monotub provide passive fresh-air exchange and a microclimate of high humidity, while the filter material stops contaminant spores and mold from riding in through those same holes. Mushrooms breathe out CO2 and need oxygen to fruit properly; the holes let that exchange happen by diffusion. But an open hole is also an open door for airborne contamination, so each one gets stuffed with polyfill or taped, turning it into a filter that passes air but blocks spores.
This is the balance the whole build serves: enough ventilation that pins form fat caps instead of leggy stems, but filtered tightly enough that nothing colonizes your surface. The FAE and CO2 balance is the science underneath it. In the full lab build sequence, the monotub is the high-yield workhorse — the box that gives the biggest flush per square foot of any home build.
Hole Placement: Where and How High
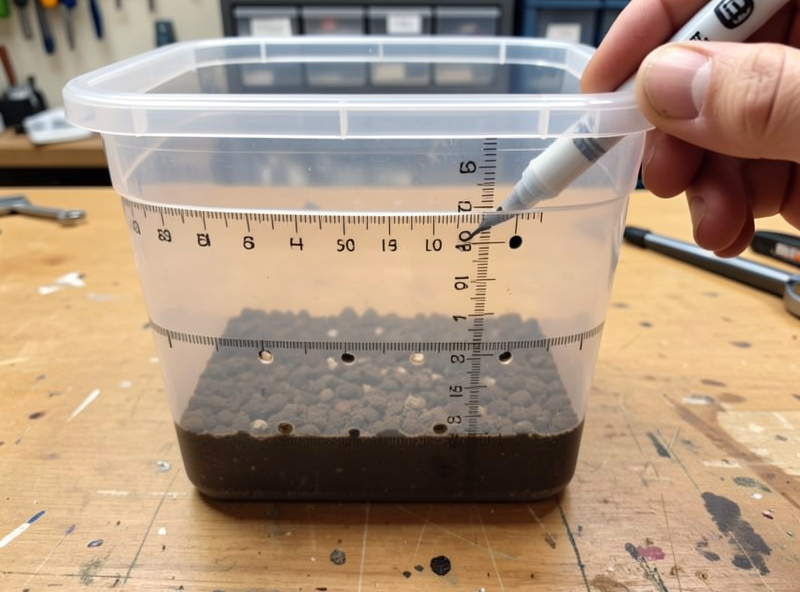
Place your holes in two bands: a lower row roughly at the substrate surface line, and an upper row a few inches above it, so air exchanges across the fruiting surface rather than over the top of it. The substrate fills the tub to a certain depth, and you want fresh air moving right where the mushrooms are forming. Holes only up near the lid let CO2 pool down on the cake, which gives you long-stemmed, small-capped fruit reaching for air.
A common, reliable layout is two holes per side at the lower band and two per side at the upper band — eight or so total on a standard tub — staggered so opposite-wall holes encourage gentle cross-flow. Match hole count to tub size and species: oyster wants more fresh air, so it forgives extra holes, while species that like more CO2 to set pins want fewer. The monotub bulk growing guide covers how this interacts with your spawn-to-bulk ratio and substrate depth.
Polyfill vs Holes vs Tape: Choosing a Filter
There are three common ways to finish a monotub hole, and they trade airflow against contamination resistance. Polyfill stuffed in the hole is the classic — it filters spores well and breathes moderately. Micropore tape (or a taped section) passes gas through the tape while blocking particles, giving very fine filtration. Open holes give maximum airflow but zero filtration, only viable in a very clean room. Here is how they compare.
| Method | Airflow | Contam Resistance | Best For |
|---|---|---|---|
| Polyfill plugs | Moderate | High | Most home monotubs, the default |
| Micropore tape over holes | Low–moderate | Very high | Dirty rooms, contam-prone grows |
| Open holes | High | Low | Very clean rooms, fast oyster grows |
| Printed filter patches | Tunable | High | Repeatable, reusable lids |
I run polyfill on most tubs as the safe default and reach for tighter taped filtration when a grow is in a dustier space or a species is slow to colonize and vulnerable. For a repeatable, reusable option, 3D-printed lids and filter patches let you dial airflow precisely and clean them between grows — worth it once you are running tubs regularly.
Drilling the Tub
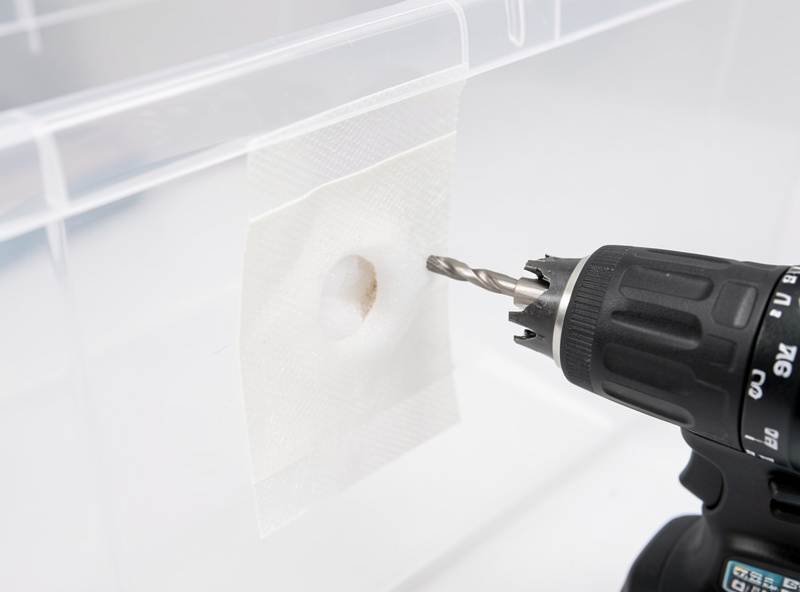
Use a hole saw or step bit to cut clean two-inch holes — ragged drilled holes shed plastic burrs and do not seat polyfill or tape well. A two-inch (50 mm) hole is the standard size that balances airflow and easy filtering. Mark your two bands with tape and a marker first, then cut slowly so the plastic does not crack, and deburr each hole with a knife so the edges are smooth.
Drill on the substrate-facing walls, not the lid, for most builds — side holes exchange air across the fruiting surface where it matters. Some growers add a couple of small lid holes for top exchange, but the side bands do the real work. Take your time marking; symmetric, well-placed holes give even airflow, while a random scatter gives dead corners where fruit aborts and moisture stagnates.
Filtering: Polyfill and Micropore Tape
Stuff each hole with a loose plug of polyfill — enough to fill it and filter the air, but not packed so tight that no air passes. The polyfill should sit flush and springy, breathing freely while catching spores. For taped holes, cover the hole with a square of micropore (surgical paper) tape, which passes gas through the paper while blocking particles; some growers tape over a polyfill plug for belt-and-braces filtration in a dirty space.
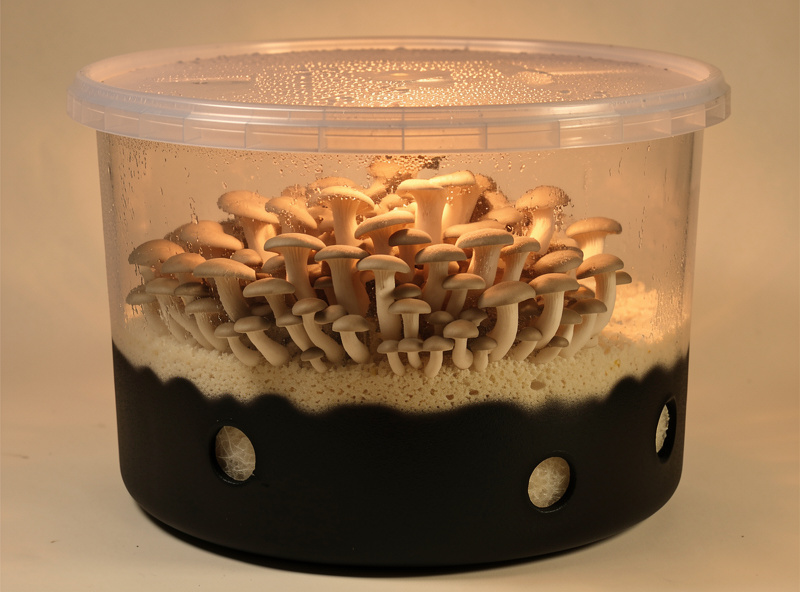
Whatever you use, keep it clean: handle polyfill with wiped hands, and replace it between grows rather than reusing spore-loaded plugs. The filter is a contamination barrier, and a dirty barrier is worse than none because it gives you false confidence. This is the same clean-process logic that runs through every build I make — the filter on a monotub does the same job as the micropore tape on a grain jar lid, keeping air in and spores out.
Liner, Black-Out, and Substrate Depth
Two finishing touches make a big difference: a black-out band on the lower walls and the right substrate depth. Spray-paint or tape the bottom few inches of the tub black so light does not hit the side of the substrate — mycelium fruits toward light, and a clear lower wall makes it pin on the sides instead of the top surface where you want the flush. Leave the upper walls and lid clear so top light triggers surface pinning.
Substrate depth sets how the holes line up: fill to a depth that puts your lower hole band right at the surface, typically a few inches of colonized bulk substrate. Too shallow and the cake dries; too deep and the lower holes end up buried. A liner is optional but helps you lift the cake out cleanly for later flushes. Pair this with a properly hydrated CVG substrate at field capacity and the tub holds its own humidity for the whole grow. If you are still deciding between this and a kit, see grow kit vs DIY monotub.
Common Monotub Build Mistakes
The build mistakes that wreck monotubs are nearly always about the holes: too few (CO2 pools, leggy fruit), too high (no exchange at the surface), unfiltered (contamination), or packed so tight no air moves. Each one shows up as a specific symptom — leggy stems mean too little fresh air, side-pinning means light leaks, green mold at a hole means a failed filter. Reading the symptom back to the hole is how you fix the next build.
The other big one is treating the monotub like a humidity chamber that needs misting — it does not. The sealed tub and damp substrate hold humidity on their own, and adding water on top usually drowns the surface and invites bacterial contamination. Build the holes right, hydrate the substrate right, and then leave it alone. That hands-off reliability is exactly why the monotub is the build I reach for when I want maximum yield with minimum fuss.
Frequently Asked Questions
Where do I drill holes in a monotub?
Drill in two bands: a lower row at the substrate surface line and an upper row a few inches above it, so fresh air exchanges across the fruiting surface. A typical layout is two holes per side at each band, staggered for cross-flow. Holes only near the lid let CO2 pool and cause leggy, small-capped fruit.
What size holes should a monotub have?
Use two-inch (50 mm) holes cut with a hole saw or step bit for clean edges. Two inches balances airflow with easy filtering by polyfill or tape. Cut slowly so the plastic does not crack and deburr each hole so polyfill seats properly and tape sticks flat.
Polyfill or micropore tape for monotub holes?
Polyfill plugs are the default for most home monotubs: good filtration with moderate airflow. Micropore tape gives very fine filtration with slightly less airflow, ideal in dustier rooms or for contam-prone grows. Many growers tape over a polyfill plug in dirty spaces for extra protection.
Why is my monotub growing leggy mushrooms?
Leggy stems with tiny caps mean too much CO2 and too little fresh air. Add more holes or place them lower at the substrate surface so exchange happens where the mushrooms form. A sealed tub with holes only near the lid pools CO2 on the cake and stretches the fruit.
Do I need to mist a monotub?
No. A monotub holds humidity from its sealed walls and damp substrate, so misting usually drowns the surface and invites bacterial contamination. Build the holes correctly, hydrate the substrate to field capacity, and leave the lid shut. The tub self-regulates without daily watering.