
Spawn-to-bulk ratio is the single number that decides whether a tub colonizes clean or loses to mold. It is the volume of colonized grain spawn relative to the bulk substrate it is mixed into, and the home-grower sweet spot is 1:2 to 1:3 — one part spawn to two or three parts bulk. Spawn heavier and the mycelium runs the substrate fast enough to outrun contamination; spawn lighter and you hand mold a head start.
I have run tubs across the whole range, from a stingy 1:5 to a luxurious 1:1, and the pattern is consistent: more spawn means faster colonization, fewer failures, and an earlier first flush, at the cost of more grain. For anyone still losing tubs, raising the spawn rate is the highest-leverage fix there is. This guide covers the ratios that work, how to measure them, and how to mix spawn through bulk without compacting it.
What Spawn-to-Bulk Ratio Actually Measures
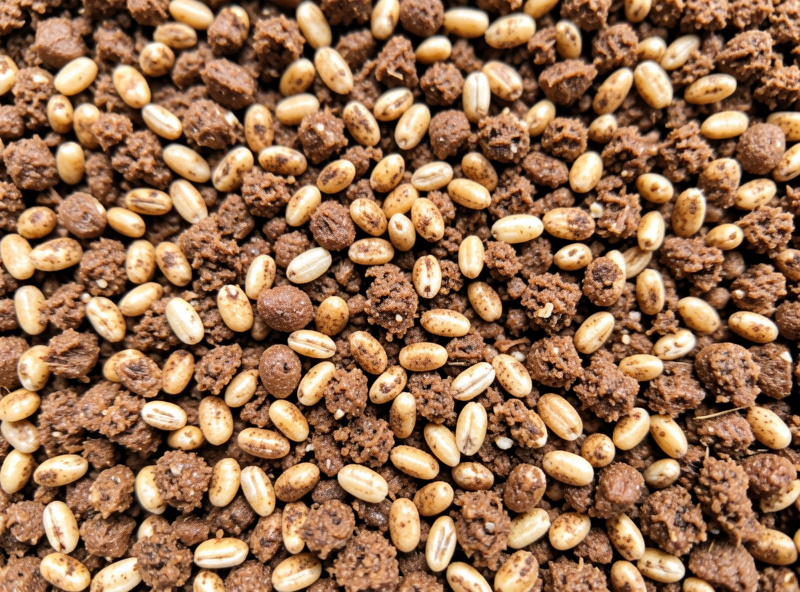
Spawn-to-bulk ratio is measured by volume, not weight: a 1:2 ratio means one quart of colonized grain mixed into two quarts of pasteurized bulk substrate. The colonized grain is the inoculum — thousands of points of established, energized mycelium — and the more of those points you distribute through the bulk, the shorter the distance the mycelium has to travel before the whole mass is knit together and defended.
The reason ratio matters so much is a race. A pasteurized bulk substrate is not sterile; it carries a low background of competitors that a single contaminant spore can join and exploit. The colonizing mycelium has to claim the substrate before any of those competitors establish a foothold. Pack the bulk with spawn and the race is over in a week; spread it thin and the race stretches to two or three weeks, which is plenty of time for green Trichoderma to take a corner.
The Best Ratio for Home Growers
For most home tubs, 1:2 is the safest default and 1:3 is the practical maximum once your process is clean. At 1:2 a 54-quart tub colonizes in roughly 7–10 days; at 1:3 it takes a little longer but stretches your spawn further. I only push to 1:4 with glass-clear, aggressively rhizomorphic grain spawn in a well-run room, and even then I accept that I am trading safety for economy.
Going the other direction, a 1:1 ratio is almost foolproof — colonization is so fast that contamination rarely gets a chance — but it burns through grain and gives diminishing yield returns, because beyond a point the bulk substrate, not the spawn, limits how much fruit the tub can produce. The relationship between spawn, substrate, and yield is why bulk growing exists at all: a small amount of grain leverages a large, cheap mass of bulk into mushrooms. That logic runs through the whole monotub and bulk growing guide.
How to Measure the Ratio in Practice
The easiest way to hit a ratio is to work in quart jars and tub volume. A standard quart jar of fully colonized grain is one unit; mix it into two or three quarts of bulk for 1:2 or 1:3. If you spawn from larger spawn bags, weigh or eyeball the volume against the bulk you have hydrated. Precision is not the point — you are not titrating a reaction — but staying in the 1:2 to 1:3 band reliably is.
A common mistake is measuring the spawn loosely and the bulk packed, or vice versa, which throws the real ratio off by a wide margin. Measure both the same way: lightly settled, not compressed. And remember that “colonized grain” means fully colonized — partially run jars with visible uncolonized kernels are weaker inoculum and effectively lower your real spawn rate, so let grain finish before you spawn with it.
| Ratio | Colonization Speed | Contam Risk | Grain Used | When to Use |
|---|---|---|---|---|
| 1:1 | Fastest (5–7 days) | Lowest | Most | Problem strains, dirty rooms |
| 1:2 | Fast (7–10 days) | Low | Moderate | Default for beginners |
| 1:3 | Moderate (10–14 days) | Medium | Less | Clean process, good grain |
| 1:4+ | Slow (14+ days) | Higher | Least | Experienced, dialed-in only |
Mixing Spawn Through Bulk Without Compacting
How you mix matters as much as the ratio. Break the colonized grain apart into loose kernels first — clumped spawn colonizes in isolated islands and leaves uncolonized pockets between them where contaminants thrive. Then fold the grain through the bulk gently with clean, gloved hands, distributing it evenly top to bottom rather than layering it. The goal is a homogeneous mix where no point in the substrate is far from an inoculation site.
Just as important is not packing the substrate down. Mycelium needs air to colonize; a compacted tub goes anaerobic in its lower layers, stalls, and sours. Mix to even distribution, then level the surface with light pressure only — firm enough to make contact, loose enough to breathe. A top dressing of plain bulk or a thin casing-style layer over the spawned mix can keep the surface from drying and even out pinning, a technique covered in the bulk substrate prep work that feeds every tub.
Does the Ratio Change by Species?
The 1:2 to 1:3 band holds for most bulk-suitable species, but aggression varies. Oyster is the most forgiving — its mycelium runs fast and ropey, so it tolerates leaner ratios better than anything else and is the reason oyster is the standard first tub. Wine cap colonizes a coarse wood-chip and straw bulk and benefits from a generous spawn rate simply because the chunky substrate has more air gaps to bridge. Button and portobello (Agaricus) on composted manure work differently again, relying on a casing layer to trigger pinning rather than a surface-pin response, but they still want a solid spawn rate to claim the compost before competitors do.
Temperature interacts with ratio too. A warm room (21–24°C) lets even a 1:3 tub colonize quickly, while a cool room slows everything and effectively makes any ratio riskier — so in a cold space, spawn heavier to compensate. The principle is the same across species and conditions: spawn rate buys speed, and speed buys safety. When in doubt about a new strain or a new substrate, default to 1:2 and adjust once you have seen how that particular culture behaves.
Ratio Mistakes That Cause Failures
The classic failure is spawning too light to save grain, then losing the whole tub to mold — a false economy, since you lose both the grain and the bulk. If you are early in your growing and unsure of your sterile technique, default to 1:2 every time; the extra grain is cheap insurance. The second mistake is spawning with under-colonized grain, which behaves like a lower ratio than the numbers suggest. Let grain fully colonize, then shake the jars to redistribute and even break the surface a few days before spawning to wake the mycelium up.
The third is uneven mixing, which produces a tub that colonizes in patches with cold, vulnerable gaps. Spawn rate cannot fix a mixing problem — even a generous ratio fails if it is clumped in one corner. Get all three right — enough spawn, fully colonized, evenly mixed — and the tub does the rest on its own.
One subtler mistake is treating ratio as the only lever. A perfect 1:2 mix still fails if the bulk is too wet, too dry, or compacted, because those problems stall colonization regardless of how much spawn you used. Ratio and substrate quality work together: the spawn rate sets the pace of the race, and the substrate condition sets whether the mycelium can actually run. If you have spawned heavy and the tub still crawls, look at moisture and compaction before you blame the grain. Treat the whole build as a system — clean grain at a generous ratio, mixed evenly through a properly hydrated, un-packed bulk — and contamination becomes the exception rather than the rule.
Keep Reading
- Monotub and Bulk Growing: The Complete Guide
- Mushroom Substrates: The Complete Guide
- Liquid Culture vs Spore Syringe vs Grain Spawn
- Mushroom Yield Per Block by Species
Frequently Asked Questions
What is the best spawn-to-bulk ratio?
For home growers, 1:2 by volume is the safest default and 1:3 is the practical maximum once your process is clean. One part colonized grain to two or three parts pasteurized bulk substrate.
Is a higher spawn rate always better?
A higher spawn rate colonizes faster and lowers contamination risk, but beyond about 1:1 it wastes grain without raising yield, because the bulk substrate, not the spawn, limits total fruit production.
How do I measure spawn-to-bulk ratio?
Measure by volume, not weight. A quart jar of fully colonized grain mixed into two or three quarts of bulk gives 1:2 or 1:3. Measure both spawn and bulk the same way, lightly settled, not packed.
Why did my tub get contaminated at a low spawn rate?
A light spawn rate leaves large uncolonized areas that the mycelium takes weeks to claim, giving mold time to establish. Raising the rate to 1:2 shortens the race and is the single most effective fix.
Can I spawn with partially colonized grain?
No. Partially colonized grain is weaker inoculum and effectively lowers your real spawn rate. Let grain fully colonize, shake the jars to redistribute, then spawn a few days later when the mycelium is active.