
Cold lime-bath pasteurization soaks chopped straw in water raised to about pH 12–13 with hydrated lime (calcium hydroxide) for 12–24 hours at room temperature. The high alkalinity suppresses competing bacteria and mold spores with zero heat, leaving the substrate clean enough for aggressive oyster spawn to take over. No stove, no pressure cooker, no thermometer.
This is the single most useful trick for anyone growing oyster without gear. It replaces the hot-water bath and the canner in one move — a bucket, a bag of garden lime, and a day of waiting. I run it whenever I want a batch of oyster straw without firing up the pasteurization gear, and it is genuinely reliable when the dose is right.
That “when the dose is right” is the entire article. Under-lime the water and you have soggy straw teeming with bacteria; over-lime and you can stall your own mycelium. Here is how to hit the window every time, and how to read the failure signs before they cost you a batch.
How Does Cold Lime Pasteurization Actually Work?
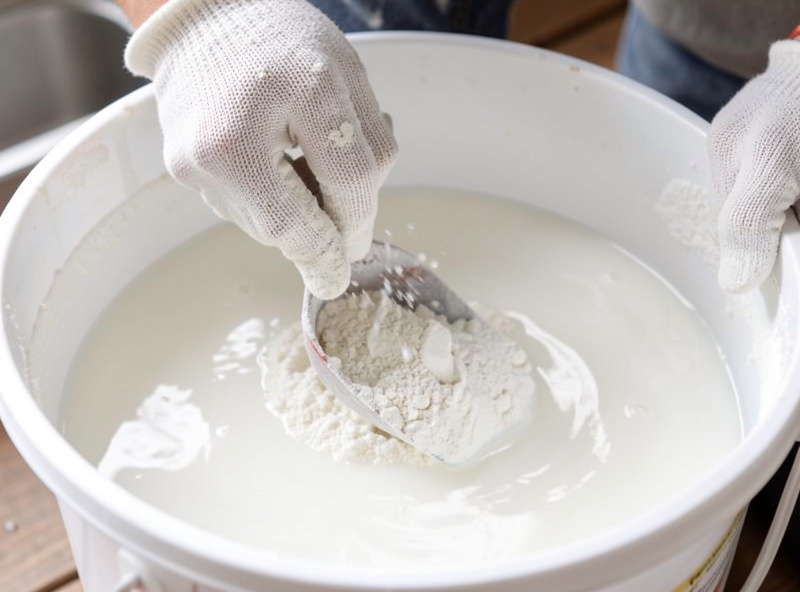
Hydrated lime dissolved in water creates a strongly alkaline solution around pH 12–13. Most bacteria, mold spores, and weed fungi cannot survive prolonged exposure to that alkalinity, so a 12–24 hour soak knocks the competition down without heat. Oyster mycelium, introduced after the straw drains and the pH moderates in the substrate, then colonizes faster than the survivors can recover.
It is chemistry doing the job heat normally does. Where hot-water pasteurization cooks the competitors at 65–80°C, the lime bath poisons their environment with alkalinity — same outcome, different lever. Crucially, this only works because straw is a low-nutrient substrate; the head start it gives oyster is enough. Try the same trick on grain and it fails, because grain is rich enough that survivors bounce back fast — which is exactly the honest limit the no-pressure-cooker overview keeps returning to: poor substrate plus fast spawn, or nothing.
The word people trip on is “pasteurization” versus “sterilization.” Lime does not sterilize — it does not kill everything, and it leaves spores. It pasteurizes: it tilts the playing field steeply in oyster’s favor. That distinction is why lime straw grows oyster beautifully and would be a disaster under a bag of nutritious Masters Mix.
How Much Lime Do You Actually Use?
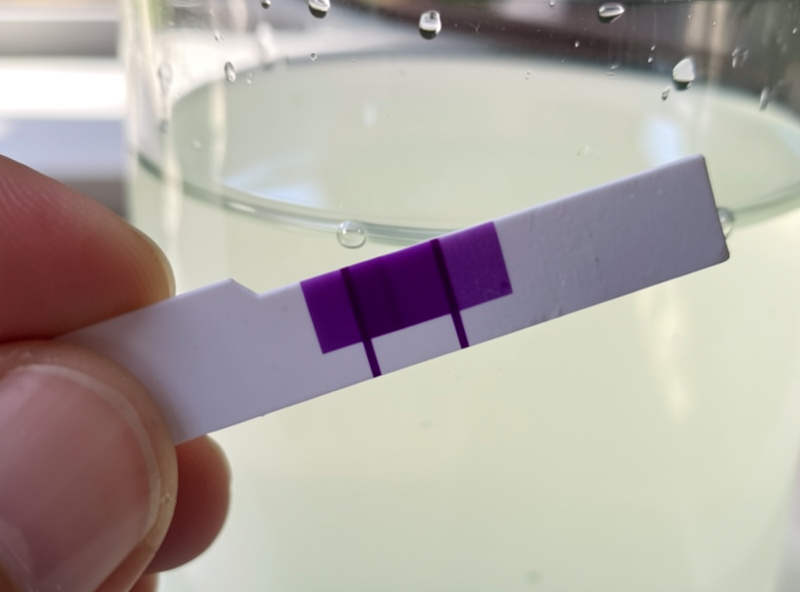
A common working dose is roughly 1–2 tablespoons of hydrated lime per gallon of water (about 4–8 grams per liter), enough to push the bath to pH 12 or above. The exact amount varies with your water and lime, so the reliable move is to dose until a pool or aquarium test strip reads solidly in the 12–13 range rather than trusting a fixed spoon count.
Use hydrated lime — calcium hydroxide, sometimes sold as slaked lime, builder’s lime, or pickling lime. Do not substitute agricultural garden lime (calcium carbonate) or dolomitic lime; those are pH buffers that barely move the water and will not pasteurize anything. This is the mistake that quietly wrecks a first attempt: the wrong “lime” off the shelf. Read the bag for calcium hydroxide.
Stir the lime into the water first and let it dissolve — it will not fully clear, and a milky, slightly cloudy bath is normal and correct. Then submerge your chopped straw completely, weighing it down with a plate or a jug of water so nothing floats above the waterline; any straw poking out of the bath is unpasteurized and becomes a contamination bridge. I keep cheap pool-test strips on the shelf specifically for this, because confirming the bath hit high-pH before I trust it has saved me more batches than any other single habit. As an Amazon Associate I earn from qualifying purchases. A small bag of hydrated lime (calcium hydroxide) lasts through dozens of grows.
How Long Should the Straw Soak?
Soak for 12–24 hours at room temperature. Below about 12 hours the alkalinity has not had long enough to penetrate and suppress the full spore load; beyond 24 hours you gain little and risk the straw going anaerobic and sour. Sixteen to eighteen hours is a comfortable, forgiving middle — start it in the evening and it is ready the next afternoon.
Temperature matters less here than with hot-water pasteurization, which is the whole appeal, but do not run the bath in a freezing garage — keep it at normal room temperature so the chemistry works at a reasonable pace. Chop the straw to a few inches before soaking so the bath reaches every surface and the finished substrate packs well and holds moisture. Long, unchopped straw traps dry pockets the lime never touched.
Cover the bucket loosely to reduce evaporation and keep debris out. You will smell the difference between a good bath and a failed one: clean lime-treated straw has a faint mineral, wet-hay smell, while a bath that has gone wrong smells sour, sulfurous, or like ammonia — that is bacteria winning, usually from too little lime or too long a soak. Trust your nose; a sour bath is not worth spawning into.
How Do You Drain and Spawn After the Bath?
Drain the straw to field capacity — lift it out, let the bath run off, and squeeze a handful so only a drop or two releases, not a stream. Then mix in your oyster spawn at roughly 5–10% of the substrate weight, pack it into a clean tub or filter-patch bag, and move it to the dark to colonize. There is no need to rinse the lime off; the alkalinity moderates in the substrate as it drains.
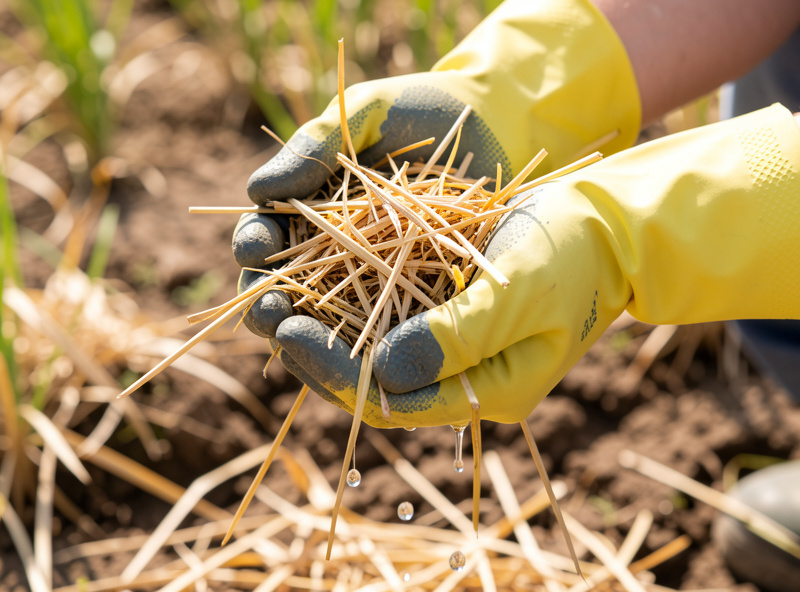
Field capacity is the number that decides your grow. Too wet — dripping straw — and you invite bacterial blotch and anaerobic sour rot as the batch sits; too dry and colonization stalls and the mycelium never bridges the gaps. The squeeze test is crude but works: a firm fist should yield a drop or two at the wrist, no more. I have drowned a batch by spawning straw that was still sheeting water, and it turned to grey slime in the tub within days — drain properly and give it that extra ten minutes to shed water.
Once spawned, treat it like any oyster block: dark, room temperature, colonizing for 10–14 days until the straw is webbed bright white, then into fruiting conditions. If you multiplied your spawn using the cardboard spawn method, tear those colonized chunks through the drained straw at transfer. Lime-bath straw plus cardboard-grown spawn is about as close to a free oyster grow as the hobby gets.
Lime Bath vs. Hot-Water Pasteurization: Which Should You Use?
Both get you to clean oyster substrate; they trade effort against reliability. The lime bath wins on zero heat and near-zero active time — mix, submerge, wait. Hot-water pasteurization wins on consistency, because holding straw at 65–80°C for an hour is a more forgiving, better-documented process than getting a lime dose exactly right. Here is the honest side-by-side.
| Factor | Cold lime bath | Hot-water pasteurization |
|---|---|---|
| Heat needed | None | Water to 65–80°C |
| Active time | Minutes to mix and submerge | 60–90 min holding temperature |
| Total time | 12–24 hour soak | 1–1.5 hours |
| Main risk | Wrong lime or wrong dose | Losing temperature control |
| Gear | Bucket, hydrated lime, test strips | Cooler, hot water, thermometer |
| Best for | Hands-off, no-stove grows | Reliable, repeatable results |
My honest take: start with the lime bath if you want the lowest-effort, no-heat path and you are willing to buy a pack of test strips to confirm the dose. Switch to hot water if your lime source is uncertain or you want the most consistent result batch to batch. For the pasteurization science behind both, Penn State Extension’s mushroom resources are a solid reference (Penn State Extension), and Cornell’s small-farms program covers substrate prep in depth (Cornell Small Farms).
Can You Reuse a Lime Bath for a Second Batch?
You can reuse a lime bath once or twice, but each batch spends the alkalinity and loads the water with organic debris, so the pasteurizing power drops fast. If you reuse it, re-test with a strip and add fresh hydrated lime to bring the pH back up to 12–13 before submerging the next straw — never assume yesterday’s bath is still strong enough.
In practice I rarely stretch a bath past a second use. The water goes browner and more organic-smelling with each round as it picks up dissolved sugars and debris from the straw, and that organic load is exactly what feeds the bacteria you are trying to suppress. Hydrated lime is cheap enough that mixing a fresh bath costs pennies, and a fresh bath removes one whole variable from the equation. If you do reuse, top up the lime, confirm the pH by strip, and skim off floating debris first. When in doubt, dump it on the compost or garden bed — spent lime water is fine for soil — and start clean. That small discipline is the same reason my batches stay consistent: control the variables you can control cheaply, and the grow rewards you.
Is Lime Safe to Handle?
Hydrated lime is caustic and will irritate skin, eyes, and lungs, so handle it with basic care: wear gloves and eye protection when mixing, avoid breathing the dry powder, and add lime to water in a ventilated space. It is a common building and food-grade material used safely at this scale for decades, but “safe when handled correctly” is not the same as “harmless” — respect it.
The realistic precautions are simple. Dry hydrated lime powder is the main hazard — it can burn eyes and irritate lungs if you inhale a cloud of it — so open the bag carefully, add it to the water gently rather than dumping, and do not lean over a fresh mix and breathe in. Once it is dissolved in the bath the risk drops to skin irritation, which gloves handle. I wear nitrile gloves and safety glasses for the mixing step out of the same reflex that keeps me tidy around the pressure canner: the boring safety habit costs nothing and prevents the one bad day.
Rinse any splashes off skin promptly, keep the bag sealed and away from kids and pets, and you are working well within how this material is handled every day in construction and food preserving. None of this is exotic — it is the same respect you would give oven heat or a sharp knife. With that in hand, cold lime pasteurization is the cheapest, lowest-tech route to clean oyster substrate there is, and it slots straight into the wider no-canner workflow.
What kind of lime do I use for cold pasteurization?
Hydrated lime, which is calcium hydroxide, also sold as slaked lime, builder’s lime, or pickling lime. Do not use agricultural garden lime (calcium carbonate) or dolomitic lime, because those barely change the water pH and will not pasteurize the substrate. Check the bag for calcium hydroxide.
How much lime per gallon of water for a straw bath?
A common dose is about 1 to 2 tablespoons of hydrated lime per gallon of water, roughly 4 to 8 grams per liter, enough to reach pH 12 or above. Because water and lime vary, dose until a pool or aquarium test strip reads solidly 12 to 13 rather than trusting a fixed amount.
How long do you soak straw in a lime bath?
Soak 12 to 24 hours at room temperature, with 16 to 18 hours a forgiving middle. Below 12 hours the alkalinity has not fully penetrated, and beyond 24 hours you risk the straw going anaerobic and sour. Start it in the evening and it is ready the next afternoon.
Do I need to rinse the lime off before spawning?
No. Drain the straw to field capacity, where a squeezed handful releases only a drop or two, then mix in oyster spawn directly. The alkalinity moderates in the substrate as it drains, so rinsing is unnecessary and would only add handling and contamination opportunity.
Is hydrated lime dangerous to handle?
Hydrated lime is caustic and can irritate skin, eyes, and lungs, so wear gloves and eye protection when mixing, avoid breathing the dry powder, and work in a ventilated space. Once dissolved in the bath the risk drops mainly to skin irritation, which gloves handle. It is used safely at this scale routinely.
Further Reading
- How to Grow Mushrooms Without a Pressure Cooker — where cold pasteurization fits in the full low-tech pipeline.
- The Cardboard Spawn Method — grow the oyster spawn you mix into this straw.
- Passive FAE: Fruiting Without a Fan or Controller — fruit the block once the straw is spawned.
- Windowsill Mushroom Growing — fruit lime-pasteurized straw near a window.
- A Low-Budget First Grow — the full budget build this pasteurization step feeds.