
A proper mushroom log inoculation comes down to three numbers: hole spacing of roughly 6 inches down the log and 2 inches around, a drill bit matched to your spawn type, and a wax seal applied while the cheese wax is still liquid at around 150°F. Get those right on fresh-cut hardwood and a single oak log will fruit shiitake for four to six years off one afternoon of work.
I have inoculated more logs than I can count behind the garden shed, and the part that actually decides success or failure is not the drilling — it is the spawn-to-wood contact and the seal that keeps that spawn from drying out before the mycelium runs. This guide walks the full process the way I run it: log selection, the drill pattern, plug versus sawdust spawn, the inoculation itself, sealing, and stacking for the spawn run.
Choosing and Cutting the Log
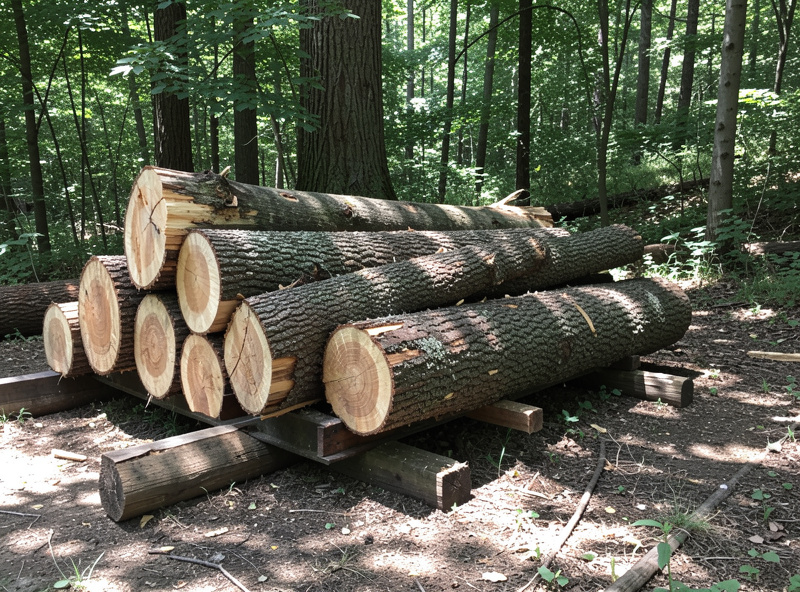
The window that matters is freshness. Cut your logs 2 to 6 weeks before inoculation — long enough for the tree’s own anti-fungal defenses to drop, short enough that wild fungi have not already colonized the wood. I aim for the dormant season, and I let cut logs rest under shade, off the ground, for about three weeks before drilling.
Diameter is the next lever. I run logs 4 to 6 inches across and 3 to 4 feet long — thinner than 3 inches and they dry out and exhaust their food too fast, thicker than 8 inches and they are miserable to move and slow to colonize. Bark must be intact; the bark is the skin that holds moisture in during the long spawn run. For species pairing, oak, maple, and birch are the workhorses, and I cover the wood-by-species tradeoffs in detail in my guide on the best wood for mushroom logs.
The Drill Pattern: Spacing, Depth, and Bit
The standard diamond pattern is the one I trust: holes 6 inches apart down the length of the log, with each row offset and rotated about 2 inches around the circumference, so the holes spiral. That diamond gives the mycelium overlapping fronts that knit across the whole log instead of leaving dead zones. A 4-inch log gets roughly three to four rows around; a thicker log gets more.
Depth and diameter depend on your spawn. For sawdust spawn I use a 12mm (about 7/16 inch) bit with a depth stop set to 1 to 1.25 inches. For plug spawn I use a 5/16 inch bit drilled to the plug length, usually about 1 inch. A brad-point or an angle-grinder log bit with a built-in depth collar saves your forearms and keeps every hole identical — consistency here is what keeps the seal flush later.
| Factor | Plug Spawn | Sawdust Spawn |
|---|---|---|
| Drill bit | 5/16 inch | 12mm (7/16 inch) |
| Hole depth | ~1 inch (plug length) | 1 to 1.25 inches |
| Spawn per hole | 1 dowel, tapped flush | Packed with inoculation tool |
| Tool needed | Hammer only | Palm inoculator |
| Colonization speed | Slower | Faster (more spawn mass) |
| Best for | Beginners, few logs | Many logs, faster fruiting |
Plug Spawn vs Sawdust Spawn
Both work; the choice is about scale and speed. Plug spawn is colonized hardwood dowels — you drill, tap one dowel flush into each hole with a hammer, and seal, and for a first batch of five or ten logs I send people straight to plugs because there is almost nothing to get wrong.
Sawdust spawn is loose colonized sawdust packed into wider holes with a palm inoculation tool. It carries far more living mycelium per hole, so colonization is meaningfully faster and you often shave a season off first fruiting. The tradeoff is that it needs the inoculation tool and a steadier hand to pack each hole full without voids. Once I was past my first dozen logs I switched to sawdust for everything because the speed compounds across a stack.
Inoculating: The Actual Process
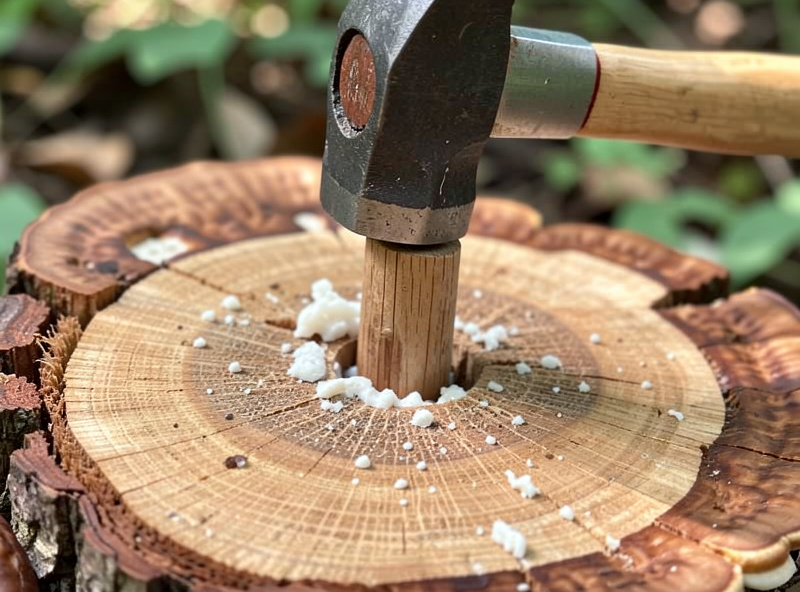
Work clean but not sterile — this is outdoor cultivation, not agar work, so the goal is giving your spawn a head start, not a lab. I lay the log on a sawhorse, drill the whole diamond pattern first, then inoculate before the wood surface dries. For plugs, set the dowel in the hole and tap it until the top sits just below flush. For sawdust, load the inoculator, press it over the hole, and push the plunger so packed spawn fills the cavity to the rim. Run a thumb across afterward — you want spawn proud of the wood, never a sunken void that wax will bridge over hollow.
This is also where I reuse the same contamination instinct that protects my indoor work. If a bag of spawn smells sour or shows the wrong color rather than the bright white of healthy rhizomorphic growth, it does not go in a log — the same call I make at the bench, covered in my guide to what healthy versus contaminated mycelium looks like.
The single mistake I see wreck the most logs is rushing past full holes. A hole that only takes half a plug of sawdust leaves an air gap under the wax, and that gap is exactly where a competitor mold settles in while your spawn struggles to bridge the void. It is worth the extra thirty seconds per log to thumb-check every hole is packed proud before you reach for the wax pot. The same goes for a plug going in too loose — if a dowel rattles in an oversized hole, the bit was too wide or the drilling wandered, and that plug will dry before it knits. Tight, full, flush, sealed: that sequence is the whole craft, and it is more about patience than any tool you buy.
I also keep my spawn cold until the moment it goes in. Warm spawn sitting open in summer sun starts drying and inviting trouble; I work out of a cooler on hot days and inoculate a stack in one focused session rather than leaving half-drilled logs open overnight. Open holes are the most vulnerable the log will ever be, so the goal is to close the loop — drill, inoculate, seal — in one continuous pass per log.
Sealing Every Hole With Wax
The seal is the step most first-timers skimp on, and it is the one that decides whether the log holds moisture through a year-long spawn run. I use cheese wax (food-grade, stays slightly flexible so it does not crack off the bark) melted in a small dedicated pot to about 150°F — liquid and clear, not smoking. A cheap foam dauber or a small brush carries it onto each hole.
Cover the spawn completely and feather a little wax onto the surrounding bark so the seal grips. Skip cut ends unless they are checking badly; if the end grain is cracking and wicking moisture out, a thin wax cap on the ends helps. The whole point is a barrier against drying and against competitor fungi getting a foothold in an open hole. Hot wax wicks into the wood grain and bonds far better than wax allowed to cool toward paste, so keep the pot warm and work in batches.
Stacking for the Spawn Run
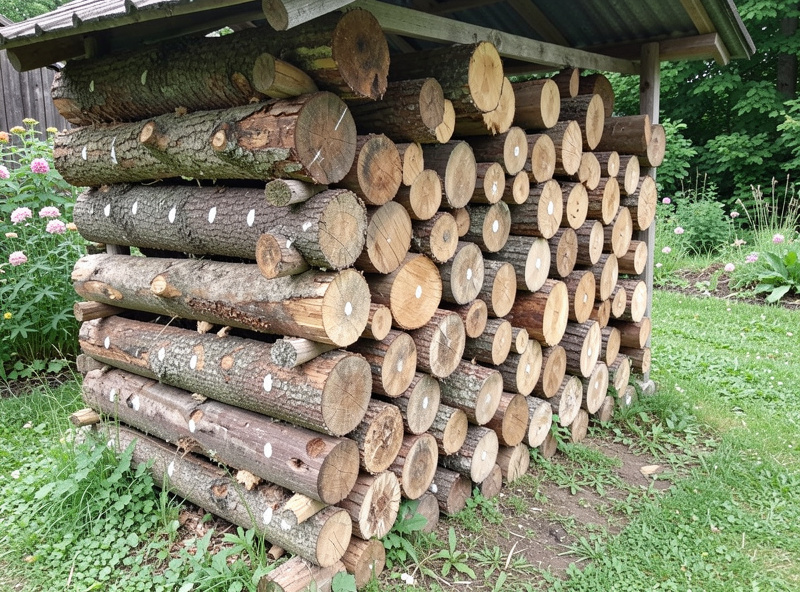
Now the log just needs time and shade. I stack inoculated logs in a shaded spot — north side of a structure or under deciduous canopy — off bare ground on a couple of rails so they do not wick soil fungi. A simple crib stack (log-cabin style) or a lean stack against a rail both work; the priority is airflow around the bark and protection from direct afternoon sun.
The spawn run for shiitake on logs runs roughly 6 to 18 months depending on species, diameter, and climate, and the log is ready to fruit when the mycelium has fully run the wood and white shows at the cut ends. During that run the only job is keeping logs from drying out — in a dry summer I soak or hose the stack. When and how that first fruiting gets triggered, plus the species-by-species substrate match, is the subject of my full walkthrough on outdoor mushroom growing, and the seasonal cut-and-inoculate calendar lives in my notes on when to inoculate mushroom logs by climate zone.
If you want a small starter kit for the project, a palm inoculation tool plus a roll of food-grade cheese wax covers everything beyond a drill and a hammer. As an Amazon Associate I earn from qualifying purchases. A basic log inoculation tool and wax set is the only specialized gear most home growers need to start.
Frequently Asked Questions
How many plugs or holes does one log need?
Use roughly 6-inch spacing down the log and 2-inch spacing around it in a diamond pattern. A typical 4-foot log of 5-inch diameter takes about 30 to 50 holes. More holes mean faster, more uniform colonization.
Do I really need to wax every hole?
Yes. The wax seal locks moisture in and keeps competitor fungi out during the long spawn run. Use food-grade cheese wax melted to about 150 degrees Fahrenheit and cover each hole completely, feathering onto the bark.
How long until inoculated logs fruit?
The spawn run takes roughly 6 to 18 months depending on species, log diameter, and climate. The log is ready when mycelium has fully run the wood and white shows at the cut ends.
Plug spawn or sawdust spawn for a beginner?
Start with plug spawn. You drill, tap one dowel flush per hole with a hammer, and seal, with almost nothing to get wrong. Sawdust spawn colonizes faster but needs an inoculation tool and a steadier hand.
Can I inoculate a log I cut last year?
Older logs are risky because wild fungi may have already colonized the wood. Inoculate within about 2 to 6 weeks of cutting, after the tree’s own anti-fungal compounds drop but before competitors move in.