
Scaling a home mushroom grow means moving from a handful of blocks you check when you remember to a rotation that produces something to harvest every single week. The jump from three blocks to thirty is not ten times more work — it is a different process, and the part that breaks first is almost never fruiting. It is grain, sterilization throughput, and the tags you forgot to write.
I run oyster on a weekly rotation, lion’s mane and king oyster on the bench, shiitake on hardwood blocks, and a wine-cap bed outside in the garden. For years my grow was a windowsill hobby — a couple of bags at a time, feast or famine. Getting to a steady rotation took me two full failed attempts, and both collapsed for the same reason: I scaled the fun part (more fruiting blocks) without scaling the boring parts (grain supply, sterilizer cycles, and a way to know what was inoculated when). This is the hub for that whole problem. Every subsystem below has its own deep guide, and they all point back here.
What Changes When You Go From Three Blocks to Thirty?
At three blocks you can wing it. At thirty, every step that took five minutes now takes an hour, and any step you do out of order costs a whole batch. The single biggest change is that your grow stops being a series of one-off projects and becomes a pipeline — grain feeds spawn, spawn feeds bulk, bulk feeds fruiting, and each stage has to keep pace with the next or the whole line stalls.
Here is the shift in concrete terms. A single 5-lb fruiting block might need roughly 1 to 1.5 lb of colonized grain spawn at a 1:2 to 1:4 spawn-to-bulk ratio. Ten blocks a week means you need 10 to 15 lb of finished grain spawn every week, colonized and clean, on a predictable date — not “whenever that jar finishes.” My first scaled attempt died right here: I had fruiting space for a dozen blocks and a grain supply that produced maybe four jars a month. The tent sat half empty while I waited on spawn, and the empty shelves grew nothing but ego damage. Scaling is a supply-chain problem wearing a gardening costume. Get the sequence right and the pipeline runs itself; get it wrong and you build a beautiful bottleneck.
How Big a Space Do You Actually Need for a Steady Rotation?
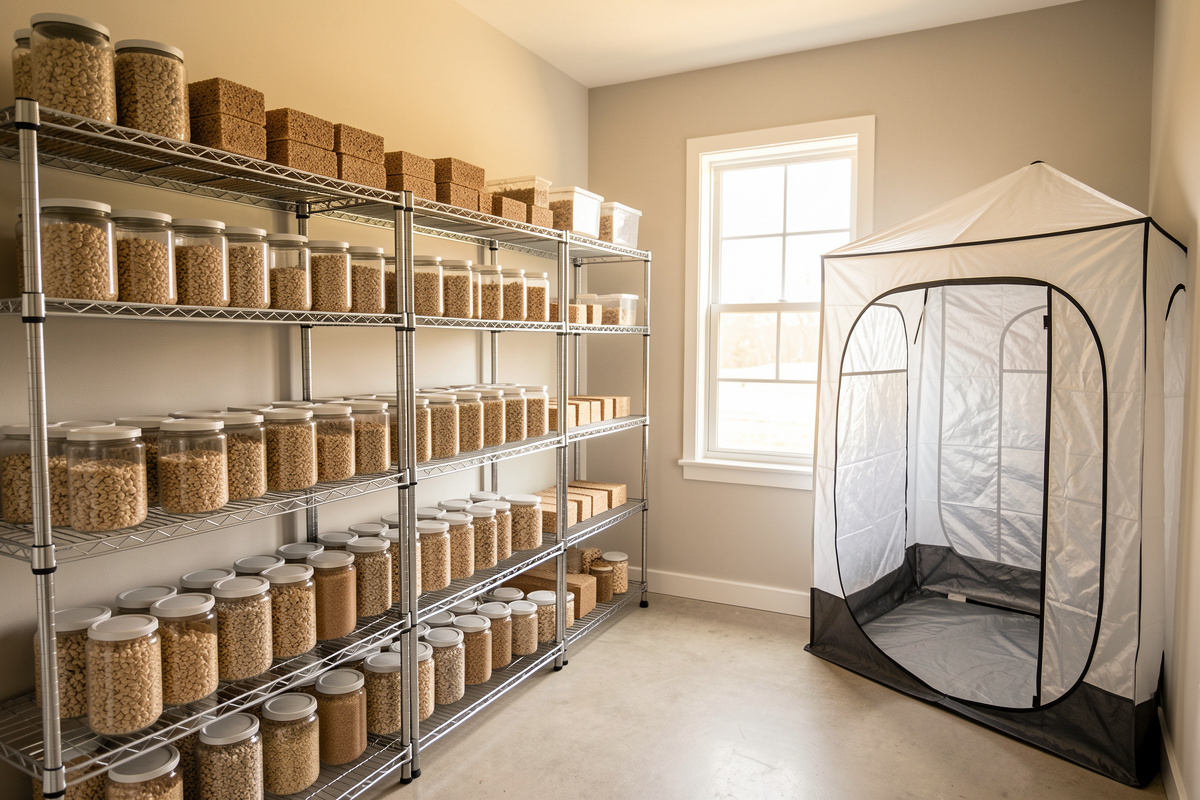
A steady weekly rotation of gourmet mushrooms fits in a surprisingly small footprint — roughly 20 to 30 square feet of floor once you stack vertically. The trick is not floor area but zones: a clean transfer zone, a warm dark colonization zone, and a humid fruiting zone, physically separated so contamination pressure from one does not drift into another.
My grow lives in a shared Swedish workroom next to the ferment bench and the curing chamber, and it is not large. Vertical wire shelving does the heavy lifting: one 48-inch shelving unit holds four levels, and a single level takes a tray of colonizing jars or a row of fruiting blocks. Colonization happens in the dark on a heat-mat-and-thermostat shelf; fruiting happens in a Martha-style grow tent with an ultrasonic humidifier on a humidistat. If you are working in an apartment, the same logic scales down — see the apartment mushroom growing setup for the tight-quarters version. The full layout logic, aisle spacing, and why you separate colonization from fruiting is in laying out a small grow room for a steady rotation. Zone discipline is the cheapest contamination control you will ever buy — it costs nothing but a floor plan.
What Does a Home Grow Look Like at Each Scale Tier?
Scaling is not one leap — it is three recognizable tiers, and the gear that carries one tier chokes at the next. Below is the honest breakdown I wish I’d had before my first failed scale-up. The numbers assume oyster and lion’s mane on a mix of CVG and supplemented sawdust; heavier species like shiitake run slower and shift these figures.
| Scale tier | Blocks/bags active | Grain spawn needed weekly | Sterilizer load per week | Fruiting footprint | Main bottleneck |
|---|---|---|---|---|---|
| Hobby (windowsill) | 1–3 | ~1–2 lb (occasional) | 1 canner load / month | A shotgun tub or shelf | Motivation |
| Weekend grower | 4–8 | ~4–6 lb | 1 canner load / 1–2 weeks | One grow tent | Sterilizer cycles |
| Steady rotation | 12–20 | ~8–15 lb | 2–3 canner loads / week | Tent + colonization shelf | Grain throughput |
| Heavy rotation | 25–40 | ~18–30 lb | 3–5 canner loads / week | Dedicated room | Contamination + labor |
| Micro-farm edge | 40+ | 30 lb+ | Daily loads | Room + second tent | Everything at once |
The pattern reads clearly once it is on a table: the bottleneck migrates. At the weekend tier your pressure canner is the limiting reagent; at the steady-rotation tier it becomes grain colonization time; at the heavy tier contamination and your own labor hours cap you long before space does. Plan for the next tier’s bottleneck, not the current one, and you never stall.
How Do You Keep Grain Spawn Coming Without a Bottleneck?
You keep grain flowing by batching it on a schedule and multiplying it with grain-to-grain transfer, not by starting each jar from a fresh liquid culture. One clean master jar taken to G2G can seed ten more, and if you stagger those starts every few days you get a continuous supply instead of a monthly flood-then-famine.
This is the subsystem that killed my first scale-up, so I am blunt about it. The way I prep grain now: rye and millet, hydrated to field capacity (grain that squeezes without dripping, roughly 45–50% moisture after a soak-and-simmer), loaded into jars with injection-port lids, and pressure-sterilized in one big canner load. Then a single colonized master jar goes to grain-to-grain transfer — one jar into ten. The full hydration and sterilization walkthrough is in grain spawn preparation: rye and millet, step by step. The scheduling logic — how many jars to start on which days so your spawn is ready exactly when a fruiting block frees up — is its own discipline, covered in batching grain spawn: building a production schedule that holds. Build the schedule around your slowest colonizing species and the fast ones will never leave you waiting.
Can You Sterilize Enough Substrate Without Buying an Autoclave?
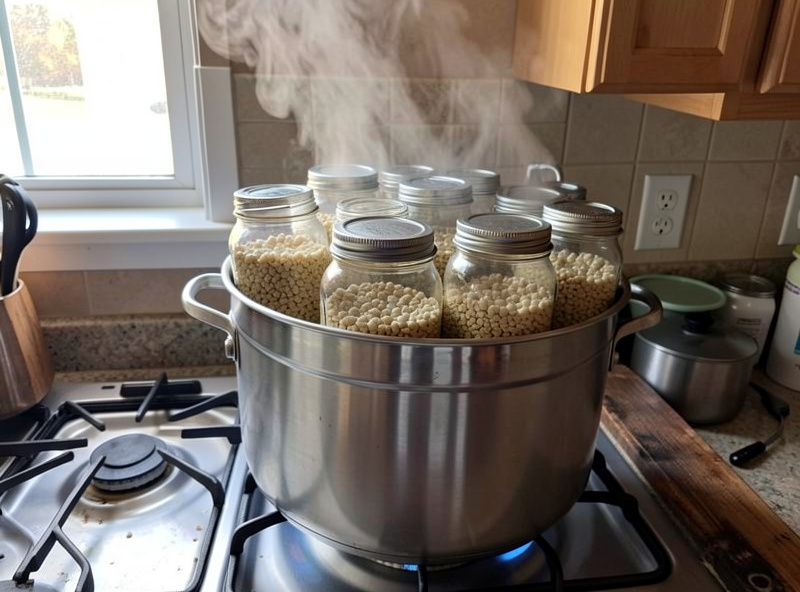
Yes — a home grow can hit a steady rotation on a large stovetop pressure canner and a pasteurization cooler, no lab autoclave required. The move is not a bigger machine but smarter throughput: pack the canner completely full, run back-to-back cycles on a schedule, and pasteurize (not sterilize) everything that will tolerate it to free the canner for grain and sawdust.
My sterilizer is a large stovetop pressure canner, and it is the busiest tool in the room. Grain spawn and supplemented sawdust must be sterilized — 90 minutes to 2.5 hours at 15 PSI depending on jar size and load, following the same pressure-processing logic the National Center for Home Food Preservation documents for canning. Bulk substrates like straw and CVG only need pasteurization, which I run as a hot-water bath or cold lime bath in a cooler — no PSI, no canner time consumed. That split is the whole trick to throughput. There is also a low-tech path for growers without a canner at all, covered in how to grow mushrooms without a pressure cooker, and picking the right machine is in best pressure canner for mushroom cultivation. The complete throughput playbook — load-packing, cycle scheduling, and where the real time goes — lives in scaling sterilization throughput without buying an autoclave. If you only fix one bottleneck this year, make it this one; a half-full canner is throwing away an hour of heat.
How Do You Get a Steady Harvest Instead of a Glut?
A steady harvest comes from staggering inoculation dates, not from timing the fruiting. If you inoculate ten blocks on the same day, they colonize together, pin together, and dump 15 lb of oyster on you in one weekend — most of which you cannot eat or sell before it ages. Start two or three blocks every few days and the same total yield arrives as a manageable trickle.
I learned this by drowning in pink oyster. Pink is aggressive — it colonizes fast and fruits faster — and I once ran an entire shelf inoculated on one afternoon. Every bag pinned within the same 48-hour window, and I harvested more than 12 lb in three days with no way to preserve it fast enough. Half went into the dehydrator, some into stock, and a genuinely embarrassing amount into the compost. Now I offset starts across the week so blocks reach the flush and harvest stage in sequence. The full staggering method — how far apart to space starts per species, and how to read colonization speed so your calendar holds — is in staggering blocks for a continuous harvest, not a glut. A rotation you can actually keep up with beats a bigger harvest you waste.
How Do You Track Thirty Blocks Without Losing the Thread?
You track a multi-block grow with dated tags and a single dead-simple log — nothing fancier than a paper tag on every bag and one notebook or spreadsheet line per batch. The instant you have more than a handful of blocks, memory fails: you cannot recall which jar was G2G’d on which day, which block is on its second flush, or which species is under that colonizing bag.
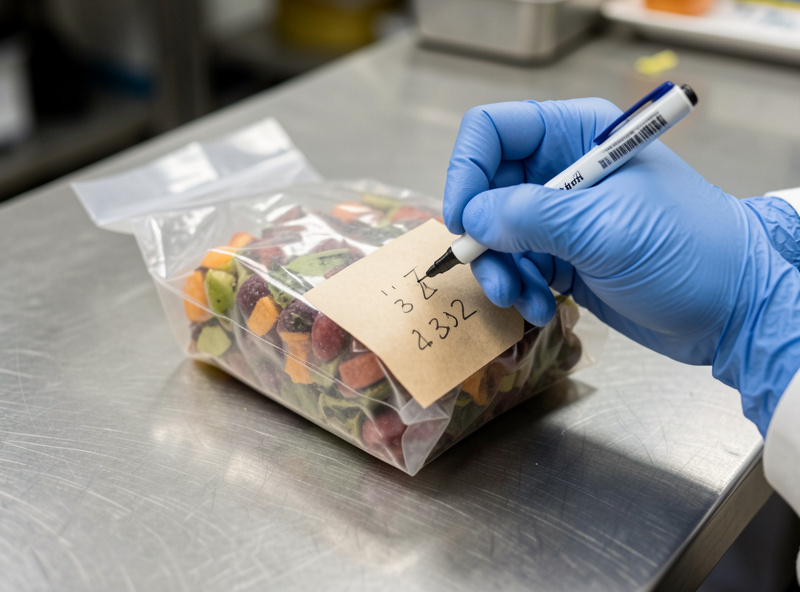
My system is deliberately boring because boring survives contact with a busy week. Every bag gets a tag the moment it is inoculated: species, substrate, inoculation date, and a two-character batch code in marker. One line goes in the log — same code, spawn source, expected colonization date, and later the flush weights. That is it. When I skipped tagging during a rushed batch, I ended up with three unlabeled lion’s mane blocks and one that turned out to be king oyster, and I only knew because it pinned differently. Never again. The complete tagging scheme, the fields that actually earn their place in the log, and a printable batch-code convention are in tracking a multi-block grow: tags, dates, and a simple system. The log is also your contamination early-warning system — patterns only show up when you write them down.
Why Does Contamination Spike as You Scale, and How Do You Hold the Line?
Contamination scales faster than production because every additional jar, transfer, and open lid is another independent chance to fail — and at volume you also work faster, cut corners, and reuse air space. A 5% contamination rate is a shrug at three blocks and a disaster at thirty. Holding the line means tightening sterile technique before you scale, not after the green mold arrives.
The math is unforgiving, and it is the same reason commercial growers obsess over environmental controls — the mushroom research program at Penn State Extension has documented for decades how quickly contamination pressure compounds at production scale. If each grain jar has a 3% chance of contaminating and you run 4 jars, you expect maybe one failure a few times a year. Run 30 jars a week and you are staring at roughly one contaminated jar every week as a baseline — and that jar, if you do not catch it, seeds the next. This is where green Trichoderma mold and cobweb mold forensics become a first-class skill; you have to spot and pull a bad jar the same day. The decision of what to toss versus save at volume is in bulk mushroom contamination: diagnosis and triage, and the broad reference is the complete contamination guide. The scale-specific playbook — why rates climb, which corners you must not cut at volume, and how to compartmentalize so one bad jar does not take the shelf — is in why contamination spikes as you scale, and how to hold the line. The same clean-process discipline that protects the substrate protects the salami curing chamber and the sourdough starter — it is one habit pointed at four hobbies.
What Gear Bottlenecks First When You Scale?
Gear fails in a predictable order as you scale: sterilizer capacity chokes first, then grain colonization space, then sterile transfer air, then fruiting humidity control. Spend money in that order and you never waste it on the wrong upgrade. The most common mistake is buying a second grow tent when the actual bottleneck is a canner that only holds seven quart jars.
Practically, the upgrades that moved the needle for me were, in order: a larger stovetop pressure canner so a single load covers a week of grain; sturdy steel wire shelving to stack colonization vertically instead of hunting for floor space; and stepping from a still-air box up to a laminar flow hood once my transfer volume outran what a still air box could safely handle. When to make that last jump is covered honestly in the laminar flow hood buying guide. If you are outfitting from scratch, decent stackable steel wire shelving units and a large stovetop pressure canner are the two purchases that pay for themselves fastest at the steady-rotation tier.
As an Amazon Associate I earn from qualifying purchases.
What Does a Realistic Weekly Rhythm Look Like?
A steady rotation runs on a repeatable weekly rhythm, not daily heroics — roughly two grain days, one bulk-and-inoculate day, and daily five-minute fruiting checks. Once the rhythm is set, the grow becomes background hum: you touch it a little every day and hard twice a week, and the harvest arrives on schedule.
Mine looks like this, loosely. Sunday is grain day: sterilize the week’s jars, and once they cool, run G2G from the master. Wednesday is the second grain start plus any agar or liquid-culture work. Saturday is bulk day: pasteurize straw or mix Masters Mix and CVG, inoculate the week’s blocks, tag every one, and log them. Every other day is a five-minute walk-through — check the humidistat, mist if the fruiting chamber humidifier is keeping up, harvest anything ready, and pull any jar showing a problem. Anchor the schedule to whichever species colonizes slowest and everything faster than it slots in around the edges. The first-year growing calendar and per-block yield expectations help you set realistic targets before you commit shelf space. Consistency beats intensity — the grow rewards the person who shows up for ten minutes daily over the one who binges once a fortnight.
Which Species Should Anchor a Scaled Rotation?
Anchor a scaled rotation with oyster as the backbone and slot everything else around it. Oyster colonizes fast, forgives sloppy substrate, tolerates a wide temperature band, and fruits aggressively on straw or CVG — which is exactly why it is the correct gateway species and the correct workhorse at volume. It absorbs the mistakes that would kill a fussier crop.
My rotation runs roughly 60% oyster (pearl, blue, and a little pink and golden for color and the restaurant crowd), with lion’s mane and king oyster on Masters Mix for the higher-value bench crop, and shiitake on supplemented sawdust blocks as the slow anchor. Shiitake is the species I schedule everything else around: a shiitake block wants a long colonize-and-brown period — often 6 to 12 weeks before it will fruit — so it sets the far end of the calendar. Fast oyster fills the gaps while the shiitake browns. The one species I keep small is button/portobello (Agaricus), because it runs on composted manure with a peat-and-lime casing layer instead of wood, and a two-phase compost bed does not fit the wood-lover rotation at all. Match colonization speed to your schedule, anchor on the slowest, and the fast species become free capacity. Realistic yields per species are in the yield per block chart.
How Do You Avoid Wasting the Harvest You Fought For?
Scaling production only pays off if you can preserve the surplus the same day it comes off the block — a steady rotation will out-produce what a household eats fresh within the first month. The preservation station is as much a part of scaling as the grow itself, and the mistake of skipping it is how good mushrooms end up in the compost.
When my rotation hit stride, I was pulling more oyster and lion’s mane than the kitchen could use fresh, and fresh gourmet mushrooms hold maybe 5 to 7 days in the fridge at their best. So the dehydrator runs on harvest days. Sliced oyster and lion’s mane dry down to a fraction of their weight and rehydrate for stock and sautés months later — the full method is in how to dry mushrooms for storage. Anything I want to keep closer to fresh gets par-cooked and vacuum-packed following how to freeze mushrooms, and the ugly bits and stems become mushroom powder. The smell of a dehydrator full of shiitake running overnight is one of the best parts of the whole hobby — dense, savory, almost meaty. Plan the preservation capacity before you plan the extra shelves. A harvest you cannot store is not yield; it is future guilt.
What Are the Hidden Costs of Scaling Up?
The hidden costs of scaling are electricity, substrate volume, and your own hours — none of which show up when you are running three bags. A steady rotation draws real power for the humidifier, heat mat, and fans, burns through coir and sawdust by the sack, and demands a few hours of genuine work every week whether you feel like it or not.
Run the numbers honestly before you commit. An ultrasonic humidifier, a heat mat, circulation fans, and grow lights running continuously add up on the electric bill in a way a single shelf never did — and in a cold Swedish winter the heat mat works harder. Substrate scales linearly: 15 to 20 blocks a week means buying coir, vermiculite, gypsum, hardwood sawdust, and soy hull in bulk, plus jars and grain by the sack. And the labor is the cost nobody warns you about — two grain days and a bulk day is real time, every week, indefinitely. Whether growing your own actually saves money against store prices is worked through in the homegrown mushrooms cost comparison, and the answer is “it depends entirely on what you’d otherwise buy.” I do not make income claims here and you should be suspicious of anyone who does — but I will say the value shows up as gourmet species you simply cannot buy fresh locally, not as a spreadsheet win. Know the real cost going in and the hobby stays a pleasure instead of becoming a second job you resent.
What I’d Do Starting Today
If I were scaling from a few blocks to a steady rotation starting this week, I would fix the pipeline back-to-front. First, get grain throughput sorted — one master culture, a G2G schedule, and a canner load every Sunday — because that is the bottleneck that starved my first two attempts. Second, build a tagging habit before you have anything worth tracking, so it is automatic by the time it matters. Third, stagger your inoculation dates from day one so your first real harvest arrives as a trickle you can handle, not a glut you compost.
Everything else — more fruiting space, a flow hood, a second tent — is an upgrade you buy after the pipeline proves it can feed itself. Scale the boring parts first. Grain, sterilization throughput, tags, and staggered dates are unglamorous, and they are the entire difference between a rotation that hums and a shelf of empty bags staring back at you. Pick one subsystem below, read its full guide, and fix it this week. Then come back for the next.
How many mushroom blocks can I run in a small home space?
A steady weekly rotation of 12 to 20 blocks fits in roughly 20 to 30 square feet once you stack vertically on wire shelving and separate colonization from fruiting into zones. Floor area matters far less than vertical space and zone discipline.
What breaks first when you scale a mushroom grow?
Grain spawn supply and sterilization throughput break first, not fruiting space. Most home growers add fruiting blocks faster than they can produce clean grain to inoculate them, so the tent sits half empty waiting on spawn. Fix grain and sterilizer capacity before adding fruiting space.
Do I need an autoclave to scale up mushroom growing?
No. A large stovetop pressure canner run on a tight schedule handles a steady home rotation. The key is packing every load full, running back-to-back cycles, and pasteurizing bulk substrates like straw and CVG separately so they never consume canner time meant for grain and sawdust.
How do I avoid harvesting all my mushrooms at once?
Stagger your inoculation dates rather than trying to time the fruiting. Start two or three blocks every few days instead of inoculating a whole shelf on one afternoon. The same total yield then arrives as a manageable weekly trickle instead of a single overwhelming glut.
Why does contamination get worse when I grow more mushrooms?
Every additional jar, transfer, and open lid is an independent chance to fail, so contamination scales with volume. A 3% per-jar failure rate is trivial across four jars but produces roughly a bad jar every week across thirty. Tighten sterile technique before scaling, not after.
How do I keep track of many mushroom blocks at once?
Tag every bag the moment it is inoculated with species, substrate, date, and a short batch code, and keep one log line per batch. Memory fails past a handful of blocks, and the written log doubles as a contamination early-warning system because patterns only appear when recorded.
Keep Building
Each subsystem of a scaled grow has its own full guide:
- Laying Out a Small Grow Room for a Steady Rotation
- Batching Grain Spawn: Building a Production Schedule That Holds
- Staggering Blocks for a Continuous Harvest, Not a Glut
- Tracking a Multi-Block Grow: Tags, Dates, and a Simple System
- Scaling Sterilization Throughput Without Buying an Autoclave
- Why Contamination Spikes as You Scale, and How to Hold the Line
- Monotub and Bulk Growing: The Complete Guide