
The first 90 days of mushroom cultivation decide whether the hobby sticks or whether the half-spent grain bag goes in the garbage. Most beginners fail not on the inoculation step but on the patience and observation steps between inoculation and pinning. After teaching three friends through their first year, my repeatable starter path is: pick one species, build one cheap setup, watch carefully for six weeks, harvest, then decide whether to scale.
This guide is the full first-year roadmap I would hand someone on day one. It covers the species pick that minimises confusion, the kit-versus-DIY decision that decides your contamination floor, the inoculation-day walkthrough, the colonisation window where new growers panic and ruin their blocks, and the level-up criteria for moving from monotub oysters to gourmet species. The goal is one successful flush in 90 days and a clear-eyed assessment of whether you want to grow your skills from there.
The First-Year Roadmap: Month by Month
A first year done well covers four phases — exploration (find your species, gather kit), execution (run two complete cultivation cycles), expansion (add one new species and one new method), and assessment (decide whether to keep growing or stop). The table below is the personal calendar I would follow if I were starting again. Each row assumes 2-3 hours of weekend work per week; nothing in this calendar requires daily attention. For a month-by-month version that runs the year-round indoor cycle alongside the seasonal outdoor timing for logs and wine-cap beds, see the full mushroom growing calendar.
| Month | Phase | Goal | Action | Spend |
|---|---|---|---|---|
| 1 | Exploration | Pick species, order kit or supplies | Read this guide, order pre-made oyster kit or DIY monotub parts | $50-100 |
| 2 | Execution 1 | Inoculate, colonise, first flush | Day 1: inoculate. Day 14: check colonisation. Day 21: introduce fruiting. Day 35: harvest | — |
| 3 | Execution 2 | Second flush + lessons applied | Block back into fruiting; second flush typically yields 60% of first | — |
| 4 | Reflection | Decide: stop, repeat, or scale | Catalog what worked; identify the bottleneck step | $0 |
| 5-7 | Expansion | Add second species (lion’s mane recommended) | Order grain spawn or buy a supplemented sawdust block | $30-60 |
| 8-10 | Tier 2 equipment | Pressure cooker, SAB, or 3D-printed parts | Add the one piece of gear that constrained your last run | $80-120 |
| 11-12 | Assessment | Year-end audit | Total yields, total spend, time invested, decision for year 2 | $0 |
The single most important advice for the first year: do not try to skip phases. The blocks you grow in months 2 and 3 are the calibration runs that teach you what colonisation looks like under YOUR humidity, YOUR room temperature, YOUR water source. Reading about it is not a substitute. The deeper diagnostic patterns — visual ID, contamination patterns, climate troubleshooting — only stick once you have personally watched a block colonise and fruit.
Pick Your First Species: A Decision Tree
Five species are reasonable first picks, and four are not. Pearl oyster (Pleurotus ostreatus) is the universally recommended starter — fast colonisation, forgiving climate, high yield, contamination-resistant. Lion’s mane is the second-best starter if you specifically want medicinal cultivation; slightly slower but equally forgiving. King stropharia (wine cap) is the best outdoor-first starter if you have outdoor space and patience for a 4-8 month timeline. King oyster and shiitake round out the reasonable five.
Beginners should avoid reishi (slow), cordyceps (specialised), maitake (needs a genuine cold-shock trigger to pin — the peer-reviewed cultivation literature confirms a real temperature drop is required for fruiting to start at all, not just preferred, per Effect of culture parameters on the production of Grifola frondosa, World Journal of Microbiology and Biotechnology, which is a fussier ask than a beginner’s first fridge-and-closet setup usually allows), and any wild-collected species (variable inoculum quality) on the first run. The reason is not that those species are technically harder — they are slower, which means small mistakes compound for longer before showing up. A pearl oyster block tells you within 14 days whether you got the inoculation right; a reishi block keeps your mistake hidden for 60 days. Start where the feedback loop is short. The five easiest species ranked, and the four to avoid on a first grow, are in easiest mushrooms to grow.
My personal recommendation for the first species depends on what you want to do with mushrooms. For cooking and eating, start with pearl oyster — high yield, versatile in the kitchen, robust against errors. For medicinal interest, start with lion’s mane — covered in the dedicated lion’s mane growing guide and the parameter spec in lion’s mane growing parameters. For maximum yield per dollar, start with oyster on pasteurised straw — the cheapest substrate-species pairing in mycology, covered in the mushroom substrate guide.
Pre-Made Kit Versus DIY Monotub
The pre-made-kit-versus-DIY decision is the second most important first-year choice. Pre-made kits (a sealed bag of substrate pre-inoculated with mycelium, ready to fruit) cost 25-45 dollars per kit and produce 400-700 grams of mushrooms with near-zero risk. DIY monotubs (a clear tote, your own grain spawn, your own bulk substrate) cost 60-90 dollars in initial parts and produce 1.5-2.5 kilograms per run.
For a first run, I recommend the kit. The kit eliminates inoculation as a variable — if it doesn’t fruit, you know the problem is your fruiting conditions, not your sterile technique. After one successful kit, move to the DIY monotub for the second run. By the third run you will have the intuition to handle both pre-made grain spawn and your own bulk substrate prep, and the per-run cost will drop below 8 dollars per kilogram of fresh mushrooms. Whether that actually beats store prices, and when your gear pays for itself, is worked out in the homegrown mushrooms cost comparison. The full decision breakdown — cost per kilogram, contamination odds, and what each path teaches — is in grow kit vs DIY monotub.
The DIY monotub at beginner tier is a 35-60 litre clear plastic tote (any hardware store, 12-18 dollars), four 4-centimetre holes drilled in the lid covered with polyfill or 0.2-micron filter patches (4 dollars in supplies), 5 kilograms of pasteurised straw or hydrated coir (6-12 dollars), and one bag of pre-made oyster grain spawn (12-18 dollars). Mix, fill the tote, seal the lid, leave at 20-24 C for 14-21 days, then introduce fruiting conditions. Total work: 90 minutes spread across two days.
Inoculation Day Walkthrough
Inoculation is the only step where sterile technique matters absolutely. Everything else (mixing, watering, lighting, harvesting) tolerates errors. Inoculation does not. The 30-minute window where the grain spawn meets the bulk substrate is when contamination either enters or does not. Get this right and the rest of the run runs itself.
My inoculation procedure for a monotub: 1) wipe every surface in the work area with 70% isopropyl alcohol, including the outside of the grain bag and the outside of the substrate tote, 2) wash hands and put on fresh nitrile gloves, spray gloves with alcohol, 3) open grain bag in a clean area away from drafts, 4) pour substrate into the tote in a single steady motion, 5) sprinkle grain spawn evenly across the substrate at 5-10 percent ratio by weight, 6) lightly mix with gloved hands, 7) seal the lid, label with date and species, move to a quiet corner.
The most common inoculation-day mistake is rushing. Move at half your normal pace. Spores and bacterial particles are mobilised by fast air movement; calm careful movement leaves them on surfaces where they cannot reach your substrate. The second most common mistake is doing inoculation in the kitchen with the kettle running or the dishwasher venting — those create air currents that pick up bathroom-air-quality contaminants. Do inoculation in a quiet room with windows closed, fans off, and pets in another room.
The Colonisation Window: Watching Without Touching
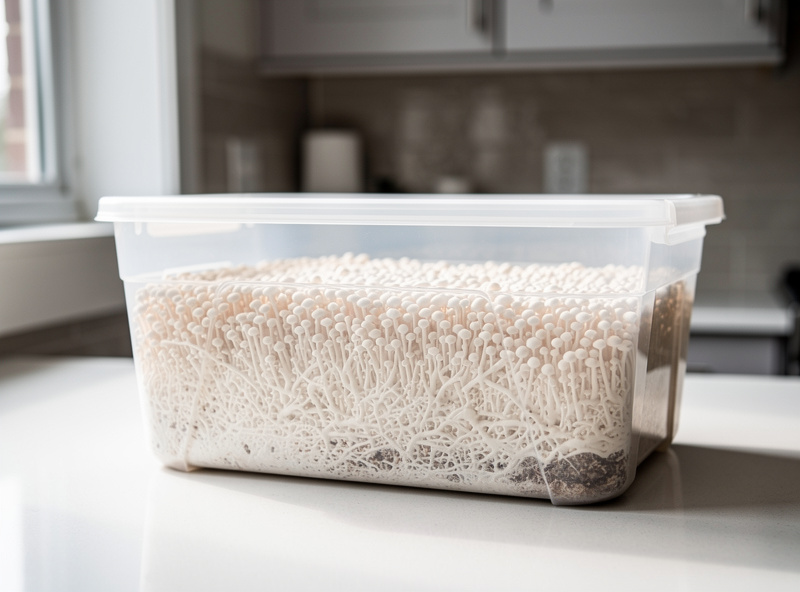
The 14 to 21 days between inoculation and full colonisation is when new growers do the most damage by opening the tote to “check on it”. Every time you crack the lid, you exchange the inside humidity with room air and introduce a small contamination risk. The mycelium needs none of your help during this window — it just needs to be left alone at 20-24 C with no light required. Colonisation is just one phase of the broader mushroom life cycle, from spore to fruiting body.
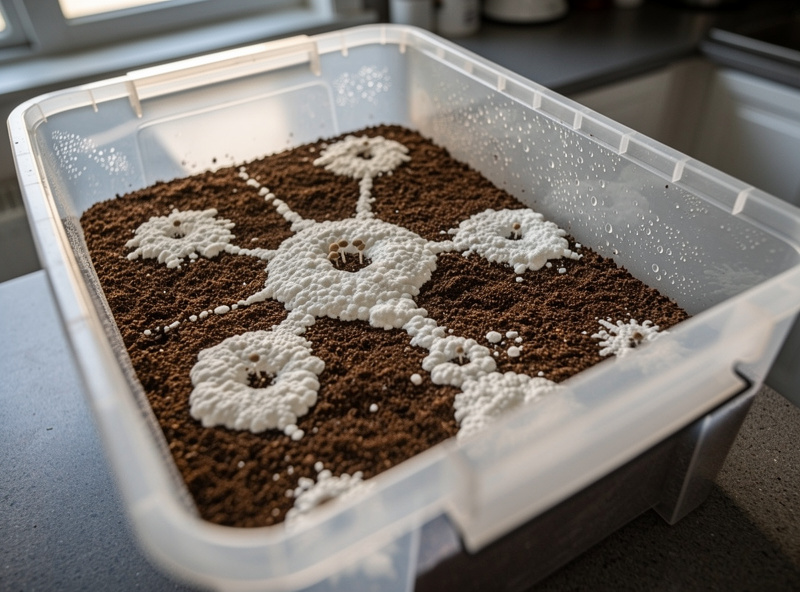
Visual ID is the skill the colonisation window teaches. Healthy mycelium grows from each inoculation point outward in a roughly circular pattern, looks white and slightly fluffy, has visible ropy strands at the leading edge, and gradually merges into a single white mat across the substrate. Anything that does not match this description deserves a careful second look. The full visual reference set — what healthy looks like at days 3, 7, 14, and 21 — is in what does mycelium look like.
Two visual problems to watch for: green, black, or yellow patches anywhere (contamination, see mushroom contamination guide) and very fine wispy growth that climbs vertically rather than spreading horizontally (cobweb mold, see cobweb mold vs mycelium). Photograph anything suspicious immediately and post it to a regional mycology forum for a second opinion — typical response time under an hour and the consensus is reliable.
Triggering Pinning and the First Flush
Once the substrate is fully white (typically day 14-21 for oyster), trigger fruiting by introducing the four fruiting cues simultaneously: drop temperature 2-4 C, increase humidity to 90-95 percent (a daily spray with a clean spray bottle works), introduce fresh air exchange (open the tote once daily for 2-3 minutes), and add indirect light (a window or LED strip on a 12-hour timer). Pins typically appear 5-10 days after these cues are introduced. If you are working in a flat, holding those humidity and fresh-air numbers in a small heated room has its own playbook in the apartment mushroom growing setup.
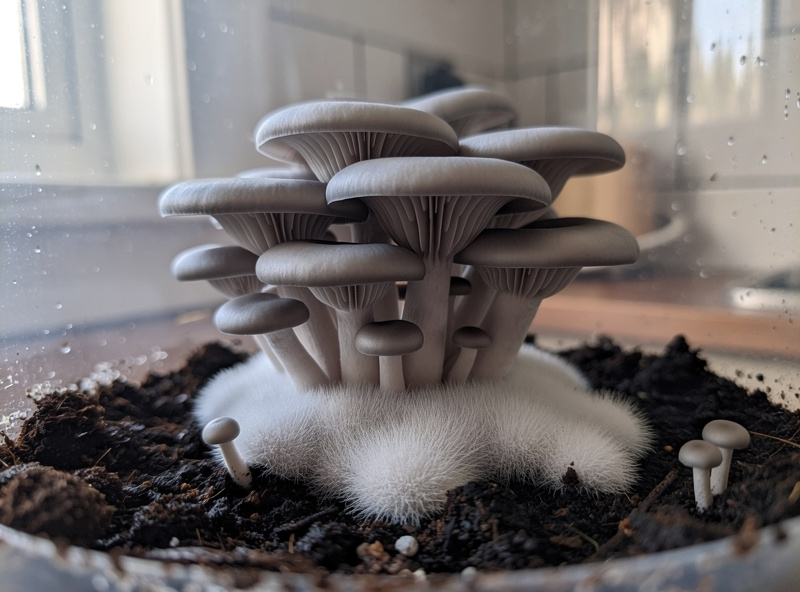
Pins are tiny white nodules — 2-5 millimetres at first — that develop into recognisable mushroom shapes over the next 7-12 days. Resist the urge to harvest as soon as you see them; let them reach full size (caps unrolled, edges starting to flatten) for maximum yield. Harvest by cutting the cluster at the base with a clean knife, never by twisting and pulling.
After the first flush, the block can re-flush. Submerge the block in cool water for 12-24 hours, drain thoroughly, return to fruiting conditions. On my own blocks the second flush runs 60-70 percent of the first, though published trial data on oyster flush ratios spans a wide range depending on strain and substrate — some studies show the second flush nearly matching the first, others show a steeper drop-off, so treat any single number, including mine, as a rough planning figure rather than a guarantee. A third flush is possible but usually small enough to not be worth the time. For realistic fresh-weight numbers by species and the biological-efficiency math behind them, see the mushroom yield per block chart. Spent blocks are excellent compost — see the outdoor crossover in outdoor mushroom growing for how spent substrate becomes garden input.
Why Your Block Won’t Pin: The Troubleshooting Checklist
A fully colonised block that sits white and stubborn for weeks past when it should have pinned is the single most common message I get from people I have taught. Before assuming something is wrong with the spawn or the substrate, work through the fruiting cues in order, because in almost every case one of the four is missing rather than the whole system being broken.
Temperature drop first: most gourmet species need an actual drop from colonisation temperature to fruiting temperature, not just a static warm room. Oyster wants roughly 2-4 C below its colonisation temperature; some species need a much sharper shock — maitake specifically will not pin at all without a real cold-shock event, which is the mechanism-level reason it is a poor first species. If your fruiting chamber sits at the same temperature as your colonisation shelf, that alone can stall pinning indefinitely.
Fresh air exchange second: a sealed tote that colonised beautifully in still air needs that same air actively exchanged once fruiting starts, or rising CO2 suppresses pin formation and pushes the mycelium toward long, thin, antler-like stroma instead of proper caps. Humidity third: 90-95 percent relative humidity sustained, not a single daily spritz that dries out again within the hour — a hygrometer in the tent removes the guesswork here, covered in the dedicated hygrometer guide. Light fourth, and the most commonly skipped: even indirect light on a 12-hour cycle matters more than people expect, since most fruiting bodies use light as a directional and developmental cue, not just a growth trigger.
If all four cues are genuinely present and pinning still has not started after three weeks in fruiting conditions, the more likely culprits are a fully spent or improperly hydrated substrate, or a colonisation that looked complete visually but was not fully committed at the block’s core — cut one block open as a diagnostic before troubleshooting further; a solid white interior confirms full colonisation, while a still-moist or grain-colored core tells you the block needed more time before you moved it to fruiting conditions.
The Three Beginner Mistakes I Made (and What They Taught Me)
My first cultivation attempt was a pearl oyster monotub in 2022. Three specific mistakes from that block taught me more than every YouTube video I had watched beforehand. Sharing them in detail because each one maps to a class of mistake new growers continue to make.
Mistake one: I opened the tote every 2-3 days to “check on it” during colonisation. Each opening exchanged the moist still air inside for dry kitchen air, slowing the mycelium and admitting trace contamination. The block colonised in 28 days instead of 14, and showed a small patch of green near one corner that I caught early but lost the surrounding 20 percent of substrate to. The fix on subsequent blocks: tape over the lid for 14 days, lid uncovered only after full colonisation.
Mistake two: I tried to fruit the block at 25 C because the room was warm. Pearl oyster prefers 18-22 C fruiting; at 25 C the caps grew thin, the stems grew long and pale, and the flush yielded 200 grams from a block that should have produced 500. The fix on the second block: temporarily moved the monotub to a cooler basement corner during fruiting, gained 250 grams. Climate beats heroism every time.
Mistake three: I harvested too late on the first flush, waiting for the caps to fully reflex before cutting. By that point the spore drop had already started, the second flush primordia were stunted by spore-coverage on the substrate surface, and the block aborted its second flush entirely. The fix on subsequent runs: harvest at the unrolled-edge stage, before full reflexion, and the second flush consistently yields 60-70 percent of the first. The detailed mistake catalog is in mushroom growing mistakes every beginner makes.
From Beginner to Intermediate: When to Level Up
Beginner tier ends when you can run two consecutive monotub blocks to full yield without contamination. That is the readiness signal for adding intermediate-tier capability: agar work, liquid culture, your own grain spawn, supplemented sawdust blocks for gourmet species. The starting-culture choices behind that step are compared in liquid culture vs spore syringe vs grain spawn. Each of those skills opens new species and lower per-run costs.
The intermediate-tier equipment list — pressure cooker, still-air box, dehydrator, climate sensors — is covered in the full bill of materials in the mushroom growing equipment guide. The intermediate substrate work — supplemented hardwood sawdust for lion’s mane and reishi — is covered in the mushroom substrate guide. The intermediate harvest and storage workflow is covered in the mushroom preservation guide.
Year-two for most growers also adds outdoor cultivation. Wine cap beds or hardwood logs add a long-payoff layer on top of the indoor cycling, and the outdoor system runs almost autonomously after the initial setup weekend — full walk-through in the outdoor mushroom growing guide. By the end of year two with this progression, most growers are producing more mushrooms than they can eat fresh and the preservation pipeline becomes the next bottleneck to solve — at which point you have already become an intermediate grower with a working system. The journey from confused beginner to confident intermediate runs roughly 18 months of weekend work; the path is well-trodden and the failure modes are knowable.
Two final pieces of advice that apply regardless of which species you start with. First: write down what you do on every block. The notebook entry from day 1 (substrate batch, spawn ratio, water source, room temperature) is what lets you compare across runs when a block underperforms. Three years of those notebook entries built the species-by-species parameter tables I now rely on; you cannot skip the data-collection step and still expect the intuition. Second: join a regional mycology group online before you need one. The community is friendly, the response time on contamination questions is under an hour, and the consensus is reliable. You will save weeks of guesswork on your first three blocks just by being able to ask “is this normal?” and get a fast clear answer.
Frequently Asked Questions
What is the easiest mushroom for a beginner to grow at home?
Pearl oyster mushrooms (Pleurotus ostreatus) are the universal beginner pick: fast colonisation in 14-21 days, forgiving of climate errors, high yield (400-700 grams per kit), and contamination-resistant. A pre-made oyster kit costs 25-45 dollars and produces the first harvest in 35-50 days from purchase, requiring only daily misting and a 12-hour light cycle.
Should I buy a pre-made kit or build a DIY monotub for my first cultivation?
Buy a kit for your first run. The kit eliminates inoculation as a variable, so if the block fails you know your fruiting conditions need fixing, not your sterile technique. After one successful kit, move to a DIY monotub for the second run — total cost 60-90 dollars and 4-5x the yield of a kit.
How long does a mushroom cultivation cycle take from start to harvest?
Pearl oyster: 35-50 days from inoculation to first harvest. Lion’s mane: 45-60 days. Shiitake: 50-70 days. Reishi: 90-120 days. Cordyceps: 60-90 days. The colonisation phase takes 14-28 days; the fruiting phase from cue to harvest takes 12-21 days. A second flush typically follows 14 days after the first.
What do I do if I see mold on my mushroom block?
Identify the mold before acting. Green mold means trichoderma — trash the block immediately, double-bagged, taken outside. Black or yellow patches mean pin mold or wet spot — also trash. Pure white fluffy growth on the casing surface might be cobweb mold (trash if more than 20 percent surface) or healthy mycelium (continue growing). When in doubt, photograph and post to a regional mycology forum for a second opinion.
Can I grow mushrooms in my apartment or do I need a dedicated room?
Yes, a single monotub fits on a kitchen counter or in a closet and produces enough mushrooms for a household. The space requirements are small: 35-60 litre tote, indirect light, room temperature 18-24 C, basic spray bottle for humidity. No dedicated room is needed until you scale to 4 or more concurrent blocks or add species with tighter climate requirements.
What should I do with a mushroom block after it stops fruiting?
Spent mushroom substrate is excellent garden compost. Mix it into vegetable bed soil, compost piles, or use as a starter for outdoor wine cap mushroom beds where the residual mycelium continues to break down organic matter. Do not try to re-fruit a block that has produced 2-3 flushes; the nutrients are exhausted and the contamination risk rises sharply.