
Growing medicinal mushrooms at home costs me under 40 dollars per fruiting block and yields 200 to 500 grams of dried fruiting bodies — roughly 8 to 12 weeks of a daily tincture or tea ration. After three years of pulling lion’s mane, reishi, turkey tail, cordyceps, maitake, and chaga off shelves I built myself, the bottleneck is never spores or substrate. It is climate control and the patience to let mycelium fully colonize before fruiting.
This guide is what I wish someone had handed me when I bought my first agar plate. It covers the six species worth growing at home, the substrates each one prefers, the climate setpoints that actually work in a converted closet or shelving tent, and the harvest and drying choices that decide whether your final tincture has anything in it. I link to every detailed spoke article on this site so you can drill in where you need to.
Why Grow Medicinal Mushrooms at Home Instead of Buying Them
Home cultivation gives you fresh fruiting bodies at roughly one tenth of retail price, full control over what species you grow, and the option to harvest at the exact maturity window where beta-glucans peak. Store-bought powders are usually mycelium-on-grain, not fruiting bodies, and the active compound levels vary wildly.
The first time I compared a 50-dollar jar of lion’s mane powder to my own home-grown dried slices, the difference was visible before any lab test. Mine was uniformly cream-coloured, slightly toothy, with a faint seafood smell. The commercial powder was beige sawdust — mostly grain substrate with mycelium on it, ground up. That is the trade in convenience: you get a fluffy shippable powder, but the erinacines and hericenones that make lion’s mane interesting are concentrated in the fruiting body, not in the mycelium-on-grain biomass. This isn’t just my own visual impression — a peer-reviewed glucan-content comparison in shiitake found fruiting bodies substantially higher in beta-glucan than mycelium grown on grain, and it’s the same substrate-dilution logic that applies across most gourmet and medicinal species.
For the gear and climate side, I run a 1.2-metre shelving tent in a spare room with a small ultrasonic humidifier on a humidistat, a 60-watt CO2 sensor, and a 12-volt PC fan for fresh-air exchange. Total parts cost was under 220 dollars. I also use the same monitoring approach I use on my infrared sauna routine — write down setpoints, watch the trend, change one variable at a time. Wellness gear and mycology gear both reward boring consistency over hero adjustments.
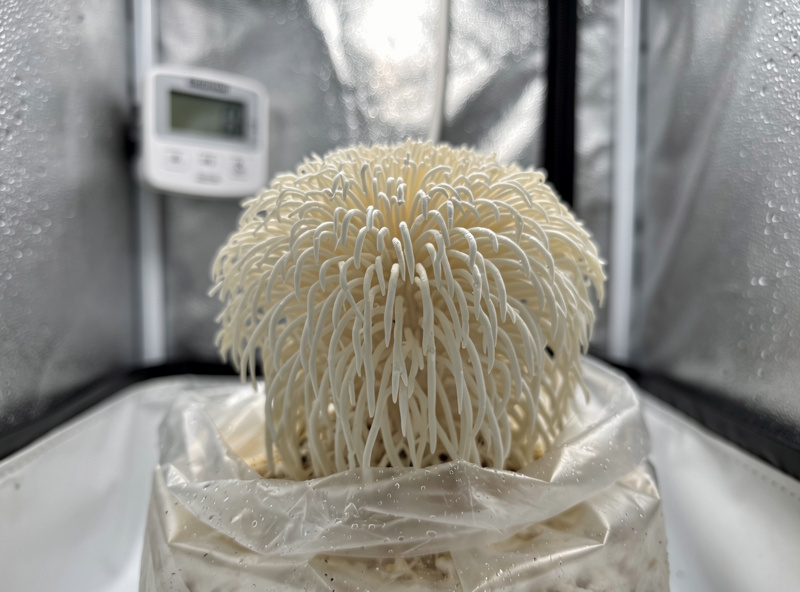
The Six Medicinal Species I Would Grow at Home First
Pick species based on three factors: how forgiving the climate window is, whether the active compound survives drying, and how often you will actually use the final product. Lion’s mane and turkey tail are the most forgiving and the most-used in my house. Reishi and cordyceps need patience. Maitake and chaga are rewarding but slower or specialised.
The table below is my personal scorecard after three years. I built and ran a fruiting cycle for each one at least twice. Difficulty is rated for someone with one prior monotub or grow-bag run under their belt. “Yield window” is the rough wet-weight range from a 2.5-kilogram supplemented sawdust block under standard fruiting conditions.
| Species | Substrate | Fruiting Temp | Days to Pin | Yield Window (wet g/block) | Difficulty | Primary Compound |
|---|---|---|---|---|---|---|
| Lion’s Mane (Hericium erinaceus) | Hardwood sawdust + 20% wheat bran | 18-22 C | 10-14 | 400-700 | Easy | Erinacines, hericenones |
| Turkey Tail (Trametes versicolor) | Hardwood sawdust + 10% bran | 16-20 C | 14-21 | 300-500 | Easy | PSK, PSP polysaccharides |
| Reishi (Ganoderma lucidum) | Hardwood sawdust + 15% bran, supplemented | 21-27 C | 21-35 | 200-450 | Moderate | Triterpenes, beta-glucans |
| Cordyceps militaris | Cooked white rice + nutrient broth in jars | 18-22 C | 30-50 | 30-60 (per jar) | Moderate | Cordycepin, adenosine |
| Maitake (Grifola frondosa) | Hardwood sawdust + 30% bran, dense block | 13-18 C | 30-60 | 250-500 | Hard | D-fraction beta-glucan |
| Chaga (Inonotus obliquus) | Not cultivated indoors — foraged from birch | n/a | n/a | n/a | Forage | Betulinic acid, melanin |
Chaga is on the table because everyone asks. You cannot meaningfully grow chaga indoors — it is a slow parasitic conk that takes 5 to 15 years on a living birch tree. If you want chaga at home, you forage it ethically (under 30% of the conk, leaving the rest to regenerate) and you make a long decoction. For the cultivable five, my detailed parameters live in the dedicated lion’s mane growing parameters guide and the broader lion’s mane growing guide.
Substrate Choices for Medicinal Species
For five of the six species above, supplemented hardwood sawdust at 60 to 65 percent moisture is the working substrate. Lion’s mane, turkey tail, reishi, and maitake all prefer it. Cordyceps militaris is the outlier — it fruits on a cooked rice and nutrient broth medium in glass jars, not on bulk substrate.
My standard recipe is 80 percent oak or beech sawdust pellets (the kind sold for smoker pellets — heat-treated, sterile-ready), 15 percent organic wheat bran, and 5 percent gypsum, hydrated to field capacity. For reishi I push the bran to 18 percent because the fruiting body grows so slowly that the substrate has to stay rich for longer. For maitake I push it to 30 percent and compress the bag harder — maitake wants a dense, well-fed block.
If you are still working out which carbon source to use, my CVG substrate recipe guide walks through coco coir, vermiculite, and gypsum for gourmet monotub species, and the coffee ground substrate experiment is worth reading before you assume coffee is the cheat code (it works for oysters; it is a mess for medicinals). For lion’s mane specifically you can also fruit on hardwood logs outdoors, which connects directly to the technique in best wood for mushroom logs.
One mistake I made on my first reishi run: I tried to save money with softwood sawdust from a hardware store. The block colonised, then refused to fruit, then went green with trichoderma. Softwood resins inhibit most medicinal species. Use oak, beech, alder, sweetgum, or maple — never pine, fir, cedar, or spruce.
Fruiting Conditions That Actually Get You Yields
Four variables matter at fruiting: temperature, humidity, fresh-air exchange, and light. Get all four right and a fully colonised block pins within two weeks. Miss one and you get aborts, leggy stems, or no pins at all.
My setpoints for the four indoor species are: lion’s mane 18-22 C, 90-95% RH, 4-6 air exchanges per hour, indirect light 12 hours; turkey tail 16-20 C, 85-90% RH, 2-3 exchanges, indirect light; reishi 24-27 C, 90-95% RH, 1-2 exchanges (high CO2 produces the elongated antler form, low CO2 produces the conk form — choose intentionally); cordyceps 18-22 C in a still container, the substrate is the humidifier, 12-hour blue or full-spectrum light. Maitake wants cooler temperatures than the others, 13-18 C, and a humidity bounce — 95% during pin set, drop to 85% during expansion.
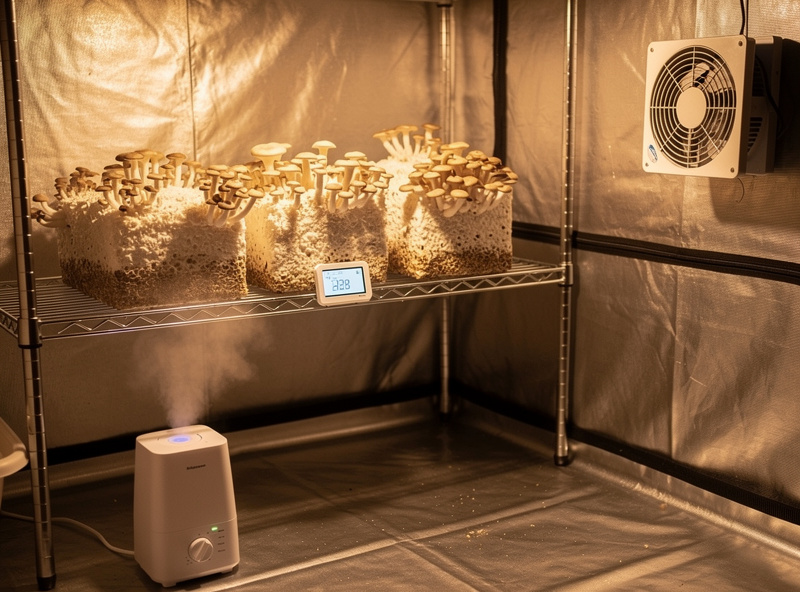
When a block sits fully colonised and just won’t pin, the fix is almost always one of the same four variables rather than something exotic. For lion’s mane, check light first — I’ve had blocks refuse to pin in a genuinely dark closet corner that fixed themselves within days of adding a cheap timer-driven LED strip. For reishi, check CO2 before anything else, since the antler-versus-conk decision is made early and is hard to reverse once the fruit body has committed to a shape. For turkey tail, check fresh-air exchange; it wants more ventilation than lion’s mane and a still corner of the tent will stall it. For maitake, check temperature before humidity — it is the one species on this list that actively dislikes a warm room, and a maitake block kept at lion’s mane temperatures will often refuse to fruit at all.
To hit those setpoints I run a Govee H5075 thermohygrometer for the trend graph, an Inkbird ITC-308 for the heater, and a humidistat-controlled ultrasonic. If you are choosing sensors, my hygrometer guide covers accuracy, placement, and which units survive the chronic 90% humidity that ruins consumer-grade sensors in three months. For more automation, the smart sensors and climate automation guide shows the home-assistant integration I now run for everything except cordyceps. The 3D-printed sealing improvements in the monotub lid build also fixed my single largest source of FAE inconsistency.
Harvesting at Peak Potency Versus Maximum Yield
Harvest timing for medicinals is not the same as for culinary species. For lion’s mane, you maximise yield by waiting until the teeth elongate to about a centimetre and the surface turns from pure white to faint cream. Harvesting earlier, while the fruit body is still tight and bright white, is the convention among growers chasing compound content over size — in my own weigh-ins that earlier pick costs roughly a tenth to a sixth of the wet weight I’d get by waiting, though that’s my own scale and notebook talking, not a lab-verified number.
For reishi the rule is clearer: harvest when the white growth tip closes off and the entire conk turns mahogany with a thin yellow-brown spore rain. If you wait two days too long the cap becomes hard and you have to grind it for tea or decoct it for hours. For turkey tail, harvest before the underside pores brown — that is when polysaccharides are highest. For cordyceps, harvest when the orange stromata stop elongating and the tips start to fade. For maitake, harvest the entire cluster the day caps fully reflex; partial harvest invites contamination on the cut surface.
I weigh every flush, photograph it next to a known reference, and write the wet weight, dry weight, and a one-line note in a paper notebook beside the tent. Three years of those notes is what taught me the harvest windows above — far more useful than anything I read online, because the windows shift by a day or two based on my specific block size and supplementation. If you want the underlying playbook for how to make those notes useful, the same approach lives in my growing mistakes guide, which is mostly a list of decisions I made on insufficient data.
Drying and Storage to Preserve Active Compounds
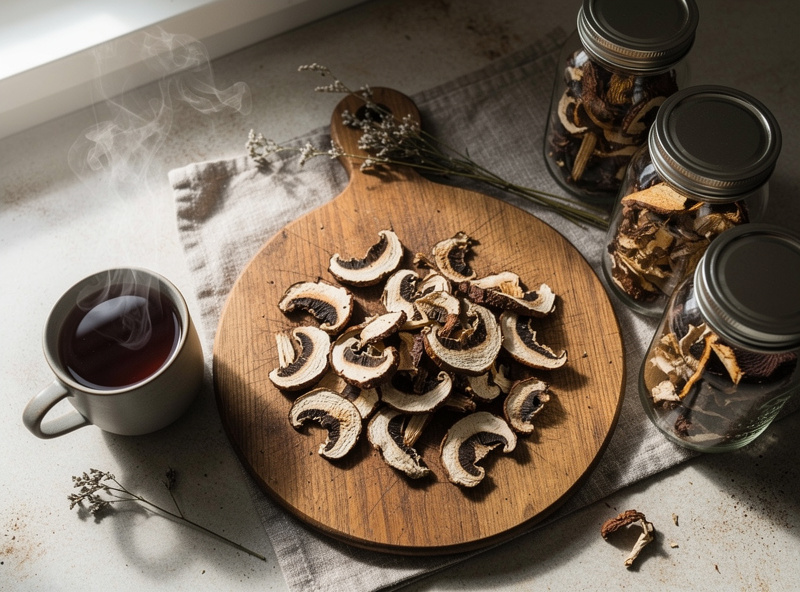
Drying is where most home growers throw away half their work. The active compounds in medicinal mushrooms are heat-sensitive above roughly 50 C and oxidation-sensitive once dried. My rule: dehydrate at 45-50 C with airflow until snap-dry (the slice cracks rather than bends), then immediately move to oxygen-absorber pouches inside lidded mason jars stored in a dark cupboard.
For lion’s mane I slice fruit bodies to about 8 mm thick before drying — any thicker and the inside stays leathery; any thinner and the slices shatter. For reishi I slice the cap into 3-mm strips because the cap is too dense to dry whole in any reasonable time, and the strips dehydrate evenly. For cordyceps, dry the entire stroma whole at 45 C; the orange colour is your potency indicator and oversights show as faded tips. For turkey tail, snap-dry the strips and grind only when needed — pre-ground turkey tail loses polysaccharide activity faster than whole strips do.
My full procedure with photos and exact temperatures is in the dedicated how to dry medicinal mushrooms guide, and the comparison between dehydrator, oven, and air-dry methods (which is mostly about which one ruins the active compounds) is in how to dry mushrooms for storage. The same dryness and oxygen control principles map almost one-for-one onto the climate work covered in curing chamber humidity tech for salami — different goal, identical hardware mindset.
Extracting Beta-Glucans and Erinacines: Tinctures Versus Decoctions
Most medicinal mushroom compounds are not bioavailable from raw or dried fruiting bodies. You need either a hot-water decoction (for water-soluble polysaccharides like beta-glucans) or a double-extraction tincture (water plus alcohol — for both water-soluble polysaccharides and alcohol-soluble triterpenes). I run double-extraction for reishi and chaga, hot-water decoction for turkey tail, and a mixed approach for lion’s mane.
My standard double-extraction is one part dried mushroom by weight to five parts 40% vodka by volume in a sealed amber jar, agitated daily for 14 days. Then I strain, set aside the alcohol extract, and add the spent mushroom to four times its weight of water, simmered (not boiled) at 80-90 C for 2 hours, topped up as it evaporates. Strain again, reduce the water extract by half, cool, and combine with the alcohol extract at a 1:1 ratio. The final liquid is roughly 20% alcohol, which is enough to preserve indefinitely in a cool dark cupboard.
For lion’s mane I prefer a 95% alcohol extract followed by a separate hot-water decoction, kept in two bottles rather than combined. The erinacines and hericenones are alcohol-soluble; the beta-glucans are not. Keeping the extracts separate gives me finer control over which fraction goes into a given batch of tea — this is a description of my own kitchen practice, not a therapeutic protocol, and I’m not going to attach a health outcome to which bottle I reach for on a given day. The research literature on erinacines, hericenones, and beta-glucans is what it is; read the primary studies rather than take my word — or anyone’s blog — for what they do in a human body. Cooking the fresh fruit body — see the lion’s mane cooking guide — is a third option, and heat does change some compounds, but it is a culinary path, not a supplement path.
Starting From a Grow Kit Versus Building From Spawn
Everyone asks whether to start with a ready-made grow kit (a pre-colonised block you just cut open and mist) or build the whole chain yourself from liquid culture or spawn. My honest answer after three years: start with one kit for whichever species interests you most, and build the sterile-work skills in parallel rather than trying to run agar-to-harvest on day one.
A kit teaches you the fruiting side — humidity, fresh air, light, harvest timing — without the sterile-technique failure modes that kill most beginner attempts before they ever reach a fruiting chamber. You will still learn plenty from a kit: what a healthy pin looks like, how fast a stalled block recovers once conditions are right, what your specific room’s humidity does overnight. What a kit does not teach you is the part that actually saves money long term, which is running your own spawn from a liquid culture or agar mother slant.
Once a kit or two has taught you what healthy colonisation and fruiting look like, moving to your own spawn is mostly a confidence step, not a technical leap — the still-air-box work is the same regardless of whether you are inoculating a $10 grain spawn jar or grafting a store-bought kit. I’d rather a beginner ruin a 15-dollar grain jar figuring out sterile technique than get discouraged three species in because they jumped straight to liquid culture and lost every transfer to contamination. The SAB comparison guide and the mycelium visual reference above are the two resources I’d point a total beginner to before they touch a scalpel.
My Home Setup and What It Cost
Total invested in the active cultivation rig: 218 dollars in 2024 prices. That number is honest — I tracked every receipt because I wanted to know whether home cultivation actually beats buying powders. It does, comfortably, within the first three blocks if you grow lion’s mane or turkey tail. Reishi and maitake stretch the breakeven by a couple of blocks because of the longer cycle.
As an Amazon Associate I earn from qualifying purchases.
The breakdown: 1.2 m x 0.5 m x 1.8 m shelving tent (65 dollars), ultrasonic humidifier (32 dollars), humidistat (18 dollars), Govee H5075 sensor (24 dollars), Inkbird ITC-308 (29 dollars), 120 mm fan and speed controller (22 dollars), shelving and wire trays (16 dollars), LED grow strip and timer (12 dollars). I built the still-air box for transfers separately — the SAB vs flow hood comparison walks through whether to bother with a flow hood at home (short answer: no, until you are running ten blocks a month).
For sterile work I use 200-millilitre pressure-cooker grain jars, supplemented sawdust in 1.5-kilogram filter-patch bags, and liquid culture from a single agar mother slant per species. The liquid culture protocol I follow assumes the same lab discipline I use for fermentation — see my fermentation contamination diagnosis notes for the visual ID training that translates directly to mycology.
What Three Years of Blocks Actually Cost Me Per Dried Gram
The 218-dollar rig is a one-time number and it undersells the real question, which is what each dried gram costs once you factor in substrate, spawn, and the blocks that failed along the way. I started tracking this after getting tired of guessing whether home cultivation was actually cheaper or just felt cheaper because the money went out in small pieces instead of one jar purchase.
A supplemented hardwood sawdust block runs me 6 to 9 dollars in sawdust pellets, bran, and gypsum, plus roughly 2 dollars in spawn amortised across a bag that inoculates several blocks. Call it 10 dollars landed cost per block including the electricity for sterilising. A healthy lion’s mane block yields 400 to 700 grams wet, which dries down to somewhere around 40 to 70 grams — mushrooms lose roughly 90 percent of their weight to water on the way to snap-dry. That puts my own lion’s mane in the rough neighbourhood of 15 to 25 cents per dried gram, before counting the blocks that contaminated and produced nothing.
Reishi and maitake cost more per gram in practice, not because the block is pricier but because the failure rate is higher and the cycle is longer — a block that takes 30 to 60 days to pin is a block sitting in your tent not producing anything if it stalls or contaminates, and you don’t find out until you’ve already sunk the weeks in. Cordyceps is the outlier on the other side: the jar-based substrate is cheap, but the per-jar yield is small, so the cost per gram lands closer to the reishi end than the lion’s mane end.
Compared against retail fruiting-body powder, which commonly runs somewhere in the 1-to-3-dollar-per-gram range depending on species and brand, home cultivation is cheaper once you’re past the first few blocks — but the breakeven point is real, it isn’t instant, and it assumes your time has no cost, which for a hobby it doesn’t, but for a business it would. I grow because I like the process and I trust my own substrate, not because I ran the spreadsheet and it screamed “quit your job.”
The Failures That Taught Me the Most
I have killed more blocks than I have fruited. Every failure was either contamination caught too late, an environmental setpoint that drifted out of range while I wasn’t watching, or impatience at the colonisation stage. Four failures stand out and are worth describing in detail because they map onto the most common questions I get.
First, a green wave on a reishi block that I attributed to “spore from the air” — actually it was trichoderma riding in on under-pasteurised bran. Now I pressure-cook all bran additions for 90 minutes at 15 PSI before mixing into substrate. The full ID and remediation walk-through is in the dedicated green mold trichoderma guide. Second, cobwebbing on a lion’s mane block — soft, fast, web-like growth I initially mistook for healthy mycelium. The differences are visual and behavioural; see cobweb mold vs mycelium for the photo ID set. Third, a maitake block that pinned and then aborted because I let humidity drop to 75 percent overnight when the humidifier ran dry — a 10-dollar float switch on the reservoir would have prevented an 80-dollar block loss.
A fourth one, smaller but instructive: I ran two species in the same tent for a season because I didn’t want to build a second shelving unit, and the reishi’s higher CO2 tolerance meant I was under-venting the turkey tail block sharing the space with it. Turkey tail pinned thin and pale instead of forming proper shelf-like brackets. Nothing was contaminated, nothing was sick — I just had two species with different fresh-air needs sharing one fan schedule, and the more CO2-tolerant species was quietly setting the rules for both. Now anything that wants aggressive fresh-air exchange gets its own tent, even if that means running two humidifiers instead of one.
Two patterns hold across all four failures: I diagnosed too late, and I fixed the symptom instead of the upstream cause. The general training resource for spotting these earlier is what does mycelium look like, which is mostly a visual reference for “healthy versus not healthy” at every stage. Pair it with the seasonal-timing primer in when to inoculate mushroom logs if you plan to take any of this outdoors, and with the medicinal mushrooms and sauna recovery protocol if you want the consumption side written up in detail.
Frequently Asked Questions
Are home-grown medicinal mushrooms as potent as commercial extracts?
Often, yes, but the honest answer is ‘it depends which commercial product.’ A lot of cheap powders are mycelium-on-grain, where the fruiting body never forms and the bulk of the material is leftover grain starch. A peer-reviewed glucan-content comparison in shiitake (Lentinula edodes) found fruiting bodies substantially higher in beta-glucan than mycelium grown on grain — see the study in PMC. Home-grown fruiting bodies, harvested at the right stage and dried under 50 C, sidestep that dilution problem. I don’t have lab equipment to test my own dried slices against a specific commercial jar, so I can’t give you a personal-batch number, just the research direction.
How long until a beginner can harvest their first medicinal mushroom?
Lion’s mane and turkey tail are the fastest, with first harvests 35 to 50 days from inoculation. Reishi and cordyceps take 60 to 90 days. Maitake takes 70 to 120 days. The single biggest accelerator is patience at the colonisation stage — do not introduce fruiting conditions until the substrate is fully white.
Do I need a flow hood to grow medicinal mushrooms at home?
No. A still-air box made from a clear tote and two arm holes is sufficient for liquid-culture work, agar transfers, and inoculating bulk substrate. A flow hood only becomes worthwhile when you run more than 10 sterile transfers per month. Most home growers never need one.
What is the difference between mushroom mycelium powder and fruiting body powder?
Mycelium powder is dried, ground mycelium grown on grain (often white rice or oats) and is mostly substrate carbohydrates with a small mycelium fraction. Fruiting body powder is dried, ground actual mushroom — the cap, stem, or conk you would recognise visually. A peer-reviewed shiitake glucan-content study found fruiting bodies substantially higher in beta-glucan than grain-grown mycelium; the exact multiple varies by species and which compound you’re measuring, so I won’t invent a single fleet-wide number.
Can I grow chaga indoors at home?
No. Chaga (Inonotus obliquus) is a slow parasitic conk on living birch trees that takes 5 to 15 years to reach harvestable size in the wild. It cannot be cultivated indoors in any practical way. Buy ethically wild-harvested chaga, or harvest it yourself from birch above 50 degrees north latitude, taking less than 30 percent of any given conk.
How do I store dried medicinal mushrooms for maximum shelf life?
Snap-dry to under 8 percent moisture in a dehydrator at 45 to 50 C, then store in lidded mason jars with a 100 cc oxygen absorber inside, kept in a dark cupboard between 15 and 22 C. In jars I’ve kept over multiple winters, whole slices are still good well past the two-year mark; that’s my own kitchen shelf, not a lab shelf-life test. Surface area accelerates oxidation, so I treat pre-ground powder as a use-it-within-six-months product rather than a long-term store.
Related Guides on MycoMansion
- Lion’s Mane Growing Parameters: Substrate, Temperature, Humidity
- Lion’s Mane Mushroom Growing Guide: Substrate, Conditions, Daily Care
- How to Dry and Store Medicinal Mushrooms for Maximum Potency
- Medicinal Mushrooms and Sauna Recovery: Lion’s Mane, Reishi, Cordyceps Protocols
- CVG Substrate Recipe: Coco Coir, Vermiculite, and Gypsum for Monotubs