
I need to correct something up front that a version of this page got wrong: you don’t print an entire replacement monotub lid on a standard hobby printer. A 32-quart or 66-quart sterilite lid is well over 500 mm on its long side — bigger than any consumer FDM bed I’ve used. What you actually print are small filter-port inserts and panels that install into holes you cut in the tub’s original lid, which replaces the standard “drill 6 holes and tape gas-exchange filters over them” approach with a cleaner, reusable, contamination-resistant version of the same idea. PETG prints, snap-in synthetic filter discs that handle repeated grow cycles without needing to be re-taped each time. Filament cost per part runs well under a dollar to a few dollars in PETG on my printer — I won’t pretend to know exactly what every commercial engineered-filter-cap kit costs across every vendor, but it’s meaningfully more than that.
Custom 3D-printed parts are one of six equipment categories that surprised me; the complete tiered build, with costs, is in my mushroom growing equipment guide.
This guide walks through the four 3D-printed parts every monotub cultivator should print first, the PETG settings that hold up to 6 months in a high-humidity environment, the filter material choice that determines whether your tub stays contamination-free, and the open-source STL files that get you started (then pair your printed hardware with smart sensors for automated climate control) without learning Fusion 360.
Why 3D Print Mushroom Cultivation Gear
Three reasons that justify the investment in a 3D printer over taping standard supplies:
- Filter integration without tape. The standard monotub setup uses synthetic filter patches stuck to the lid with foil tape. Tape adhesive degrades in humidity within 2-4 grow cycles, requiring re-application. 3D-printed filter holders snap in mechanically and last indefinitely.
- Custom-fit inserts for any container. Standard filter patches and pre-made ports are sized for standard sterilite tubs, not the alternative containers (Cambros, food storage tubs, custom enclosures). A printed insert panel can be sized to whatever hole you actually cut, on whatever container you actually have.
- Specialized parts that don’t exist commercially. Self-healing injection ports for liquid culture, modular humidity-control vents, vertical mister mounts — all printable, none widely sold for hobbyist cultivation.
The Four Parts to Print First
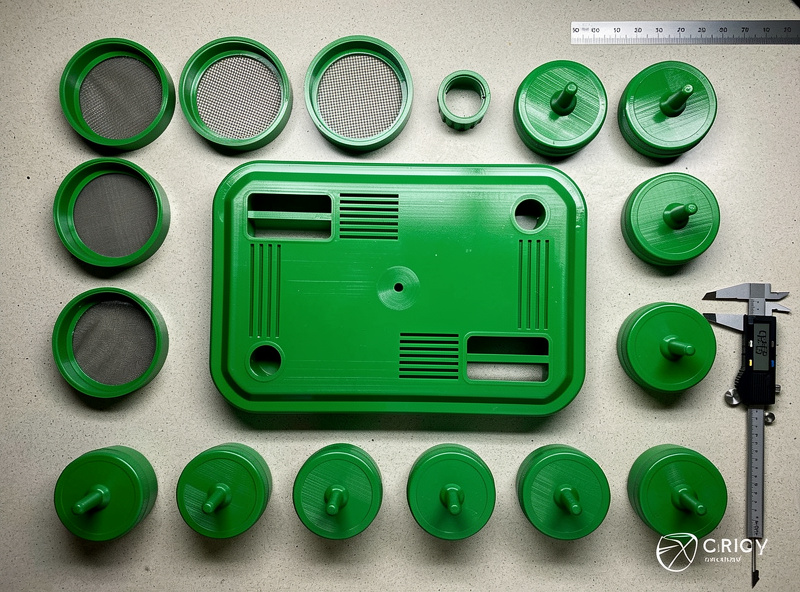
1. Filter-Port Panel Insert
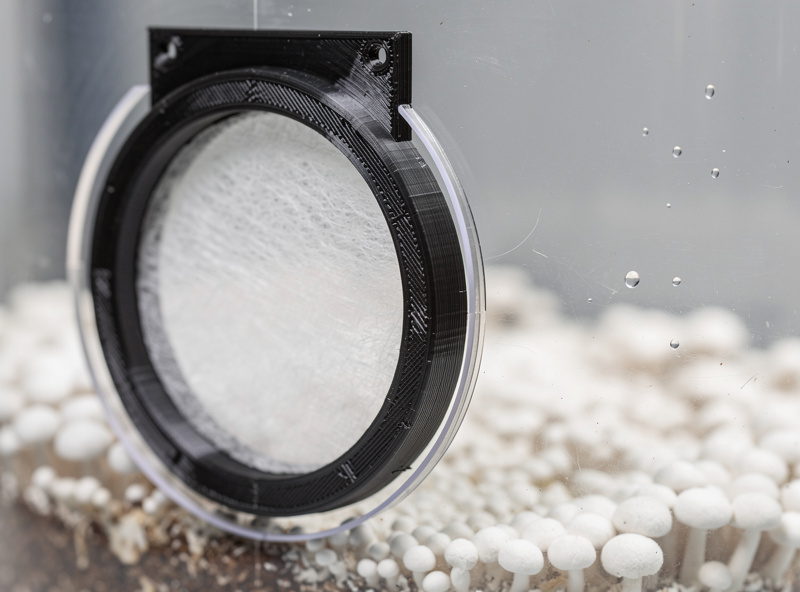
A rectangular PETG panel with six 60 mm circular filter ports built in, sized to drop into a rectangular cutout you make in the center of your existing sterilite lid (I trace and jigsaw the opening, then screw or epoxy the panel in from underneath) rather than replacing the whole lid. This keeps the printed part well within a normal hobby printer’s bed size — you’re printing a panel, not the whole 500 mm+ lid. Print time on my printer runs a few hours depending on panel size. Filament cost: a couple dollars.
2. Snap-In Filter Holders (×6 per lid)
Circular two-piece snap-fit assembly that holds a 60 mm filter disc between them and snaps into the lid port. Print time: 15 minutes each. Filament cost: $0.20 each.
3. Self-Healing Injection Port
Threaded port with a silicone sheet sandwich that allows hypodermic-needle injection of liquid culture without contamination. Critical for liquid-culture inoculation methods. Print time: 30 minutes. Filament cost: $0.40.
4. Jar Lid Adapters with Filter and Injection Port
Two-piece replacement for standard wide-mouth canning jar lids, with built-in filter patch and injection port. Eliminates the drill-and-RTV-silicone process for grain spawn jars. Print time: 25 minutes. Filament cost: $0.30 each.
PETG Settings for High-Humidity Environments
Mushroom cultivation environments are 80-95% RH at 70-75°F sustained for weeks. PLA softens and warps in these conditions; PETG holds up indefinitely. The settings that matter for cultivation parts:
- Material: PETG, food-safe variant if you can source it (Sunlu PETG, Polymaker PolyLite PETG, eSun PETG+). Avoid recycled PETG of unknown source.
- Layer height: 0.2 mm. Finer (0.12-0.15 mm) gives smoother surfaces and easier sanitation, useful for the filter holders specifically.
- Wall thickness: 1.6-2.0 mm (4 perimeters at 0.4 mm nozzle). Below this, parts flex enough to break the snap fits over time.
- Infill: 30-40% gyroid. Lower infill saves time and filament; gyroid pattern resists humidity-driven flex.
- Nozzle temperature: 240°C. PETG specifically benefits from running 5-10°C hotter than the spool recommendation for stronger layer adhesion.
- Bed temperature: 80°C. Use a glue-stick release layer on PEI sheets — PETG sticks too well to bare PEI and damages the build plate when removing parts.
For broader PETG settings and material selection guidance, our partner site has the 3D printing materials guide covering PLA vs PETG vs ABS vs ASA tradeoffs in detail. The PETG stringing fix walkthrough covers the most common quality issue beginners face when first running PETG.
Filter Material Selection
The 3D-printed filter holder is only half the system. The synthetic filter disc inside it determines actual contamination resistance:
| Filter material | Pore size | Cost / patch | Best for | Notes |
|---|---|---|---|---|
| Polyfill (synthetic stuffing) | 10-30 microns | $0.05 | Beginner tubs only | Marginal contamination resistance, replace per cycle |
| Polyester batting (quilt batting) | 5-15 microns | $0.10 | Small grow tubs | Better than polyfill but not by much |
| Tyvek (DuPont 1059B) | 2-5 microns | $0.50-1.20 | Standard recommendation | Excellent gas exchange, contamination-resistant |
| 0.2 micron PTFE membrane (lab-grade) | 0.2 microns | $2-4 | Critical sterile work | Best resistance, restricts gas exchange somewhat |
| Synthetic Filter Patch (Cultivator-specific) | 0.5 microns | $0.50-1 | Standard recommendation | Available from Out-Grow and North Spore at hobbyist-friendly pricing |
| HEPA filter material (cut from H13 panel) | 0.3 microns | $1-3 | Critical sterile work | Excellent but slightly slow gas exchange |
Tyvek is the practical default for most home cultivators — excellent contamination resistance, decent gas exchange, hobbyist-friendly cost. The 0.2 micron PTFE membranes are reserved for critical sterile work like agar plate cultivation or liquid culture preparation.
Open-Source STL Files
Three repositories cover most of what’s described above:
- Thingiverse — search “mushroom monotub lid,” “monotub filter,” “myco filter port.” 100+ files, mixed quality.
- Printables.com — Prusa’s design library. Smaller selection but generally higher quality, with pre-tested print profiles.
- Shroomery community downloads — community-shared cultivator-specific STLs with discussion of which work best for which tub sizes.
Read the comments before printing — community-tested files for monotub work specifically benefit from cultivator feedback on which filter sizes seal best, which lid designs warp at humidity, and which injection ports actually self-heal versus leak after the first injection.
The Cultivation Workflow That Justifies the Print Investment
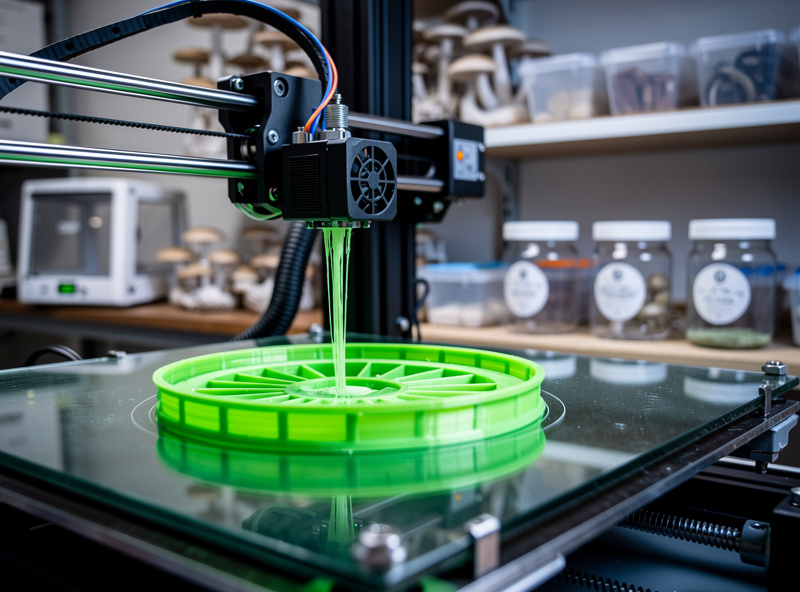
I don’t have a clean, verified apples-to-apples number for exactly where the print investment beats buying — commercial kit pricing varies too much by vendor and what’s actually included to responsibly reduce it to one crossover point. What I can tell you directly: a single spool of PETG (roughly $20-25) prints far more filter holders, jar lid adapters, and injection ports than any one grower running a handful of tubs will use in a season, and once you’ve printed a few STLs the marginal cost of another part is close to nothing but the plastic and print time. If you’re only ever going to run one tub, the printer itself isn’t worth buying just for this — the math only starts to make sense once you’re already justifying the printer for other projects, or running enough tubs that reprinting beats reordering.
The parts themselves are reusable across many grow cycles rather than single-use, which is the real saving over tape-and-replace filter patches — you accumulate spare parts for future expansion at near-zero marginal cost once the first print run is done.
Build Sequence for Your First Print Run
- Day 1: Order 1 kg of PETG ($25) and a bag of synthetic filter patches ($10-15). Set up your printer and verify it handles PETG correctly with a small test print (a Benchy or calibration cube).
- Day 2: Download or design a filter-port panel insert sized for the cutout you plan to make in your tub lid. Slice with the settings above. Run the print (a few hours, well within a normal print bed).
- Day 3: Print 6 filter holders (90 minutes total) and 2-3 jar lid adapters (1-1.5 hours). Print 2 injection ports (1 hour).
- Day 4: Sanitize all printed parts with 70% isopropyl alcohol. Snap filter patches into holders. Cut the panel opening in your tub lid and install the insert.
- Day 5+: Use in normal cultivation workflow. The CVG substrate and oyster mushroom workflow both work without modification with these printed parts in place.
For the broader cultivation context that pairs with this hardware, see our CVG substrate recipe, the oyster mushrooms on garden waste, and the best hygrometer for mushroom growing. The green mold contamination guide covers what these printed parts protect against and what to do when contamination happens anyway. Getting the lid and filter dialled in also pays off most when the spawn-to-bulk ratio is correct — good gas exchange only helps a tub that was built right from the start.
For deeper background on home cultivation safety and food-safe materials, the FDA’s Packaging & Food Contact Substances page covers the regulatory side of food-contact materials. The Shroomery cultivation forum is the deepest free community resource for hobbyist-tested cultivation hardware and contamination identification.
Frequently Asked Questions
Can I really print mushroom monotub lids with a hobby 3D printer?
Yes — any modern FDM printer prints filter-port panels, filter holders, and jar lid adapters cleanly in PETG, and none of these parts need a huge bed. What you can’t print on a standard hobby printer is an entire replacement lid — a 32-quart sterilite lid is well over 500 mm on its long side, bigger than any consumer FDM bed. That’s why the panel-insert approach (cut a section out of your existing lid, print a panel to fill it) is the practical method rather than printing a full lid from scratch.
Why PETG instead of PLA?
PLA softens at 60-65°C and warps in sustained high-humidity environments. PETG handles 75-85°C and stays dimensionally stable in 80-95 percent RH for years. The cost difference between PLA and PETG is roughly $4 per kilogram; the durability difference is dramatic. Use PETG exclusively for cultivation parts.
What filter material should I use in the printed holders?
Tyvek 1059B is the practical default — excellent contamination resistance at 2-5 micron pore size, good gas exchange for fruiting, and roughly $0.50-1.20 per patch. For critical sterile work like agar or liquid culture preparation, upgrade to 0.2 micron PTFE membrane filters at $2-4 per patch. Synthetic filter patches sold by Out-Grow and North Spore are also good for general grow tubs.
Are 3D-printed parts safe for food-grade cultivation?
PETG is food-safe in its base material form, but printed parts have layer lines that can harbor bacteria. Sanitize all printed parts with 70 percent isopropyl alcohol before each grow cycle. For applications with direct food contact (the actual mushrooms touching the part), use food-safe-rated PETG and avoid recycled filaments of unknown origin.
How long do printed monotub parts last?
In my own use, PETG filter-port panels and holders hold up well past the point where a taped-on filter patch would have failed and needed replacing — the snap-fit interfaces are the first thing to eventually wear. Filter holders last similarly. Replacement is cheap (re-print individual parts) and the master STL file is reusable indefinitely, which is the real advantage over disposable tape-and-patch setups.
Where do I download the STL files?
Thingiverse and Printables.com both have 50+ free monotub-related STLs from the cultivation community. Search ‘mushroom monotub lid,’ ‘monotub filter,’ or ‘myco filter port.’ Read the comments before printing to confirm community-tested fit for your specific tub size.
Do I need a self-healing injection port?
Only if you use liquid-culture inoculation methods. Self-healing ports allow hypodermic injection through a silicone sheet without breaking the sterile barrier of the tub or jar. For grain-spawn-only workflows, they are not required. For LC inoculation of grain jars and grow tubs, they prevent the most common contamination vector at the inoculation point.