
Mushroom grow bags are autoclavable polypropylene sacks with a built-in filter patch that let you sterilize, inoculate, colonize, and often fruit a substrate block inside one sealed vessel. A single 0.2-micron filter-patch bag holds around 3 to 5 pounds of hydrated sawdust and colonizes with no jar-to-jar transfers — which is exactly why they have quietly replaced half the glassware on my bench.
I still run jars for grain and I still run monotubs for bulk oyster, but the filter-patch bag is the vessel I reach for when I want a supplemented-hardwood fruiting block with the fewest possible contamination openings. This guide walks the whole chain the way I actually run it: what the bag is made of, how the filter patch works, how to size and fill and seal it, how to colonize it, and the decision that trips up most home growers — whether to fruit inside the bag or open it into a chamber. Each section links out to a deeper spoke so you can go as far down any rabbit hole as you need.
What a Mushroom Grow Bag Actually Is
A proper grow bag is made of polypropylene (PP), not the polyethylene of a sandwich bag. That distinction is the whole point: PP survives a pressure canner at 15 PSI and roughly 250°F without melting, slumping, or leaching, while PE deforms and fails. Every autoclavable bag worth buying is PP, and if a listing does not say polypropylene or “autoclavable,” I assume it is not and I do not put it in the canner.
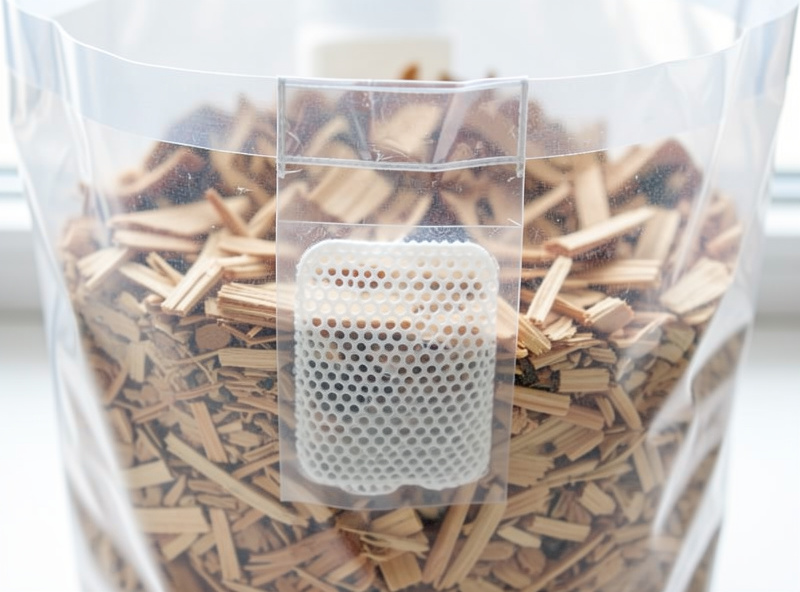
The defining feature is the filter patch — a small rectangle of hydrophobic microporous membrane heat-welded to one face of the bag. It lets the colonizing mycelium breathe out CO2 and pull in oxygen while blocking mold spores and bacteria from getting in. That patch is what turns a plastic sack into a self-contained micro-lab: sealed, gas-permeable, and sterile on the inside. Most bags are gusseted (side folds that let a flat sack expand into a brick shape) so a filled block stands up on its own.
The sizing on these — the “3T,” “4T,” “0.2 micron” codes you see on listings — is genuinely confusing the first time. I break the two variables apart in the dedicated unicorn bag filter micron guide and the grow bag size guide for spawn vs fruiting, because picking the wrong micron rating or the wrong volume is the single most common ordering mistake I see.
The Filter Patch and Micron Ratings
The micron number is the pore size of the filter membrane, and it sets the trade-off between gas exchange and contamination protection. The three ratings you will see are 0.2, 0.5, and 5 micron. A 0.2-micron patch blocks essentially everything, including bacteria, and is what I default to for grain and for any bag I want to fruit through. A 5-micron patch breathes much faster — great for a species that is a heavy CO2 producer or a block you plan to open anyway — but it lets finer contaminants through, so it is not what I trust for grain.
The reason this matters is that gas exchange and contamination protection pull in opposite directions. Tighter pores mean cleaner air but slower breathing and slightly slower colonization; looser pores mean fast breathing but more exposure. For a beginner running supplemented sawdust, 0.2 micron is the safe, forgiving default. I go deep on the 0.2 vs 0.5 vs 5 decision, and which species and stages actually benefit from the faster patches, in the filter micron breakdown. If you would rather print your own patched lids for tubs, my notes on 3D-printed filter-patch lids cover the same membrane logic in a different vessel.
Sizing and Filling the Bag
Bag capacity is quoted by the volume of dry-then-hydrated substrate it comfortably holds, and the two sizes that cover most home grows are a roughly 5-pound bag for a full fruiting block and a smaller bag for spawn or small-batch work. I fill a fruiting bag with about 3 to 5 pounds of substrate at field capacity — the “squeeze test” moisture level where a hard squeeze yields a few drops and no more. My go-to fill is Masters Mix (50/50 hardwood sawdust and soy hull) for lion’s mane and king oyster, or supplemented sawdust for shiitake and other wood-lovers.
Getting the moisture right before it goes in the canner is non-negotiable, because you cannot fix a too-wet or too-dry block after sterilization without opening it. I check every batch against the field-capacity test. Overfill and the block colonizes slowly and unevenly through its dense core; underfill and you waste canner space and get a floppy block that will not hold pins. Matching the fill volume to the bag and the species is exactly the spawn-vs-fruiting size decision most people get wrong on their first order.
Sterilizing the Filled Bag
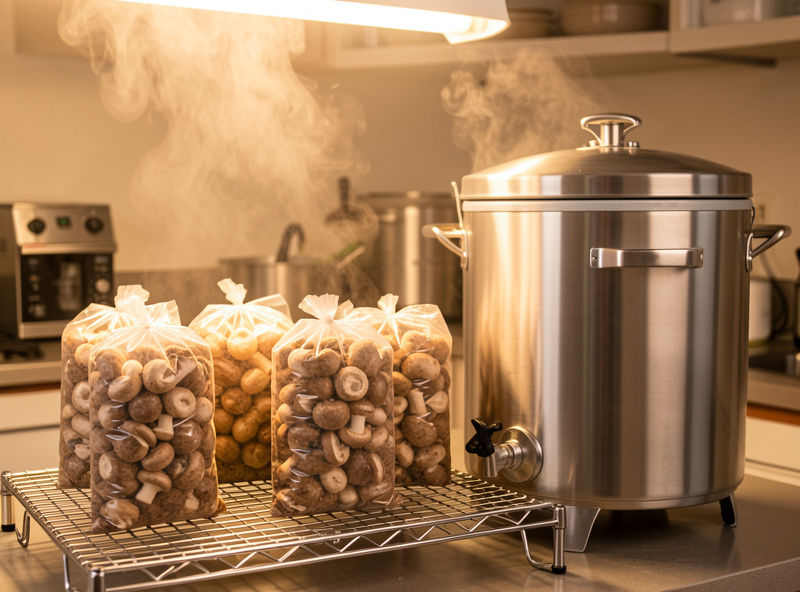
Once filled and loosely folded, the bag goes into the pressure canner. Supplemented sawdust and Masters Mix are nutritious enough that pasteurization is not sufficient — they must be fully sterilized. I run filled fruiting bags at 15 PSI for 2.5 hours; a denser or larger block gets the longer end of that. The filter patch survives the canner fine as long as the bag is not crammed against the canner wall or another bag’s patch, which can wet it out or scorch it. My full time-and-PSI logic lives in the pressure cooker sterilization guide and, for grain specifically, the grain sterilization guide.
Let the bag cool completely to room temperature before you open it — a warm bag pulls air in as it cools, and if that air is unfiltered, you have just inoculated your sterile block with whatever was floating in the room. I cool overnight inside the still-air box or beside the flow hood, patch-side up, so the only air it draws comes through the filter.
Inoculating and Sealing
Inoculation is where the batch is usually won or lost. I inoculate a cooled sawdust bag with colonized grain spawn — roughly a pint of spawn per 5-pound block — either under the laminar flow hood or, for a quick single bag, in the still-air box. Whether you need the hood at all comes down to how many bags you open at once, which I break down in still air box vs flow hood. Open the bag, pour in the spawn, and you now have to close it back up cleanly.
Sealing is its own skill. The three methods are an impulse heat-sealer (a clean permanent weld, my default for fruiting blocks I will not reopen), a tight fold clipped shut (fast, reusable, slightly less secure), and a self-healing injection port heat-welded into the bag for liquid-culture or spore work with no reopening at all. Which one fits depends on the grow — I compare all three, with the impulse-sealer settings I actually use, in sealing grow bags. If you would rather skip the separate-spawn step entirely, the pre-filled convenience option has real trade-offs I lay out honestly in the all-in-one grow bag breakdown.
Colonization
After inoculation the bag goes to the colonization shelf — dark, clean, and held around 70 to 75°F for most gourmet species. I break up the spawn by massaging the bag once the mycelium has taken hold (usually a few days in) to distribute it through the block and speed things up. A 5-pound supplemented block typically takes 2 to 4 weeks to fully colonize, and shiitake wants weeks more to brown and firm before it will fruit, which I cover in the shiitake block guide.
The filter patch means you never have to open the bag during colonization, which is the entire contamination advantage over a jar. Watch for trouble through the plastic: fluffy blue-green is Trichoderma, a wispy grey overgrowth racing across the surface is cobweb mold, and a sour smell with a slimy zone is bacterial. Healthy mycelium is bright white and rhizomorphic. If you are still learning the difference, the healthy vs contaminated photo guide is worth a slow read before you toss a bag you could have saved.
Fruiting In the Bag vs Opening to a Chamber
Here is the decision that defines your yield. You can fruit a fully colonized block right through the bag — cut an X or a few slits in the plastic, and pins form at the cuts where they get fresh-air exchange. Or you can cut the whole top off, or remove the block entirely into a Martha-style fruiting chamber, exposing far more surface area to the air.
Fruiting in-bag is clean, tidy, and gives directed pinning at the slits, but it limits the fruiting surface and can trap CO2, which stalls pins or throws leggy, long-stemmed fruit. Opening to a chamber gives maximum surface and better FAE and usually a bigger, better-formed flush — at the cost of a more exposed, contamination-prone surface that needs a humid, well-managed chamber. Which wins depends on species and setup, and I run the full yield-and-FAE comparison in fruiting in bag vs open chamber.
Bags vs Jars, and Reuse
People ask whether the bag replaces the jar. For a fruiting block of supplemented sawdust, the bag wins on labor and contamination openings. For grain spawn the answer is more nuanced — jars are reusable and easy to shake, bags colonize faster and pour cleaner — and I settle it with real numbers in grow bag vs jar for grain spawn.
And because these bags are not free, the reuse question is real: a spent block bag can sometimes be salvaged, but a fruited-through filter patch generally cannot be re-sterilized reliably. What is safe to reuse and what belongs in the spent-substrate pile is covered in can you reuse mushroom grow bags. For the wider vessel context — jars, tubs, blocks, and where bags fit — start from the equipment hub, and for the grain side of the chain the grain spawn and culture guide.
Which Species Suit Bag Culture
Wood-loving gourmet species are the natural fit for bag culture because they want a sterilized, nutritious sawdust block. Lion’s mane and king oyster on Masters Mix, and shiitake on supplemented sawdust, are my three staple bag crops. Oyster is forgiving enough to run on pasteurized straw in a column, so I do not usually bag it, but a supplemented oyster block in a bag works fine. Reishi and pioppino also take well to block-in-bag culture.
A Realistic Bag-Culture Timeline
From sealed bag to first harvest, a supplemented-sawdust block runs about five to seven weeks for a fast species and longer for shiitake. Knowing the timeline stops you from panicking on day 10 or opening a bag early — the most common reason a clean block gets contaminated is impatience.
Day 0 is fill, seal loosely, and sterilize at 15 PSI, then cool overnight. Day 1 is inoculation with grain spawn under the flow hood or in the still-air box, then straight to the dark colonization shelf at 70 to 75°F. By day 3 to 5 the spawn has “taken” and I massage the bag to break it up and distribute the spawn. Full white colonization of a 5-pound block lands around week 2 to 4; I wait for the block to fully myceliate corner to corner, plus a consolidation period, before doing anything. Only then do I introduce a fruiting trigger — cutting the bag or moving the block to the chamber — and pins usually appear within a week of that, with harvest a few days after pinning. Shiitake breaks that pattern: it wants weeks of extra browning on the block surface before it will fruit, which is why I keep it on a separate mental clock from lion’s mane and oyster.
The point of the timeline is patience. The filter patch means the bag is doing its job untouched — every time you open it “just to check,” you trade a little sterility for information you could have read through the plastic instead.
Mistakes I See Most With Bags
Nearly every failed bag I have autopsied traces back to one of four errors, and none of them are exotic. Fixing these takes any grower from a coin-flip success rate to consistently clean blocks.
First, opening a warm bag. A bag still cooling from the canner pulls unfiltered air in through any gap — always cool to full room temperature before inoculating. Second, wetting the filter patch. If condensation or canner water saturates the patch, it stops breathing and can wick contamination straight through; keep the patch dry and upright, and never stack a wet bag on another bag’s patch. Third, over-sterilizing thin or under-sterilizing dense blocks — a giant 5-pound brick needs the full 2.5 hours because heat penetrates a dense core slowly, and a thin bag does not need marathon times that just cook the substrate. Fourth, cutting the fruiting slits too early: pins form at cuts, so if you slit a half-colonized bag you invite side pins and contamination at an exposed, uncolonized edge. Wait for full colonization, then cut.
The fifth, quieter mistake is reusing a bag you should not. I cover exactly which bags are safe to re-run in can you reuse mushroom grow bags, but the short version is: a fruited-through, welded bag is a compost input, not a vessel.
Grow Bag Specs at a Glance
| Spec | Spawn / small bag | Fruiting block bag | What it drives |
|---|---|---|---|
| Typical fill | 1–2 lb | 3–5 lb | Colonization speed, yield |
| Filter micron | 0.2 micron | 0.2–0.5 micron | Contamination vs breathing |
| Material | Polypropylene (autoclavable) | Polypropylene (autoclavable) | Survives 15 PSI canner |
| Sterilize | 90 min at 15 PSI (grain) | 2.5 hr at 15 PSI (block) | Full sterilization, not pasteurization |
| Seal method | Fold or injection port | Impulse-sealer weld | Reopen vs permanent |
| Fruit through it? | Rarely | Yes — slit or open to chamber | Surface area, FAE, yield |
For sourcing, I buy plain autoclavable 0.2-micron filter-patch grow bags in bulk and a basic impulse heat sealer for permanent welds. As an Amazon Associate I earn from qualifying purchases.
Frequently Asked Questions
Can I reuse a mushroom grow bag after it fruits?
A spent fruiting bag is generally not reliably re-sterilizable, because the filter patch wets out and the plastic is often cut. Fold-sealed bags that never fruited can sometimes be re-canned once, but a welded, fruited-through bag should be composted, not reused.
What micron filter should a mushroom grow bag have?
Use a 0.2-micron filter patch as your default. It blocks bacteria and mold spores while still breathing, which makes it the safe choice for grain and for blocks you plan to fruit through. Faster 5-micron patches only suit heavy CO2 producers you will open anyway.
Do I sterilize or pasteurize a filled grow bag?
Fully sterilize it. Supplemented sawdust and Masters Mix are nutritious enough that pasteurization leaves survivors. Run a filled fruiting block at 15 PSI for about 2.5 hours in a pressure canner, then cool completely before opening.
How much substrate fits in a mushroom grow bag?
A standard fruiting block bag holds about 3 to 5 pounds of hydrated substrate, while smaller spawn bags take 1 to 2 pounds. Fill to field capacity moisture and leave headroom to fold and seal the top cleanly.
Can I fruit mushrooms inside the bag?
Yes. Once the block is fully colonized, cut an X or slits in the plastic and pins form at the cuts. It is tidy but limits fruiting surface and can trap CO2. Opening the block to a humid chamber usually yields more and better-formed fruit.
Are grow bags better than jars for grain spawn?
They are faster to colonize and pour more cleanly, but jars are reusable and easier to shake. For a large spawn run bags win on labor; for repeated small batches jars are more economical. It depends on your scale and how often you run spawn.
Related Guides
- Unicorn Bag Filter Types Explained: 0.2, 0.5, and 5 Micron
- Grow Bag Sizes: Spawn vs Fruiting Blocks
- Sealing Grow Bags: Impulse Sealer, Folds, and Injection Ports
- All-in-One Grow Bags: The Convenience Tradeoff
- Grow Bags vs Jars for Grain Spawn
- Can You Reuse Mushroom Grow Bags?
- Fruiting Inside the Bag vs Opening to a Chamber