
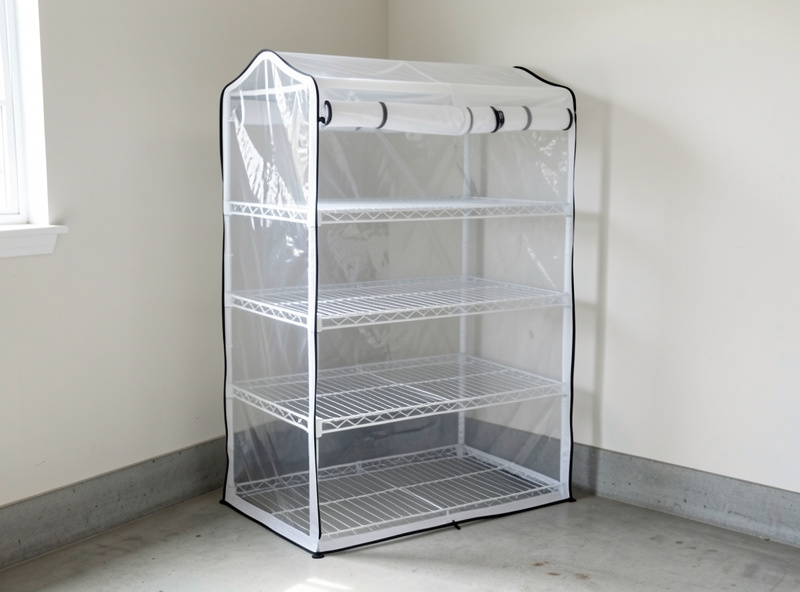
A $40 plastic-zip mini greenhouse is the cheapest way to build a room-scale mushroom fruiting space. The four- and five-shelf seedling greenhouses sold at every garden center are already enclosed, shelved, and wrapped in a wipeable plastic skin that holds humidity — drop in a humidifier and a fan and you have a fruiting room for a fraction of what a commercial chamber costs. It is the build I reach for when a tent is no longer enough.
When you outgrow a Martha tent, the next step up is volume, and a mini greenhouse gives you that without a construction project. The conversion is mostly about managing humidity and airflow across a bigger space than a tent, plus keeping the whole thing clean enough to run grow after grow. Here is how I turn one into a working fruiting room.
Why a Mini Greenhouse Works So Well
A mini greenhouse is already 90% of a fruiting room: an enclosed plastic volume with wire shelves and a zip door, which is almost exactly what mushrooms want. The clear cover traps humidity and lets in the low light fruiting bodies need, the wire shelves drain condensation and let mist circulate, and the zip door gives you access without unsealing the whole structure. All the conversion adds is active humidity and managed fresh air.
It sits at the top of the DIY lab build sequence — the room-scale step after the tent. Where a tent fruits a dozen blocks, a greenhouse room fruits a rolling rotation across more shelf space, which is what you want once you are running multiple species continuously. For four-season and outdoor versions of the same idea, see the broader greenhouse mushroom growing guide.
Choosing the Greenhouse
Pick a four- or five-tier greenhouse with a sturdy frame and a cover that fully zips closed, ideally with a roll-up door panel rather than a flimsy flap. The frame holds your blocks, so a wobbly tube frame that bows under a few heavy fruiting blocks is a false economy — look for steel tube over the thinnest plastic-clip frames. The cover should seal all the way around; gaps at the bottom bleed humidity and let in contamination.
Size it to your space and your output. A compact four-shelf unit fits a garage corner or a spare-room nook and fruits plenty for a household; a taller five-shelf unit gives more capacity if you have the floor space and the grows to fill it. Do not go bigger than you can keep humid — a half-empty oversized greenhouse is harder to hold at humidity than a full smaller one, because there is more air to fog. If space is tight, the apartment setup guide covers fitting a fruiting space into a closet.
Sealing and Setting It Up
Set the greenhouse on a wipeable floor or a tray, level it so shelves do not lean, and check that the cover seals to the floor all the way around — a towel or foam strip along the bottom edge closes the gap that most units leave. That bottom seal is where humidity escapes and where crawling contamination gets in, so it is worth the five minutes. Position the unit away from direct sun, which can cook a sealed plastic box, and away from heating vents that dry it out.
Keep the sterile side of your lab — the still air box and any agar work — well away from the greenhouse, because a fruiting room throws clouds of spores every time you open it. I keep my fruiting space and my transfer bench on opposite sides for exactly that reason. The greenhouse is the dirtiest-by-design station in the lab; site it accordingly.
Humidity at Room Scale
The bigger the volume, the bigger the humidifier you need — a small desktop unit that holds a tent will cycle dry in a greenhouse and never reach 90%. Use a continuous-output ultrasonic humidifier with a large tank, sized up from what a tent needs, and run it on a humidistat so it holds the band automatically instead of fogging blindly. Place it on the bottom shelf or floor with the fog directed up into the open center so it fills the whole volume rather than soaking the nearest block.
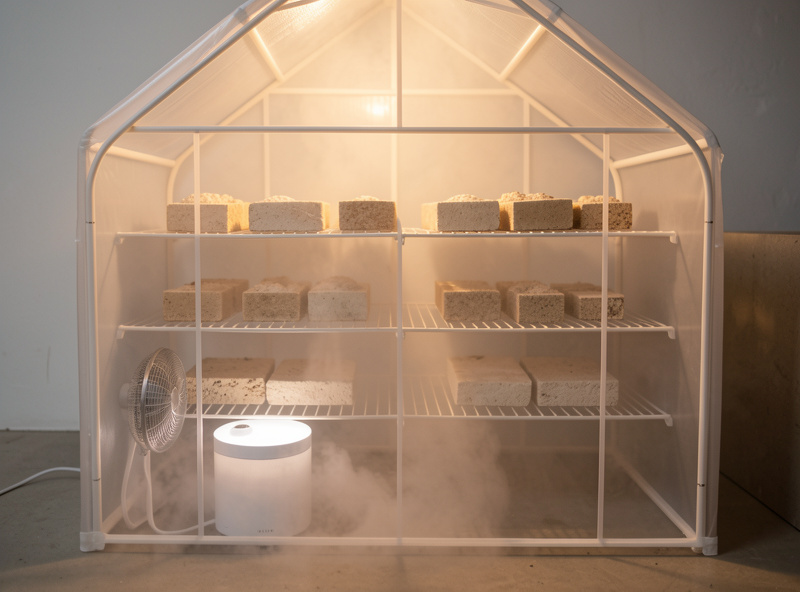
This is where the controller build pays off. Wiring the humidifier to a humidistat and a fan to a cycle timer — the same humidity and FAE controller you would build for a tent — turns the greenhouse into a hands-off room that holds 85–95% on its own. Without that automation, a space this size is genuinely hard to hand-mist, because the surface area to humidify is several times a tent’s. Build the controller first; it is what makes room scale practical.
Airflow Without Dead Corners
A bigger box has a bigger problem with stagnant air, so fresh-air exchange and gentle circulation matter more in a greenhouse than in a tent. CO2 pools in the still bottom corners of a sealed plastic room, and that is exactly where you get leggy, aborted fruit. A small fan on a cycle timer flushes stale air, and a second tiny circulation fan kept on low keeps the air inside moving so no corner goes dead — the FAE and CO2 balance scaled up to room size.
The trick is gentle, even movement, not a gale. Too much airflow dries the whole room and fights the humidifier; too little lets CO2 settle. I run a short FAE pulse every hour or two and a barely-moving circulation fan continuously, then watch where condensation forms — even fogging on all the walls means the air is mixing, while a dry patch flags a dead spot to aim a fan at. A hygrometer placed mid-room, and ideally a second down low, tells you whether the whole volume is holding.
Shelving, Light, and Loading It
Load the shelves so air and mist reach every block, leaving gaps rather than packing them wall to wall — crowded blocks shade each other, trap stale air, and grow misshapen fruit. Space your fruiting blocks with room to flush outward, and stagger them on the wire shelves so mist from below rises through the whole stack. Leave the bottom shelf for the humidifier and a catch tray, and keep the heaviest blocks low so the frame stays stable.
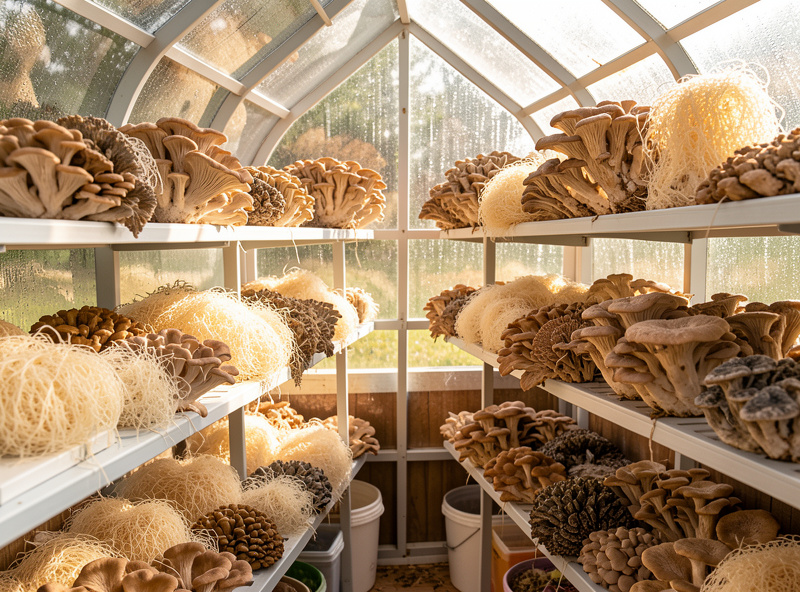
The clear cover already passes enough daylight for most species to fruit, but a low-wattage grow light on a timer gives consistent results if the greenhouse sits somewhere dim. Mushrooms need only modest light to trigger and orient fruiting — a few hours a day is plenty — so do not overthink it. With even light, even humidity, and managed air, a greenhouse runs a rolling rotation of lion’s mane, oyster, and other gourmet blocks coming off the shelves continuously.
What It Costs and What to Expect
The greenhouse itself runs $40–80, and the conversion parts — a large-tank humidifier, a humidistat, a couple of small fans, and a hygrometer — add roughly $80–120, so a complete fruiting room lands around $120–200. That is a fraction of a commercial fruiting chamber, and most of the cost is the controller gear you would buy for a tent anyway. If you already built a Martha tent, you can often move the same humidifier and controller straight into the bigger greenhouse.
Set realistic expectations on capacity: a four- or five-shelf greenhouse comfortably holds eight to fifteen fruiting blocks depending on species and how aggressively they flush outward, and the limit is usually humidity coverage, not shelf space. Do not chase the maximum block count on day one — load it two-thirds full while you learn how your unit holds humidity, then fill it once the climate is dialed. A greenhouse running a staggered rotation, with new blocks going in as spent ones come out, keeps fresh mushrooms coming off the shelves week after week rather than in one big glut.
Cleaning and Running a Fruiting Room
A fruiting room is a humid, spore-heavy space, so it has to be designed and run for cleaning or it turns into a mold farm. The plastic cover wipes down with diluted isopropyl, the wire shelves rinse clean, and a swappable floor tray catches spent water and debris — between grows, strip it, wipe everything, and let it dry out fully before reloading. Bare wire and wipeable plastic mean there is no fabric or wood for contamination to colonize, which is the whole reason this build holds up over time.
That clean-process discipline is the thread running through every station in the lab — the same instinct that protects the substrate protects the curing chamber, the koji tray, and the sourdough starter. A greenhouse fruiting room is the most contamination-exposed build because of its size and the volume of spores it handles, so it rewards the most cleaning attention. Run it clean, keep the humidity and air dialed, and a $40 greenhouse becomes the productive heart of a home cultivation lab — the room where everything you built upstream finally fruits.