
A humidity and FAE controller turns a fruiting chamber you babysit into one that runs itself, and the safe way to build it uses plug-in modules — no mains wiring. A humidistat-switched outlet runs the humidifier; a repeat-cycle timer pulses the fan. Set the humidistat to hold 85–95% and the timer to flush air every couple of hours, and the chamber holds its own climate while you are at work.
This is the build that separates a reliable grow room from a frustrating one. You do not need to splice mains wires or build a relay box — the parts that do this safely are sold as plug-in units, and they handle standard outlet voltage so everything stays behind a sealed plug. Here is how I wire mine, the setpoints I use, and the fail-safes that keep a stuck part from cooking or drowning a grow.
What the Controller Actually Does
A fruiting controller does two jobs on two independent circuits: it holds humidity by switching a humidifier on and off against a setpoint, and it manages fresh air by pulsing a fan on a timed cycle. Mushrooms need both high humidity and regular fresh air, and those two needs fight each other — every air exchange dries the chamber. Automating them means the humidifier tops humidity back up after each fan cycle without you lifting a finger, holding the balance steady around the clock.
It is the same sensor-setpoint-switch logic as the incubation chamber’s thermostat, just pointed at humidity and air instead of temperature. In the full lab build, this is the upgrade that makes a Martha tent or a converted greenhouse genuinely hands-off. Understanding the underlying humidity-versus-FAE trade-off is what lets you set it correctly.
The Safe Way to Wire It: Plug-In Modules
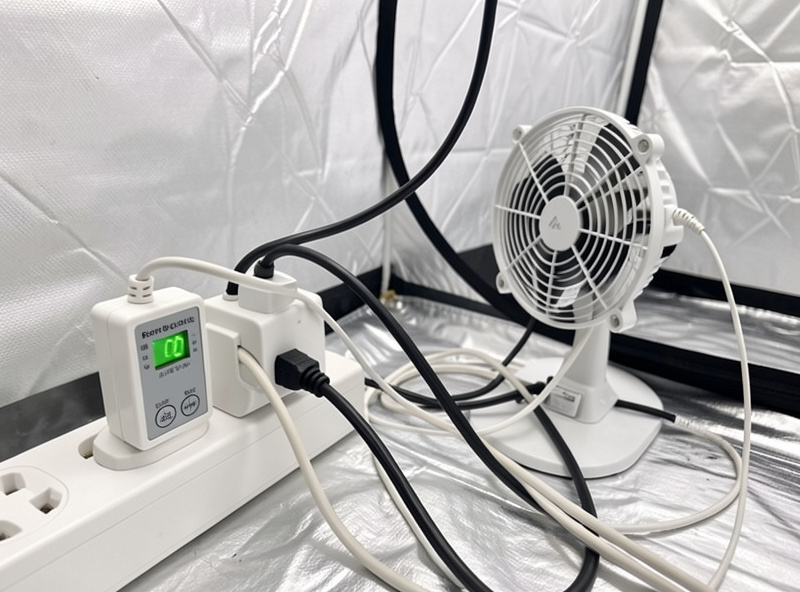
Build the whole controller from plug-in units so you never touch mains wiring — a plug-in humidistat outlet and a plug-in cycle timer do everything a custom relay box does, without the risk. Each module is a sealed unit with a standard plug on one end and a standard socket on the other: the humidifier plugs into the humidistat, the humidistat plugs into the wall, and the controller switches the socket on and off based on its probe. Same for the fan and its timer. No stripped wires, no exposed contacts.
If you do want a single enclosure with multiple switched outlets, buy a pre-built grow controller rather than wiring your own from loose components — unless you are genuinely qualified to work with mains voltage, in which case you already know the local code and grounding rules. For everyone else, the plug-in approach is the right call: it is safer, it is faster, and it is just as effective. The broader options are covered in grow room automation and fail-safes.
The Humidity Circuit: Humidistat and Humidifier
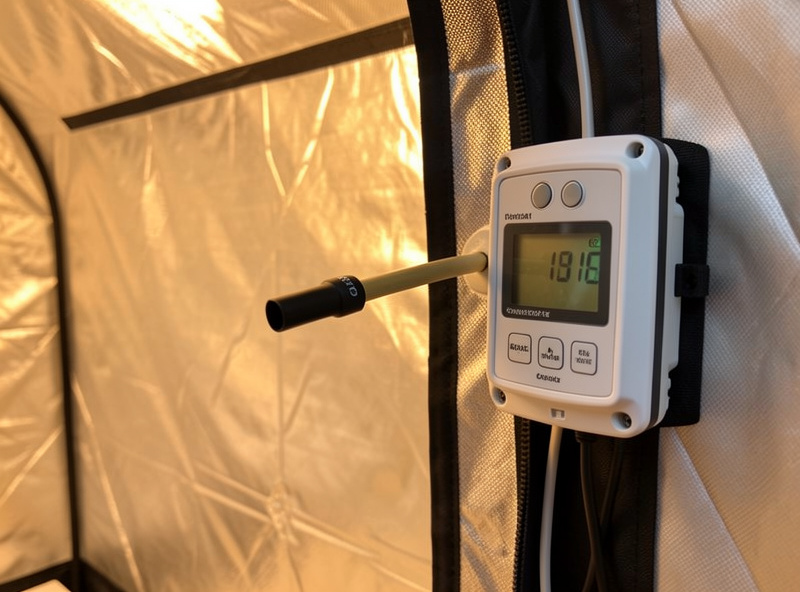
Plug an ultrasonic humidifier into a humidistat controller with its probe inside the chamber, set to switch the humidifier on below your low setpoint and off above your high one. The humidistat reads chamber humidity continuously; when it drops below, say, 88%, it powers the humidifier socket, and when it climbs past 93%, it cuts it. That hysteresis band keeps the humidifier from chattering on and off every few seconds while holding a tight humidity range.
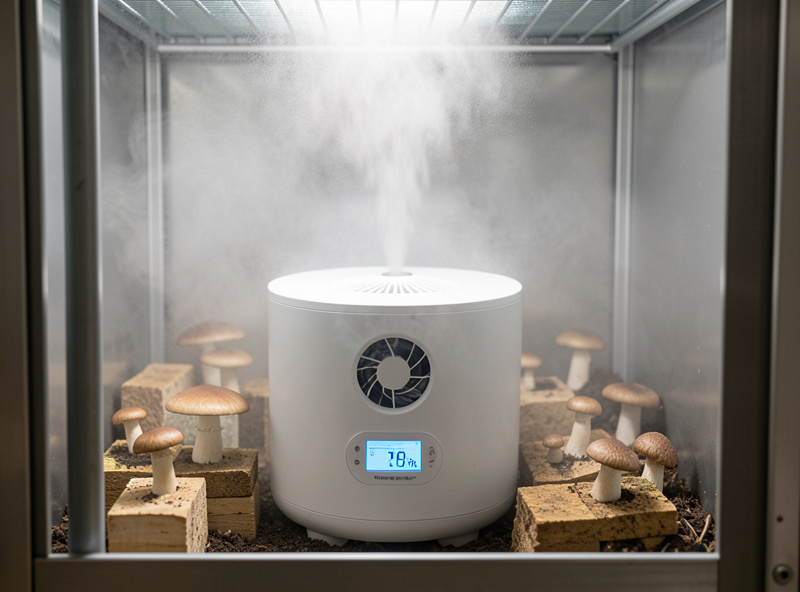
Match the humidifier to the chamber volume — a small unit cannot hold a big tent — and run a continuous-output model so it actually keeps up when the humidistat calls for fog. Direct the mist into open air, not onto the mushrooms, to avoid waterlogging caps. Choosing the right unit is its own decision; I broke it down in picking a fruiting chamber humidifier. The humidistat does the brains; the humidifier just needs to be big enough to answer it.
The FAE Circuit: Timer and Fan
Plug a small fan into a repeat-cycle timer set to run a few minutes on, then off, every one to three hours — that pulse flushes stale CO2-laden air and exchanges it for fresh without bleeding all your humidity at once. A repeat-cycle (interval) timer is the key part: unlike a clock timer with a handful of daily on-times, it cycles indefinitely on a short loop, which is exactly what fresh-air exchange needs. Start at five minutes on per hour and adjust to the species and chamber.
Size the fan small — a computer fan or a little clip fan is plenty — because the goal is gentle air exchange, not a wind tunnel that dries everything out. Position it to draw fresh air through a filtered port and let stale air leave through another, so you get real exchange rather than just stirring the same air. Too little FAE gives leggy, small-capped fruit; too much crashes humidity and dries pins. The timer lets you tune that balance precisely once you read how your chamber behaves.
Parts List and How They Connect
The whole controller is five plug-in parts plus the chamber. Here is what I use and how each piece connects, all through standard outlets.
| Part | Plugs Into | Job |
|---|---|---|
| Humidistat controller | Wall outlet | Reads humidity, switches the humidifier socket |
| Ultrasonic humidifier | Humidistat socket | Adds fog when humidity is called for |
| Repeat-cycle timer | Wall outlet | Pulses the fan on a short loop |
| FAE fan | Timer socket | Exchanges stale air for fresh |
| Digital hygrometer | Battery | Independent check on the controller |
As an Amazon Associate I earn from qualifying purchases. The two modules that do the work are a plug-in humidistat controller and a repeat-cycle interval timer. An independent hygrometer is worth adding so you can confirm the controller’s probe is telling the truth.
Probe Placement and Setpoints
Put the humidistat probe in the open air of the chamber, away from the humidifier’s direct mist and off the wet walls, so it reads the air your mushrooms breathe rather than a local wet spot. A probe sitting in the fog stream reads 99% constantly and never lets the humidifier run; a probe taped to a dripping wall reads high while the chamber air is dry. Mid-chamber, in clear air, is the honest spot — the same principle as placing a thermostat probe in the air, not on the heater.
For setpoints, most fruiting sits at 85–95% humidity with a fresh-air pulse every hour or two, but tune to the species and stage: pinning often wants higher humidity and less FAE, then you back humidity down and raise FAE as fruit develops so caps firm up instead of staying soft. Log it with smart sensors if you want data, but a good hygrometer and your eyes on the pins tell you most of what you need.
Fail-Safes and What Can Go Wrong
The two failure modes to design against are a humidifier that runs dry and a controller that sticks on, so build in a couple of cheap safeguards. A humidifier with a low-water auto-shutoff stops it burning out when the tank empties; checking the tank every couple of days prevents the chamber from silently drying out mid-grow. An independent hygrometer that you read by eye catches a stuck or miscalibrated probe before it ruins a flush — never trust a single sensor with the whole grow.
The other quiet failure is contamination in the plumbing: standing water in a humidifier reservoir grows bacteria that then aerosolize into the chamber, so empty and wipe the reservoir between refills and keep the lines clean. This is the same clean-process discipline that runs through every build I make — the controller is only as clean as the water it fogs. Get the wiring safe, the probe honest, and the reservoir clean, and a fruiting chamber will hold its climate for weeks while you do other things. When even a controlled tent fills up, the next step is converting a mini greenhouse into a room running the same controller logic.
Frequently Asked Questions
Do I need to wire mains voltage to build a humidity controller?
No. The safe way uses plug-in modules: a humidistat-switched outlet for the humidifier and a repeat-cycle timer outlet for the fan. Each is a sealed unit with a standard plug and socket, so you never touch bare wires. Only build a hardwired relay box if you are qualified for mains work.
What humidity should a fruiting chamber controller hold?
Most fruiting sits at 85 to 95% relative humidity with a fresh-air pulse every one to three hours. Pinning often wants higher humidity and less fresh air; as fruit develops, lower humidity slightly and raise FAE so caps firm up. Set the humidistat with a band, like on below 88% and off above 93%.
What kind of timer do I need for fresh-air exchange?
A repeat-cycle (interval) timer, not a daily clock timer. It loops a short on-off cycle indefinitely, such as five minutes on every hour, which is what fresh-air exchange needs. A clock timer with a few daily on-times cannot pulse the fan frequently enough to manage CO2 in a sealed chamber.
Where should the humidistat probe go in a fruiting chamber?
In open chamber air, away from the humidifier’s direct mist and off the wet walls. A probe in the fog stream reads near 100% and never lets the humidifier run; one on a dripping wall reads high while the air is dry. Mid-chamber in clear air reads the humidity your mushrooms actually experience.
How do I keep a humidity controller from failing mid-grow?
Build in fail-safes: use a humidifier with low-water auto-shutoff, check the tank every couple of days, and keep an independent hygrometer you read by eye to catch a stuck probe. Empty and wipe the humidifier reservoir between refills, since standing water grows bacteria that aerosolize into the chamber.
Can one controller run both humidity and fresh air?
You run two independent circuits, often in one setup: the humidistat handles humidity on its own loop and the cycle timer handles the fan on its own loop. Some all-in-one grow controllers combine both with multiple switched outlets, but two separate plug-in modules do the same job safely and cheaply.