
If you are trying to decide what lab gear to actually buy for a home mushroom grow, the honest short answer is this: a pressure canner, a decent digital scale, and a reliable incubation setup will get you further than any single expensive gadget. A stovetop pressure canner running a full 90 minutes at 15 PSI sterilizes grain spawn and supplemented sawdust that a hot-water bath simply cannot make safe — and that one purchase decides whether your jars colonize or turn to green Trichoderma.
I run a full gourmet and functional cultivation lab in Sweden — agar plates to fruiting blocks, oyster on the weekly rotation, lion’s mane and king oyster on the bench, shiitake on hardwood, reishi and a wine-cap bed outdoors. Over years of it I have bought the wrong tool first more than once, killed jars to contamination that better gear would have prevented, and slowly worked out which purchases earn their bench space. This guide is the buying decision the rest of the internet skips: not how long to run a canner, but which canner, and in what order to spend the money.
The Buying Order That Actually Matters
The single most useful thing I can tell a new grower is that lab gear has a purchase order, and getting it wrong wastes money. Sterilization comes first because it is the link that fails most often; a pressure canner is non-negotiable the moment you move past pre-sterilized kits. A scale comes second because every substrate recipe and hydration target is a weight ratio, not a guess. Incubation comes third, fruiting environment fourth, and the “nice to have” instruments — pH meters, refractometers, stir plates — last, only when your process is already clean.
Most home grows die at the grain or transfer stage, not at fruiting. That is why I steer beginners toward sterilization and clean-transfer gear before anything glamorous. A gorgeous fruiting tent will not save spawn that was never sterile. If your budget is small, buy fewer tools that solve the failure points and skip the instruments that only refine an already-working process. I have laid out the full first-purchase list in the starter gear list, but the principle holds across every budget: spend where batches actually fail.
Sterilization: The Pressure Canner Is the Foundation
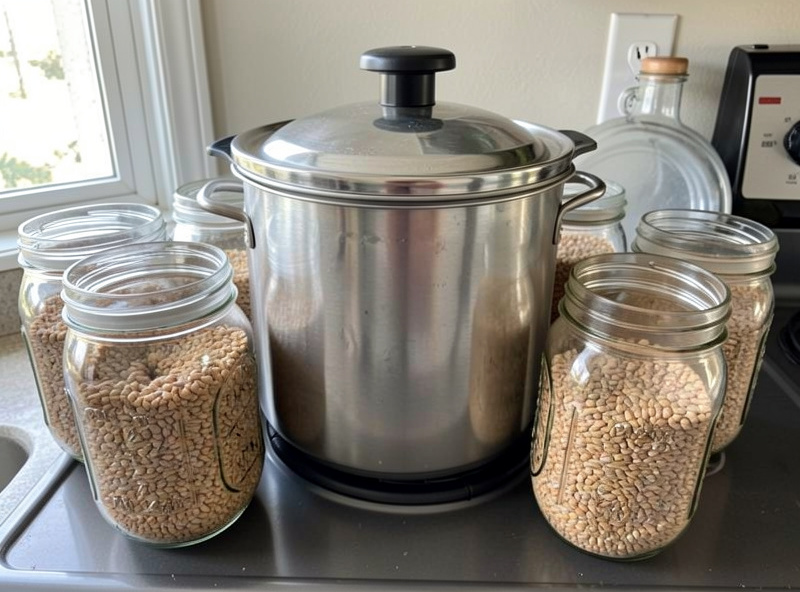
A pressure canner is the piece I would buy first, every time, and it is the one where cheaping out costs you the most. Grain spawn and supplemented sawdust carry heat-resistant bacterial endospores that only steam under pressure at roughly 121 °C (250 °F, 15 PSI) will kill. A boiling-water bath tops out at 100 °C and leaves those spores alive — which is exactly why pasteurized straw works for oyster but sterilized grain is mandatory for everything else. The USDA-backed National Center for Home Food Preservation documents the same 15 PSI pressure-processing standard for destroying heat-resistant spores.
Size is the real decision. A tall 23-quart canner holds a proper load of quart jars in one run; a smaller 10-to-16-quart unit forces you to sterilize in frustrating little batches. I run a large stovetop canner and would not go back. The trap people fall into is buying a pressure cooker marketed for cooking that cannot fit jars upright, or an aluminum unit whose gauge drifts. I break down capacity, gauge-versus-weighted-valve, and specific picks in the pressure canner buying guide — it is the one lab purchase worth reading in full before you spend.
One correctness note that saves batches: a weighted-gauge (jiggler) canner holds 15 PSI mechanically regardless of a drifting dial, which is why I trust it for grain. If you buy a dial-gauge unit, it needs periodic calibration or your “15 PSI” run is a guess. Sterile technique is a chain, and this is the first link.
Clean Air: Still-Air Box vs. Laminar Flow Hood
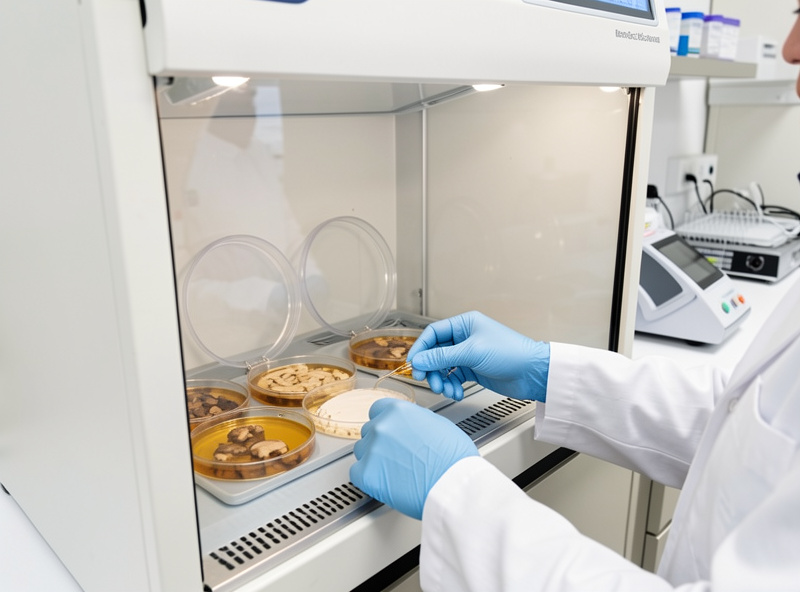
Here is where growers overspend and underspend in the same breath. A still-air box — a clear tote with two arm holes — costs almost nothing and is genuinely enough for routine grain-to-grain transfers and inoculating jars through a self-healing port. I use a SAB for the everyday work and it handles most of what a hobby grow needs.
A laminar flow hood is a different animal: a HEPA filter and blower that push a wall of particle-free air across your work surface, so contamination is swept away from open plates instead of settling into them. It is the tool that makes agar work and open grain transfers reliable, and it is genuinely worth it once you are doing culture work at volume. But it is a real investment, and blower size, HEPA rating, and whether to buy or build all matter. I walk through when the SAB is enough versus when only laminar flow saves the plate in the flow hood buying guide. My honest take: buy the canner and a SAB first, and add the flow hood when agar and liquid culture become routine — not before.
Measurement: Scales, pH Meters, and Refractometers
Every substrate I mix is a weight ratio. Masters Mix is 50/50 hardwood sawdust and soy hull by dry weight; CVG is measured; hydration to field capacity is a target you can only hit if you can weigh water against dry mass. A digital scale is therefore not optional — it is the second thing I would buy. The question is resolution: a 1-gram kitchen scale is fine for weighing kilograms of substrate, but dialing gypsum or supplement percentages, and especially any small-batch agar recipe, rewards finer resolution.
I split scale buying into two jobs — a larger-capacity scale for bulk substrate and a fine 0.1-gram (or 0.01-gram) scale for supplements and agar — and explain which resolution actually matters where in the digital scales guide. Buying one scale to do both is the common mistake; the ranges rarely overlap well.
The instruments people ask about most are the ones I use least. A pH meter and a refractometer are refinement tools, not survival tools — useful for agar media and, in the refractometer’s case, for reading sugar concentration in liquid culture broth, but not something a first grow needs. I make the honest case for which of these earns a spot on the bench and which is a solution looking for a problem in the pH meter and refractometer guide. Short version: most home growers never need either, and that is fine.
Culture Work: The Stir Plate Question
A magnetic stir plate spins a small stir bar inside a jar of sterilized broth, keeping liquid culture aerated and mixed so mycelium disperses instead of clumping. It genuinely speeds colonization when you inoculate grain from well-dispersed LC. But it is squarely an optional, later-stage tool — you can make perfectly good liquid culture without one, and you can make grain spawn without liquid culture at all.
The interesting part of the stir-plate decision is buy-versus-build: the internals are a PC fan, a couple of magnets, and a potentiometer, and a home build costs a fraction of a commercial unit. Whether that is worth your evening depends on how much LC you actually run. I cover magnetic bar sizing, realistic speed settings, and the honest buy-or-build math in the stir plate guide. If you are still killing jars at the grain stage, a stir plate is not your problem yet.
Incubation: Heat Mats and Thermostats
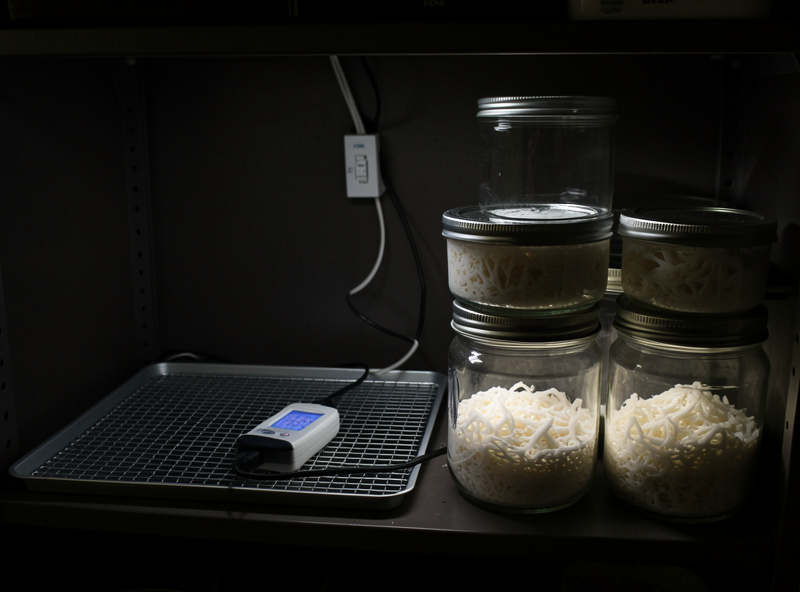
Most gourmet species colonize fastest somewhere around 24–27 °C, and if your grow space runs cold — as mine does through a Swedish winter — you need to add gentle, controlled heat. The pairing that matters is a seedling-style heat mat driven by an external thermostat with a probe, so the mat cycles to hold a set temperature instead of running full-tilt and cooking the edge of your jars.
The buying mistake here is running a heat mat with no thermostat, which routinely pushes spawn past 30 °C and stalls or kills it, or favors thermophilic contaminants. Sizing the mat to your shelf and picking a thermostat with a sensible dead-band is the whole game. I cover mat sizing, thermostat picks, and safe target temperatures in the heat mat and thermostat guide. A stable, dark, clean colonization shelf is one of the highest-return setups a cold-climate grower can build.
How the Big Purchases Compare
Below is how I rank the major lab purchases by how early you need them and how much a bad buy hurts. “Failure impact” is my read on how badly skipping or mis-buying the tool damages a typical home grow.
| Tool | Buy Priority | Optional? | Failure Impact If Skipped/Mis-bought |
|---|---|---|---|
| Pressure canner | 1st | No (past kit stage) | High — grain and sawdust never truly sterile |
| Digital scale | 2nd | No | Medium — substrate ratios and hydration become guesses |
| Heat mat + thermostat | 3rd (cold rooms) | Climate-dependent | Medium — slow or stalled colonization; overheating kills spawn |
| Still-air box | Early | No (cheap) | Medium — airborne contam during transfers |
| Laminar flow hood | Later | Yes, until agar work | Low early, High for serious culture work |
| Stir plate | Later | Yes | Low — convenience for liquid culture only |
| pH meter / refractometer | Last | Yes (most skip) | Low — refinement, not survival |
Matching Gear to Your Species and Substrate
What you grow changes what you must buy. If oyster on pasteurized straw or CVG is your plan, you can start with pasteurization gear (a hot-water bath or cooler tek) and delay the pressure canner — oyster is the forgiving gateway species for exactly this reason. But the moment you want lion’s mane or king oyster on Masters Mix, or shiitake on supplemented sawdust blocks, you are sterilizing supplemented substrate and the canner becomes mandatory.
Species choice cascades through the whole gear list: sterilized fruiting blocks need a canner; a temperature-stable colonization shelf matters more for slow-browning shiitake blocks than for fast oyster; humidity-hungry lion’s mane leans harder on your fruiting environment than tolerant oyster does. I would rather a new grower buy the correct three tools for oyster and succeed than buy a full lab for a species they are not ready to run. Get one species fruiting cleanly, learn where your process breaks, then buy the tool that fixes it.
Budget: Where to Spend and Where to Wait
If I had a limited budget and were starting over, I would put the money into a large pressure canner and a two-scale setup, build a still-air box from a tote for almost nothing, and add a heat mat with a thermostat if my room ran cold. That covers sterilization, measurement, clean transfers, and incubation — the four places batches actually fail — for a fraction of a “complete lab” kit.
Everything else waits. The laminar flow hood, the stir plate, the pH meter and refractometer are upgrades you buy once your process is proven and you know precisely why you want them. The same clean-process discipline that protects the substrate protects the salami curing chamber and the sourdough starter across my workshop — and in all of them, the cheap habit (patience, cleanliness, measurement) beats the expensive gadget. Buy the foundation right, and the rest is optional.
Build It or Buy It: Where DIY Actually Pays
Not every tool is worth buying finished. The still-air box is the clearest case — a clear storage tote and a hole saw give you a transfer chamber for a few euros that performs as well as anything sold as a “mushroom SAB.” I have never seen a reason to pay for one. The stir plate is the next-best DIY candidate: a PC fan, two rare-earth magnets, and a speed controller replicate a commercial unit for a fraction of the price, and I cover that build honestly in the stir plate guide.
Where DIY stops paying is anything doing safety-critical or precision work. A pressure canner is not a build project — you want a certified vessel with a valve you trust holding 15 PSI, full stop. A laminar flow hood is buildable, but the HEPA filter is the expensive part either way, so the savings are smaller than people expect and the tolerances matter. My rule: build the things where “good enough” genuinely is (SAB, stir plate, a simple grain-jar rack), and buy the things where a failure ruins a batch or hurts you (canner, thermostat, scale). That split keeps a home lab affordable without cutting the corners that actually matter.
Sterilization vs. Pasteurization: Why It Changes What You Buy
This single distinction drives half the gear list, so it is worth getting right. Sterilization means killing essentially everything — including heat-resistant bacterial endospores — and it requires a pressure canner holding roughly 121 °C. Pasteurization means knocking back the competition without killing everything, done at around 65–80 °C in a hot-water bath or an insulated cooler, and it is enough for a nutritionally poor, hard-to-colonize substrate like straw or CVG paired with an aggressive colonizer such as oyster.
The rule I follow: if the substrate is nutritious enough to feed contaminants faster than your mycelium can claim it — grain, supplemented sawdust, Masters Mix — it must be sterilized. University mushroom programs such as Penn State Extension detail the substrate and sanitation principles behind that split. If it is lean and you are running a fast, forgiving species, pasteurization is enough. That is why a straw-and-oyster grower can start with a cooler and a thermometer, while anyone running a canner-sterilized fruiting block cannot. Understanding it stops you buying a canner you do not yet need — or skipping one you do. It also feeds directly into how you plan your first gear purchases.
The Buying Mistakes I See Most Often
A few purchasing errors show up again and again, and every one of them costs money or batches. The first is buying a pressure cooker instead of a canner — a squat cooking pot that will not fit quart jars upright, forcing you into tiny loads or none at all. The second is running a heat mat with no thermostat, which cooks spawn and is arguably worse than no heat at all.
The third is spending on instruments before fundamentals: a refractometer or pH meter or a stir plate bought while grain jars are still contaminating is money spent in the wrong place. The fourth is under-buying the scale — one coarse kitchen scale that cannot resolve the small supplement weights that a proper two-scale setup handles. And the fifth is buying a laminar flow hood before you are doing the agar and culture work that actually justifies it.
None of these are exotic mistakes — I made several of them myself. The fix is the same each time: buy for the failure point in front of you, not the impressive setup in someone else’s photo. Clean process and correct measurement carry a home grow far further than the shiniest tool on the shelf, and the gear that earns a permanent spot on my bench is the gear that stops a specific, repeatable failure.
Frequently Asked Questions
What is the first piece of lab equipment I should buy for growing mushrooms?
A pressure canner. Grain spawn and supplemented sawdust need steam under pressure at about 121 C (15 PSI) to kill heat-resistant bacterial spores. A boiling-water bath only reaches 100 C and leaves those spores alive, so it cannot make grain safe.
Do I need a laminar flow hood, or is a still-air box enough?
For routine grain-to-grain transfers and jar inoculation, a still-air box is genuinely enough and costs almost nothing. A laminar flow hood is worth buying once you are doing agar work and open transfers at volume, where its HEPA-filtered airflow reliably keeps open plates clean.
What resolution digital scale do I need for mushroom substrate?
Two scales cover it best: a larger-capacity 1-gram scale for weighing kilograms of bulk substrate, and a fine 0.1-gram or 0.01-gram scale for supplements and agar media. One scale rarely spans both ranges well, which is the common buying mistake.
Is a pressure canner or pressure cooker better for mushroom cultivation?
A tall canner is better because it fits quart jars upright and comes in larger 23-quart capacities. A weighted-gauge canner holds 15 PSI mechanically without calibration, while many small cooking-oriented pressure cookers cannot fit jars or hold pressure reliably.
Do I need a pH meter and refractometer to grow gourmet mushrooms?
Most home growers never need either. They are refinement tools for agar media and liquid culture broth, not survival tools. A first grow succeeds or fails on sterilization, measurement, and clean transfers long before pH or sugar concentration matter.
Why does my grain spawn need a thermostat with the heat mat?
A heat mat with no thermostat can push spawn past 30 C, which stalls or kills mycelium and favors thermophilic contaminants. An external thermostat with a probe cycles the mat to hold a target near 24 to 27 C, which is where most gourmet species colonize fastest.
Related Guides
Each big-ticket purchase has its own deep-dive buying guide:
- Best Pressure Canner for Mushroom Cultivation: Sizes and Picks
- Buying a Laminar Flow Hood: HEPA, Blower Size, When It’s Worth It
- Digital Scales for Substrate and Hydration: What Resolution Matters
- Stir Plates for Liquid Culture: Magnetic Bars, Speed, Buy or Build
- Heat Mats and Thermostats for Incubation: Sizing and Picks
- pH Meters and Refractometers: Which Lab Tools Earn a Spot
- The Starter Gear List: What a First Grow Really Needs to Buy