
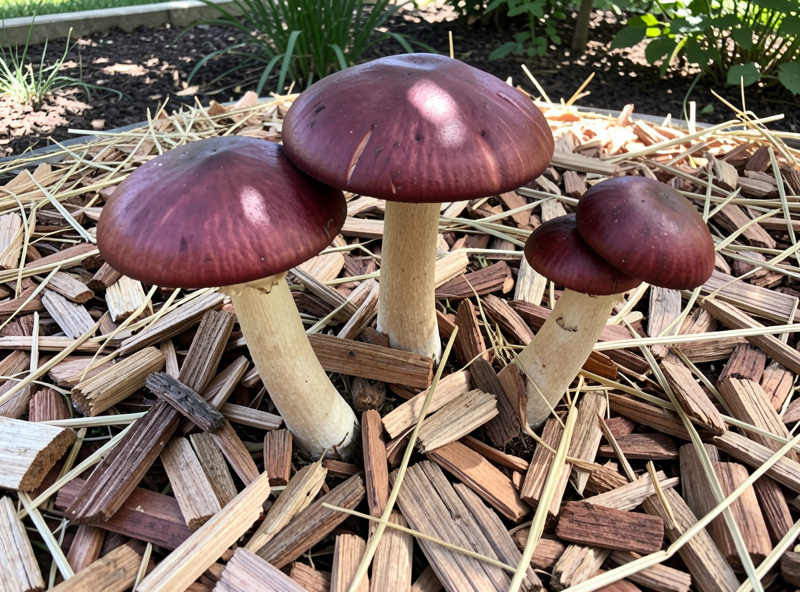
Wine cap mushrooms (Stropharia rugosoannulata) are the easiest gourmet mushroom to grow outdoors: you spread spawn through a bed of hardwood wood chips and straw, keep it damp, and harvest burgundy-capped mushrooms that can exceed 1 kg in a single cluster. There is no sterilisation, no pressure canner, and no fruiting chamber — the garden does the work, and a well-built bed produces for two to three years.
This is the species I point every gardener toward first, because it sidesteps almost everything that makes indoor cultivation finicky. Wine cap’s mycelium is aggressive enough to colonise raw wood chips outdoors and outcompete most of what is already living in your garden soil. Below is the full cultivation method — spawn choice, wood selection, building and inoculating the bed, what colonisation looks like, and how to time the flush. If your interest is specifically weaving the bed into garden paths and ornamental planting, I cover that landscaping angle separately in my guide to building an outdoor wine cap bed along garden pathways; this guide is about growing the mushroom itself.
Why Wine Cap Is the Best Outdoor Gourmet Mushroom
Wine cap earns the beginner recommendation for one reason: it forgives almost everything. Where the indoor block species on my gourmet specialty mushrooms guide demand sterilised substrate and clean transfers, wine cap takes raw hardwood chips in open air and thrives. Its mycelium is fast and territorial, so it claims the wood before competing moulds get a foothold — the same trait that makes oyster forgiving, scaled up to an outdoor bed.
The payoff is generous. A bed built in spring will often fruit by late summer or the following spring, and a healthy bed produces flushes for two to three years before the wood is spent. The caps are genuinely large — palm-sized is normal, dinner-plate sized happens — and young wine caps have a firm texture and a mild, potato-and-asparagus flavour that takes well to searing. They are also nearly impossible to buy fresh, which is the whole appeal of the specialty species: you grow what the shops cannot sell.
One more advantage worth naming: wine cap doubles as a garden worker. The bed conditions soil, retains moisture, and the spent chips become excellent mulch. It is the rare crop that improves the ground it grows on.
It also suits a cool climate better than people expect. I run my bed in a Swedish garden, and the milder summers actually work in wine cap’s favour — the bed rarely bakes, and the long, damp shoulder seasons of spring and autumn line up well with its fruiting preferences. In a cold-winter climate the mycelium simply goes dormant under the chips and snow, then picks back up when the soil warms. The one adjustment is timing: build in late spring once the ground has warmed, and expect the first real flush the following year rather than rushing it in a short first season. If anything, gardeners in hot climates have the harder job, because keeping a bed from drying out through a fierce summer takes more effort than letting a temperate bed take its time.
Choosing Spawn and the Right Wood
Wine cap is sold as sawdust spawn or grain spawn. For an outdoor bed I prefer sawdust spawn — it is cheaper by volume, mixes evenly through wood chips, and is already adapted to a woody substrate. Grain spawn colonises faster but is a magnet for birds and rodents in an open bed, so if you use it, bury it well. You want roughly 2 to 2.5 litres of sawdust spawn per square metre of bed; skimping on spawn is the most common reason a bed colonises slowly and lets weeds or competitor fungi move in first.
The substrate is where people go wrong. Wine cap wants hardwood, not softwood — the resins in pine, spruce, and cedar inhibit the mycelium. Fresh hardwood chips are ideal, and a mix of chip sizes works better than uniform material because the fines colonise fast while the larger pieces feed the bed longer. Straw added to the mix speeds early colonisation and holds moisture, which is why a chip-and-straw blend outperforms either alone.
| Substrate Material | Suitability for Wine Cap | Notes |
|---|---|---|
| Fresh hardwood chips (oak, beech, maple) | Excellent | The ideal base; mixed sizes best |
| Straw (wheat, barley) | Very good (blended) | Speeds early colonisation, holds moisture |
| Aged hardwood chips | Good | May carry competitors; soak before use |
| Hardwood sawdust | Good (as amendment) | Adds fast-colonising fines to a chip bed |
| Softwood / conifer chips | Poor | Resins inhibit mycelium; avoid |
| Cardboard (plain, wet) | Useful base layer | Good moisture wick under chips |
Building the Bed and Inoculating
Pick a shaded or part-shaded spot — under deciduous trees, along a north fence, or beside taller crops. Full sun dries the bed and stalls fruiting. The bed sits directly on soil so the mycelium can draw moisture from below, and there is no need to dig down; this is a layered bed built upward.
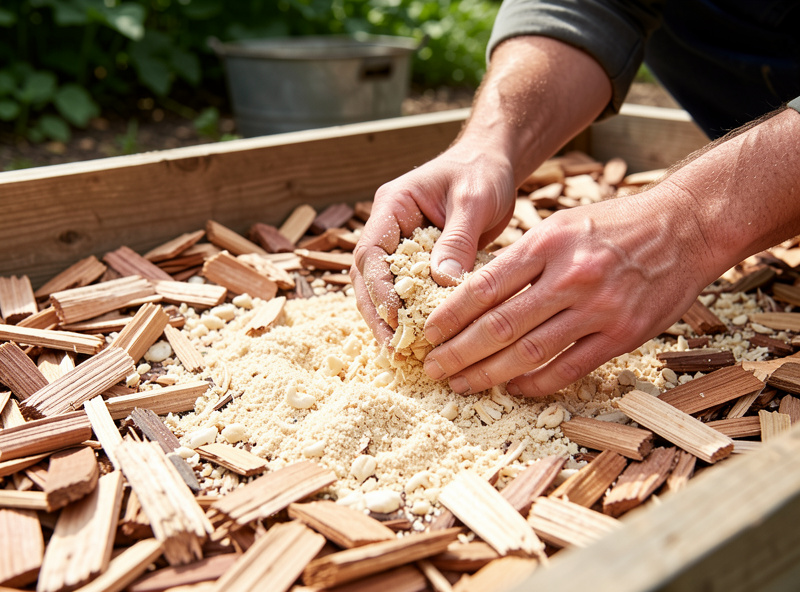
Lay a base of wet cardboard or a thin straw layer on cleared ground to suppress weeds and wick moisture. Then build in layers: a few centimetres of damp wood chips and straw, a scattering of broken-up spawn, more substrate, more spawn, finishing with a chip layer on top. Aim for a finished depth of around 10 to 15 cm. Water each layer as you go until the material is at field capacity — squeeze a handful and you should get a few drops, not a stream. The field-capacity test is the single most useful habit to carry over from indoor growing; too dry and the spawn stalls, too wet and you invite souring.
Timing matters: build in spring or early autumn when temperatures sit in the mild range. Avoid the peak of summer, when a fresh bed can dry out faster than the mycelium establishes. After inoculating, keep the bed consistently damp — like a wrung-out sponge — for the first several weeks. A layer of straw mulch on top buys you a lot of moisture stability.
Colonisation: What to Expect
Within two to four weeks of building the bed in good conditions, dig gently into the chips and you should see white, cottony-to-ropey mycelium webbing the wood together. Healthy wine cap mycelium is bright white and smells of fresh forest floor; the rope-like rhizomorphs are a good sign the colony is running well. If you see green, dusty patches that is Trichoderma, and a damp, sour smell points to overwatering — both are covered in my contamination guide, though outdoor beds shrug off problems far better than sealed indoor blocks.
Full colonisation of the bed takes one to three months depending on temperature and how generously you spawned it. You do not need to wait for total colonisation to relax your watering, but keep the bed from ever drying out completely during this phase — a dried-out bed sets the colony back hard. The mycelium will keep working as long as there is moisture and unconsumed wood, which is why topping the bed up with fresh chips each year extends its productive life.
Triggering and Timing the Flush
Wine cap fruits in response to a combination of a colonised bed, warmth, and moisture — usually after a good rain following a warm spell. In most climates that means flushes appear from late spring through autumn, with the biggest often after summer rains. A spring-built bed commonly gives its first flush the same late summer or the following spring; patience in year one pays off with heavier flushes later.
You can nudge fruiting by deep-watering the bed during a warm dry spell to mimic rainfall. Keep the bed mulched and shaded so the surface stays humid — pins desiccate quickly in exposed, breezy conditions, the outdoor version of the fresh-air-versus-humidity balance I describe for indoor fruiting chambers. Beyond that, the bed largely runs on its own schedule, which is part of the charm: you check it, you do not babysit it.
Harvest, Kitchen, and Storage
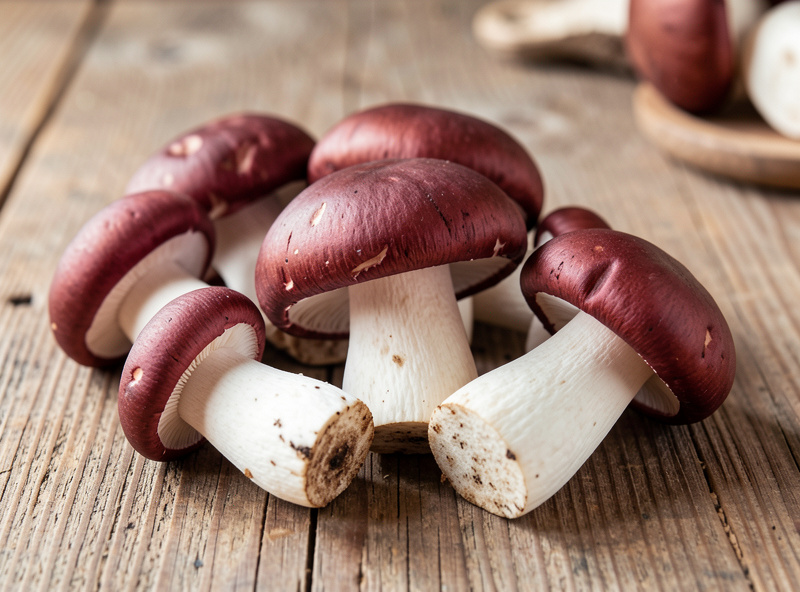
Harvest wine caps young, while the cap is still domed and before the gills darken from grey to near-black. A young wine cap is firm and mild; an old one turns soft and the flavour fades. Cut or twist the whole mushroom at the base. The window is short once they size up, so check the bed every day or two during a flush.
In the kitchen, treat wine cap like a firm gourmet mushroom: slice it, get a pan properly hot, give it room, and let the moisture cook off before seasoning — the same approach that works for searing oyster mushrooms. Young caps and stems both cook well; older specimens are better diced into something cooked long. Always cook wine cap thoroughly — like most cultivated gourmet mushrooms, it is not eaten raw. Fresh wine caps keep three to five days in a paper bag in the fridge, and they dry and freeze well when a flush outpaces your kitchen; the preservation guide covers both.
When the bed finally slows after a couple of years, the spent chips are not waste — they are among the best uses for spent substrate, going straight onto garden beds as rich mulch. Top the old bed with fresh hardwood chips and you often restart the cycle rather than building from scratch.
Troubleshooting Wine Cap
The most common failure is a bed that never fruits, and it is almost always one of three things: too much sun drying it out, not enough spawn so colonisation stalled, or softwood chips inhibiting the mycelium. A bed that colonised but will not fruit usually just needs another season and a good soaking after warm weather — wine cap rewards patience. If you see other mushrooms appearing, identify before eating; an established wine cap bed is dominant, but a brand-new, under-spawned bed can let stray fungi fruit first. When in doubt, do not eat anything you cannot confidently identify as wine cap by its wine-red cap, white stem, and the distinctive toothed ring on the stem. For broader beginner pitfalls, my common mistakes guide and the overview of growing oyster on garden waste both translate directly to outdoor wine cap work.
Frequently Asked Questions
How long does it take wine cap mushrooms to fruit?
A bed built in spring commonly fruits by late summer of the same year or the following spring. Colonisation takes one to three months depending on temperature and spawn rate, and fruiting follows warmth and moisture, usually after a good rain. Patience in year one means heavier flushes in years two and three.
What wood is best for growing wine cap mushrooms?
Fresh hardwood chips such as oak, beech, or maple are ideal, ideally mixed with straw to speed colonisation and hold moisture. A blend of chip sizes works best. Avoid softwood and conifer chips like pine, spruce, and cedar, because their resins inhibit wine cap mycelium.
Do I need to sterilise anything to grow wine cap?
No. Wine cap is grown outdoors on raw hardwood chips with no sterilisation or pasteurisation. Its aggressive mycelium outcompetes most competitors in an open bed, which is what makes it the easiest gourmet mushroom for beginners and gardeners to grow.
How much spawn do I need for a wine cap bed?
Aim for about 2 to 2.5 litres of sawdust spawn per square metre of bed. Under-spawning is the most common reason a bed colonises slowly and lets weeds or competitor fungi establish first, so be generous rather than sparing with your spawn.
How big do wine cap mushrooms get?
Wine caps are large mushrooms. Palm-sized caps are normal and dinner-plate-sized caps occur in good conditions, with single clusters sometimes exceeding a kilogram. Harvest them young while the cap is still domed and the gills are pale, because texture and flavour fade as they age.
How long does a wine cap bed keep producing?
A healthy bed produces flushes for two to three years before the wood is spent. You can extend its productive life by topping it with fresh hardwood chips each year, which often restarts the cycle instead of requiring a new bed to be built from scratch.