For your first grow, a pre-made kit wins; by your third grow, a DIY monotub wins decisively. A $25-45 kit yields 400-700 grams at near-zero risk and teaches fruiting; a $60-90 monotub yields 1.5-2.5 kilograms and drops your cost below $8 per kilogram once you have the technique. The right answer depends entirely on which run you are on.
I have started friends on both paths and watched the same pattern repeat: people who begin with a kit get a confidence-building harvest and stick with the hobby, while people who jump straight to a DIY monotub on run one have roughly a coin-flip chance of contamination killing their enthusiasm before they ever see a pin. This guide breaks down the kit-versus-DIY decision on the four axes that actually matter — contamination risk, cost per kilogram, time investment, and what each path teaches you — so you can pick the path that fits where you are right now.
Disclosure: MycoMansion is reader-supported. As an Amazon Associate I earn from qualifying purchases made through links in this article, at no extra cost to you. I only point to gear I actually use or would buy for my own grow.
What a Grow Kit and a DIY Monotub Actually Are
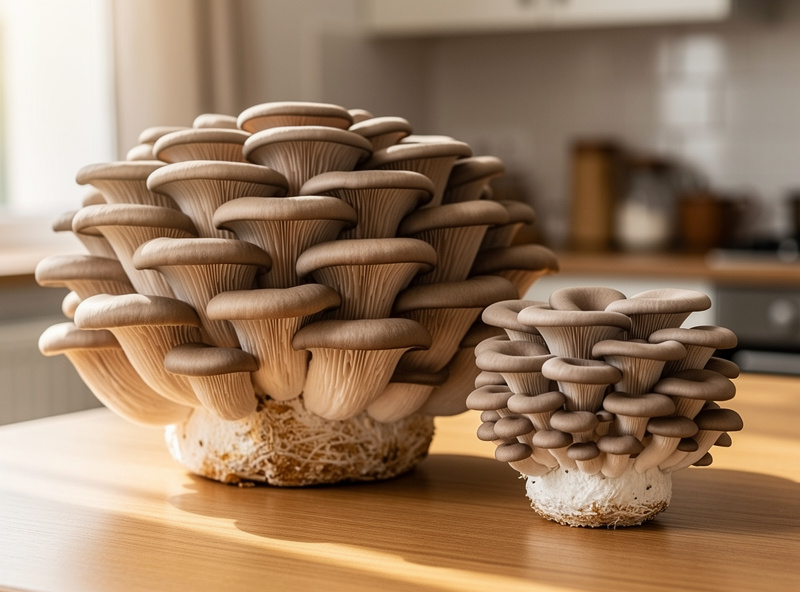
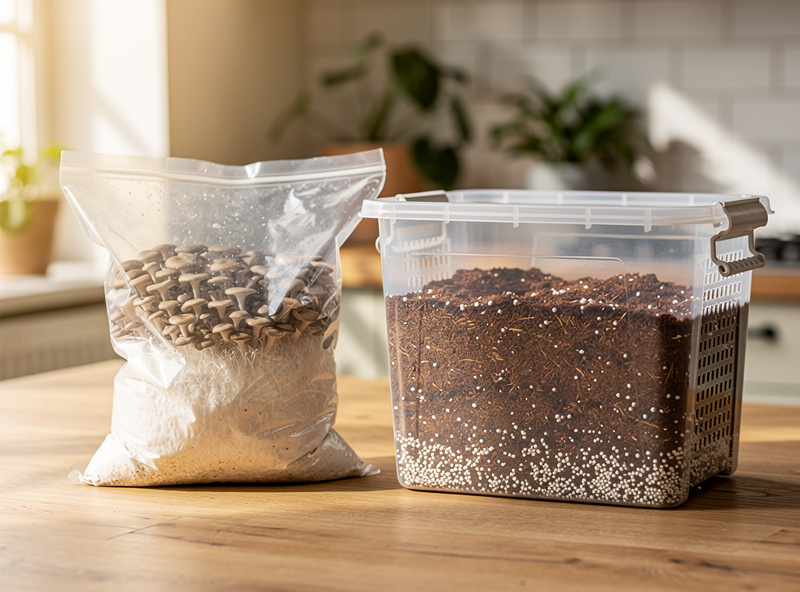
A grow kit is a sealed bag of substrate already colonised with mushroom mycelium, shipped ready to fruit — you cut a slit, mist it, and harvest in 1-2 weeks. A DIY monotub is a clear plastic tote where you mix your own grain spawn into your own bulk substrate, then colonise and fruit it yourself over 5-7 weeks. The kit is a finished cake you only have to bake; the monotub is baking from raw flour.
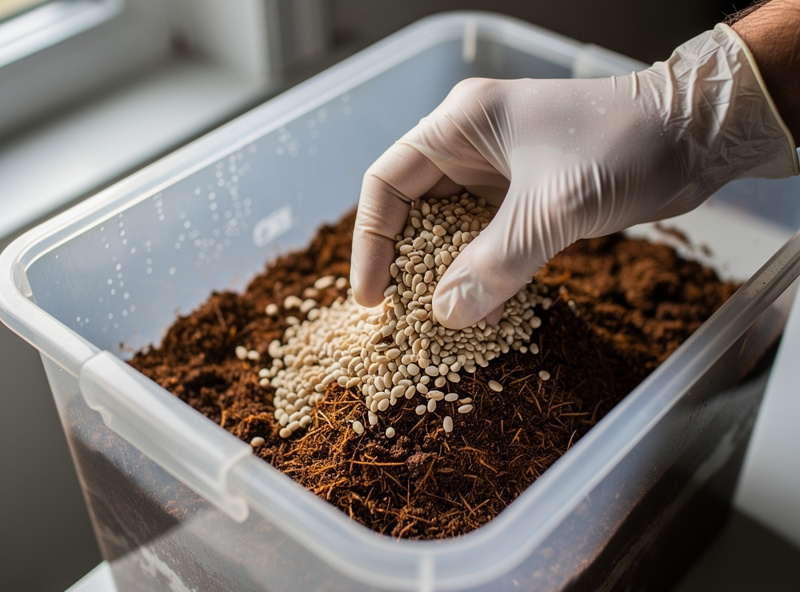
The critical difference is where the contamination risk lives. With a kit, the vendor has already done the two highest-risk steps — sterilising substrate and inoculating it under a flow hood — in a clean commercial lab. All you control is fruiting, which is forgiving. With a monotub, you do the inoculation, the single step where sterile technique matters absolutely. That one transfer of grain spawn into bulk substrate is where 80% of beginner failures happen, and it is exactly the step a kit removes from your plate.
Contamination Risk: The Real Beginner Killer
On a kit, contamination risk is near zero because colonisation is complete before the kit reaches you — fully myceliated substrate is a fortress that outcompetes invaders. On a DIY monotub, a first-timer realistically faces a 30-50% chance of losing a block to green Trichoderma or bacterial wet spot, almost always traced back to the inoculation moment rather than anything that happens during fruiting.
This is the single strongest argument for starting with a kit. If your kit does not fruit, you have a short list of fixable causes — too dry, too warm, not enough fresh air — and none of them involve sterile technique. If your first-ever monotub does not fruit, the cause could be anywhere across grain prep, hydration, spawn ratio, or the inoculation transfer, and you have no baseline to diagnose against. Learning fruiting on a clean kit first means that when you do build a monotub, contamination becomes the only new variable, and you can recognise it early using a photo reference like what healthy mycelium looks like versus the warning signs in the contamination guide.
Cost Per Kilogram: Where DIY Pulls Ahead
A kit costs $25-45 and yields 400-700 grams across all flushes, which works out to roughly $50-90 per kilogram of fresh mushrooms — barely cheaper than buying gourmet oysters at a farmers market. A DIY monotub costs $60-90 in first-run parts but yields 1.5-2.5 kilograms, and because most of that spend is reusable gear (the tote, the drill bits, the filter patches), your second monotub costs only the substrate and spawn — around $20 — pushing your per-kilogram cost below $8 by the third run.
The economics only favour DIY if you keep growing. One kit beats one monotub on cost because the monotub’s gear cost is amortised across many runs. If you are genuinely unsure whether the hobby will stick, the kit is also the cheaper way to find out. The breakdown below assumes pearl oyster, the cheapest and most forgiving species-substrate pairing in home cultivation.
| Factor | Pre-Made Grow Kit | DIY Monotub (Run 1) | DIY Monotub (Run 3+) |
|---|---|---|---|
| Upfront cost | $25-45 | $60-90 | ~$20 (consumables only) |
| Yield per run | 400-700 g | 1.5-2.5 kg | 1.5-2.5 kg |
| Cost per kg | $50-90 | $30-45 | under $8 |
| Contamination risk | Near zero | 30-50% | under 10% |
| Active time | 10 min total | 90 min over 2 days | 60 min |
| Time to first harvest | 10-18 days | 35-50 days | 35-50 days |
Time and Effort: Honest Numbers
A kit demands about 10 minutes of total active work: open it, mist twice daily for two weeks, harvest. A DIY monotub demands roughly 90 minutes spread across an inoculation day and a fruiting-setup day, plus a few minutes of daily fresh-air exchange during fruiting. Neither path is labour-intensive — the real cost is calendar patience, not hours of work.
What people underestimate is the colonisation wait. A kit arrives pre-colonised, so you skip straight to the 10-18 day fruiting sprint. A monotub makes you wait 14-21 days at 20-24°C for the mycelium to fully claim the substrate before you can even trigger pinning, and during that window the hardest discipline is leaving it alone — every time you crack the lid to “check,” you trade humid still air for dry room air and invite contamination. If you are an impatient person, know that the monotub front-loads three weeks of doing nothing while staring at a tote.
What Each Path Teaches You
A kit teaches you fruiting: reading pin formation, dialling humidity and fresh-air exchange, and timing the harvest at the unrolled-cap stage for maximum yield and a viable second flush. A monotub teaches you the entire upstream pipeline — substrate hydration to field capacity, spawn-ratio math, and the sterile transfer that is the gateway skill to every advanced technique. Both are worth learning; the question is the order.
My standard advice is to run one kit, then move to a monotub for run two. The kit gives you a calibrated mental picture of healthy fruiting — what good pins look like, how fast they bulk up, what a clean block smells like — so that when you build your own monotub, anything abnormal jumps out immediately. Trying to learn fruiting and sterile technique simultaneously on run one is the classic overreach that ends with a green block in the bin and a discouraged grower. For the full progression past these first two runs, the first-year beginner guide maps the whole arc from kit to intermediate gourmet cultivation.
Building a Beginner Monotub: The Parts List
A beginner monotub is a 35-60 litre clear tote ($12-18), four 4-centimetre holes drilled in the lid and covered with polyfill or 0.2-micron filter patches ($4 in supplies), about 5 kilograms of pasteurised straw or hydrated coir ($6-12), and one bag of pre-made oyster grain spawn ($12-18). Mix spawn into substrate at 5-10% by weight, fill the tote, seal, and colonise at 20-24°C for 14-21 days. Total parts cost lands at $60-90 with the tote and tools reusable forever.
Buying pre-made sterilized grain spawn for your first monotub removes the trickiest sub-step — sterilising and colonising grain yourself, which needs a pressure cooker and clean transfers — so you only have to nail the spawn-to-bulk inoculation. The tote itself is just a food-safe clear storage tote; any opaque-free 35-60L box works. If you would rather skip the build entirely for run one, a ready-to-fruit oyster mushroom grow kit is the lowest-risk on-ramp. The full bulk-substrate options, including the coir-vermiculite-gypsum mix most beginners use, are in the CVG substrate recipe and the broader substrate guide.
Which Should You Pick
Pick a kit if this is your first grow, you want a harvest in under three weeks, or you are testing whether the hobby appeals to you before investing in gear. Pick a DIY monotub if you have already fruited one kit, you plan to grow repeatedly, and you want fresh mushrooms at under $8 per kilogram. The two paths are sequential, not competing — almost every committed grower starts with a kit and graduates to monotubs.
The one scenario where I would skip the kit entirely is if you already have hands-on sterile-process experience from an adjacent hobby — fermentation, brewing, or canning — and you are comfortable working clean. In that case a monotub on run one is a reasonable gamble, especially if you buy pre-made grain spawn so the only new skill is the inoculation transfer. For everyone else, the kit-first path is the highest-probability route to a first harvest and the fastest way to avoid the discouraging early failures catalogued in the beginner mistakes guide.
Frequently Asked Questions
Is a mushroom grow kit or DIY monotub better for a first-time grower?
A grow kit is better for run one. It arrives pre-colonised, so contamination risk is near zero and you only learn fruiting. A kit costs 25-45 dollars and harvests in 10-18 days. Move to a DIY monotub on run two, once you can recognise healthy fruiting.
How much cheaper is growing mushrooms in a DIY monotub versus a kit?
A kit costs roughly 50-90 dollars per kilogram of fresh mushrooms. A DIY monotub costs 30-45 dollars per kilogram on run one and drops below 8 dollars per kilogram by run three, because the tote and tools are reusable and only substrate and spawn are repurchased.
What is the contamination risk on a DIY monotub for beginners?
A first-time DIY monotub realistically faces a 30-50 percent chance of contamination, almost always from the inoculation step where grain spawn meets bulk substrate. A pre-made kit has near-zero risk because the high-risk sterilising and inoculation steps were done in a commercial lab.
What do I need to build a beginner mushroom monotub?
A 35-60 litre clear tote (12-18 dollars), four 4-centimetre lid holes with polyfill or 0.2-micron filter patches (4 dollars), 5 kilograms of pasteurised straw or hydrated coir (6-12 dollars), and one bag of oyster grain spawn (12-18 dollars). Total: 60-90 dollars, tote and tools reusable.
How long until I harvest mushrooms from a kit versus a monotub?
A kit harvests in 10-18 days because it arrives pre-colonised and you skip straight to fruiting. A DIY monotub takes 35-50 days because it adds a 14-21 day colonisation window at 20-24 Celsius before you can trigger pinning and the first flush.
Can I reuse a grow kit or monotub for multiple harvests?
Both re-flush. After the first harvest, soak the block in cool water for 12-24 hours, drain, and return to fruiting. The second flush yields 60-70 percent of the first. A third flush is usually too small to bother with, after which the spent block becomes excellent garden compost.