
The totem method inoculates hardwood log rounds without a single drilled hole: you stack the rounds like a sandwich with a half-inch to inch layer of sawdust spawn between each, bag the tower to hold humidity, and let mycelium run across the exposed end grain. It colonizes faster than dowels because a fresh cut face is the easiest surface a wood-loving fungus can find — no bit, no wax, no 40 holes to drill. For oyster and lion’s mane, it is the most beginner-forgiving log technique there is.
I build totems in the garden in Sweden when I have wide rounds too fat to bother drilling, and they are the technique I recommend to anyone who owns a chainsaw but not a pressure canner. The whole method rides on one insight — mycelium loves end grain — and on avoiding a couple of simple mistakes with wood freshness and bagging. Get those right and a totem practically inoculates itself.
This is a spoke off my mushroom spawn types and inoculation methods hub. If you would rather drill, my working with plug spawn guide covers the dowel route; here I am doing it the no-drill way.
What Is the Totem Method?
The totem method is a log-inoculation technique where cut hardwood rounds are stacked vertically with sawdust spawn sandwiched between them, then enclosed in a bag while the mycelium colonizes through the flat cut faces. The finished “totem” is a self-contained colonizing unit that you unbag once it is run through and set out to fruit.
It solves a real problem: wide, short rounds are awkward to inoculate with dowels because their fat end grain dries and gets colonized by wild fungi before drilled plugs can knit across the diameter. Totems flip that weakness into a strength by inoculating the entire cut face at once. Field & Forest Products, who popularized the technique for home growers, built it specifically around the aggressive gourmet species that can race across end grain — and those are exactly the ones I trust it with. Because it needs only sawdust spawn and a bag, it is also the cheapest entry into log cultivation, skipping the drill-and-wax gear covered in my mushroom log inoculation guide.
Why Does Inoculating the End Grain Work So Well?
End grain works because it is the wood’s open plumbing. A cut face exposes the severed vessels and fibers that run the length of the log, giving mycelium a huge contact area and a direct highway straight down the grain. Compared to a drilled hole that colonizes outward through dense side grain, an end-grain inoculation runs faster and more completely.
That speed is also why freshness matters so much. The same open vessels that welcome your mycelium welcome every wild spore in the air, so a cut face is a contested surface from the moment the saw finishes. Inoculate a fresh round and your dense, healthy sawdust spawn owns the face before competitors establish; inoculate a stale one and you are fighting uphill. The sawdust spawn I press onto the face is a Masters Mix-based spawn precisely because a vigorous, wood-adapted mycelium wins that race — the affinity logic is the same one I lay out in sawdust spawn vs grain spawn.
What Species and Wood Suit Totems Best?
Totems suit aggressive gourmet colonizers — oyster and lion’s mane above all — on fresh hardwood rounds 8 to 14 inches in diameter and 6 to 12 inches tall. Fast species matter because the totem’s exposed faces reward whichever fungus colonizes quickest; a slow, fussy strain gives wild competitors too long a head start on all that open end grain.
Wood choice follows the same logic as any log work. Oak, beech, birch, and maple all take totems; softer hardwoods like birch and poplar colonize faster but decompose sooner, while oak runs slower and lasts longer. My full breakdown is in best wood for mushroom logs. The rounds should be freshly cut — within a couple of weeks — from a live, healthy tree, and never from conifer. Lion’s mane in particular loves the totem format; if you want species-specific care once it fruits, see my lion’s mane growing guide. Shiitake technically works but colonizes slowly enough that I keep it on drilled logs and cover the forcing method in how to grow shiitake on logs.
How Do You Build a Totem Step by Step?
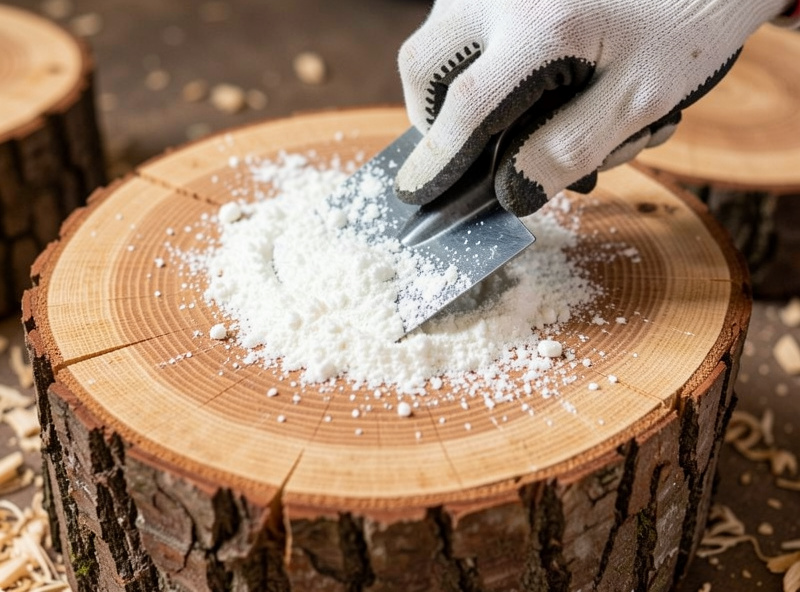
Build a totem by stacking two to three rounds with a spawn layer between and on top, then bagging the stack. Stand the bottom round on end, trowel on a half-inch to one-inch even layer of sawdust spawn covering the whole face, set the next round squarely on top, repeat, and finish with a spawn layer capped by a small round or a piece of cardboard to protect the top face.
The physical feel of it is satisfying and diagnostic. Fresh oak end grain is cool and faintly sweet-smelling, and good sawdust spawn presses on like damp crumbly bread, holding its shape against the face. I press each layer firm so there are no air gaps between spawn and wood — gaps are where the run stalls and where mold sneaks in. Keep the total stack low enough to stay stable; a three-round totem is plenty, and taller towers tip. Once stacked, slide the whole thing into a large clear bag to hold humidity, and set it somewhere shaded and stable to colonize. The end-grain contact does the rest.
Which Bag Do You Use, and Why Does It Matter?
Use a large, clear, loosely closed bag — not a sealed, opaque one. The bag’s only job is to hold humidity around the colonizing faces while still allowing some fresh-air exchange; seal it airtight and you trap the mycelium in its own carbon dioxide and standing moisture, which invites bacteria instead of fruiting bodies.
This is the step beginners get wrong, and my own first mistake was different but just as costly. I built my first pair of totems from oak rounds that had been sitting cut in the woodpile for two months — bone dry on the faces and, I realized too late, already colonized by wild fungi in the end grain. The spawn never took; one totem grew a fuzzy gray cobweb bloom across the interface and the other just sat inert. The lesson was blunt: totems demand genuinely fresh-cut rounds, and a stale face is a lost totem before you start. Now I cut and inoculate the same week, use a breathable clear bag left loosely gathered at the top, and set the totem in full shade where it holds humidity without cooking. A little airflow, a lot of shade, and fresh wood — that is the whole recipe.
How Long Does a Totem Take to Colonize and Fruit?
A totem typically colonizes in three to six months and begins fruiting from the interfaces and around the bark once fully run through. Oyster is on the faster end and lion’s mane close behind; the timeline stretches with denser wood, cooler temperatures, and larger-diameter rounds. As with any log work, you wait for full colonization before expecting mushrooms.
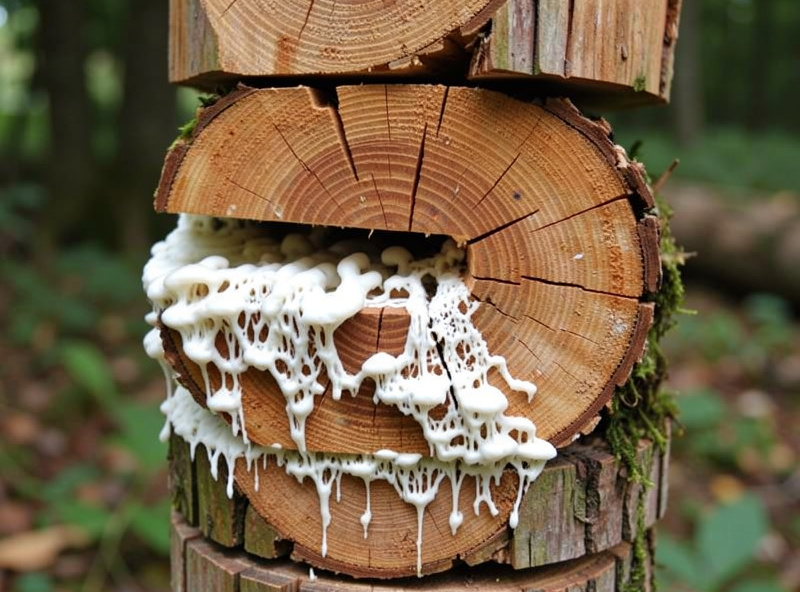
You will see the run before you see mushrooms. White mycelium blooms out from between the rounds and creeps up under the bark, and the interfaces knit into a solid seam. When the faces are fully white and the mycelium has begun reaching up the sides, unbag the totem and stand it in a shaded, humid outdoor spot — pins usually form at the round-to-round junctions where the spawn was thickest. Reading that colonization correctly is its own skill, and I cover the signals across every format in reading the spawn run. Cornell Small Farms Program figures on outdoor log colonization line up with this range — patience is not optional with wood.
How Does the Totem Method Compare to Plug Spawn?
Totems win on speed, cost, and simplicity for wide rounds; plugs win on convenience for standard-diameter logs and on species like shiitake that colonize slowly. A totem needs only sawdust spawn and a bag, colonizes the full end grain fast, and skips drilling and waxing entirely — but it is bulkier to bag and store and works best with aggressive species. Plugs load more slowly, one hammer tap per hole, but suit narrower logs and a wider species range, and the finished logs stack neatly outdoors.
In practice I run both and let the wood decide. A fat 12-inch round becomes a totem; a manageable 4- to 6-inch log gets drilled with dowels. If you are choosing your first project and you have wide rounds and an aggressive species like oyster or lion’s mane, start with a totem — it forgives the most and teaches you to read a spawn run on a real piece of wood. The same clean-process patience that carries a totem through its months in the bag is the one that carries a salami through the curing chamber and a starter through its rise on the kitchen counter; it is one discipline pointed at four different fermentations under one roof.
Troubleshooting a Stalled or Sour Totem
Most totem failures trace back to three causes: stale wood, a sealed bag, or too-thin a spawn layer. A totem that sits inert with no white growth after several weeks usually started from a dried or pre-colonized round. One that turns slimy and sour got sealed airtight and went anaerobic. One that colonizes patchily was built with skimpy or uneven spawn layers that left gaps between spawn and face.
Read the totem the way you would any spawn run. Bright white, reaching mycelium across the interfaces is healthy. A diffuse gray, wispy bloom is cobweb mold — sometimes survivable if caught early, often not. Any green or black patch means a competitor has established, and a sour, wet-dishrag smell means bacteria won. When a totem sours, I do not try to rescue it near my other wood; it goes to the compost pile well away from the fresh rounds, the same triage instinct I apply to any contaminated batch. Prevention beats rescue every time: fresh wood, firm even spawn layers, a breathable bag, deep shade.
Keep Building
The totem is one technique in a whole family of no-canner outdoor methods — pair it with a drilled log or a stump and you have a fruiting rotation that runs for years. Start with the spawn types hub for the full map, then dig into the specific techniques below.
- Working With Plug Spawn: Dowels, Drilling, and Sealing
- Sawdust Spawn vs Grain Spawn: When Each One Wins
- Best Wood for Mushroom Logs: Oak, Maple, Birch Compared
- Lion’s Mane Mushroom Growing Guide
- How to Grow Shiitake on Logs: Inoculation to Forced Flush
Authority references: Field & Forest Products (originators of home totem instructions for oyster and lion’s mane) and Cornell Small Farms Program (outdoor log colonization timelines).