
Chicken coop bedding — a mix of pine shavings, straw, manure, and feathers — is a nitrogen-rich mushroom substrate after hot-composting at 55-65°C for 14-21 days. Six laying hens produce approximately 30-40 kg of spent bedding per month, and once hot-composted to kill pathogens and ammonia, this material supports oyster mushroom (Pleurotus ostreatus) yields of roughly 1 kg of mushrooms per 5 kg of dry substrate weight. The same coop cleanout that you currently bag and discard or pile in a corner of the yard can produce 6-8 kg of oyster mushrooms per month — roughly $80-120 worth at retail prices — using the same pasteurization and inoculation techniques that work for straw and sawdust substrates. The only additional processing beyond regular hot-composting is pasteurization at 65-75°C for 1-2 hours to kill competitor molds that survived the compost heat, and the spent mushroom substrate that remains after harvest is a premium soil amendment that closes the nutrient loop back to the garden beds.
Hot-Composting: The Mandatory First Step
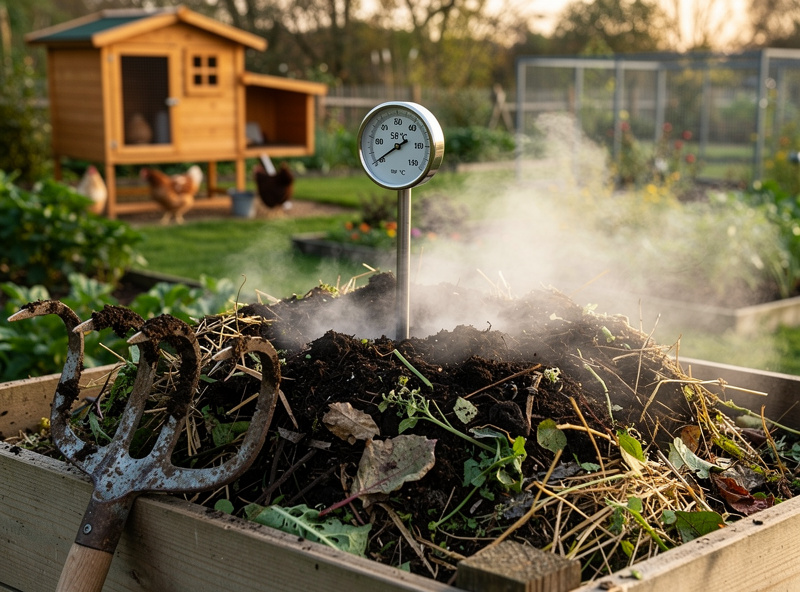
Raw chicken manure is loaded with enough ammonia that you can smell it from across the run, and it carries pathogens including Salmonella and Campylobacter that survive for weeks in ambient conditions — that’s the smell-and-safety reason it can’t go straight into a substrate bucket. Hot-composting solves both problems. Build a pile at least 1 cubic meter in volume — smaller piles cannot sustain the 55-65°C core temperature required for pathogen kill. Here’s the part I got backwards the first time I tried this: fresh chicken manure on its own is nitrogen-hot, not carbon-heavy — University of Kentucky Cooperative Extension’s own composting reference lists chicken manure at roughly 8:1 carbon-to-nitrogen, while the target for a working compost pile is closer to 25:1–30:1 (source cited below). That means the pile wants to run 70-75% carbon-rich material against just 25-30% manure by volume — a lot more brown material than you’d think, not “a modest supplement.” The saving grace is that coop litter isn’t pure manure: the pine shavings (roughly 500:1 C:N) and straw (roughly 80:1) already mixed into the bedding are doing real carbon work, so a well-maintained litter cleanout runs closer to target than raw manure would. Still layer in extra dried leaves, shredded cardboard, or wood chips as you build the pile, and if it starts smelling like ammonia instead of dirt, that’s your sign to add more carbon, not less. Turn the pile every 3-4 days with a pitchfork, moving material from the outer edges into the hot core — this is also what a well-known pathogen-kill benchmark (the EPA’s turned-windrow standard for compost, cited below) actually requires: 55°C or higher sustained through the full active-heating window, not just a quick 3-day spike, with a minimum of five turnings to make sure material at the edges gets its turn in the hot core. Budget the full 14-21 days for that reason. By the end, the ammonia smell disappears completely, the pile volume reduces by approximately 40%, and the material is ready for pasteurization. (Sources: University of Kentucky Extension, “Composting Poultry Litter in Your Backyard”; 40 CFR Part 503, Appendix B, turned-windrow pathogen treatment standard.)
Pasteurization and Inoculation: From Compost to Substrate
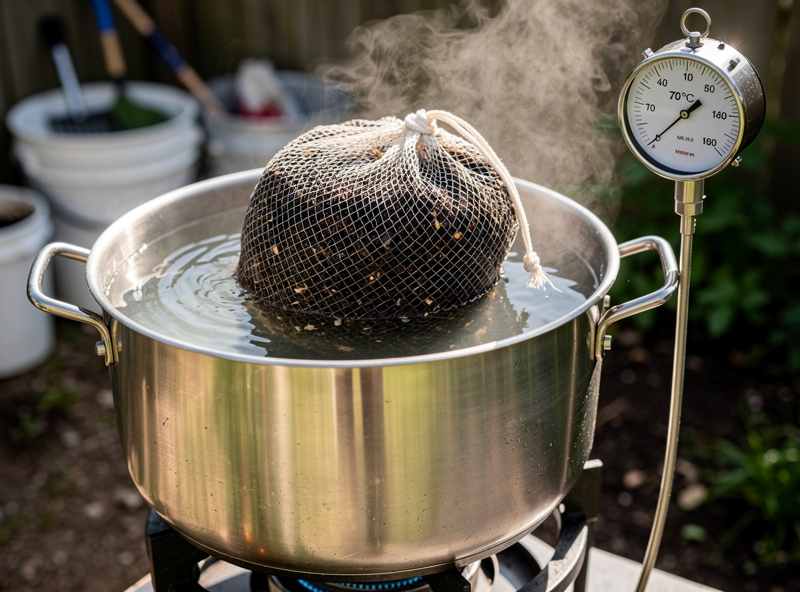
Hot-composted bedding is not sterile — it still contains Trichoderma and other competitor molds that will outcompete oyster mushroom mycelium if given the chance. Pasteurization at 65-75°C for 1-2 hours kills competitor molds while preserving the beneficial thermophilic bacteria that suppress contamination after inoculation. The simplest method for home-scale production is hot-water pasteurization: submerge the composted bedding in a mesh bag inside a 200-liter drum or large pot of water held at 70°C for 90 minutes. Drain the bag for 30 minutes until the substrate passes the squeeze test — a handful squeezed firmly should produce a few drops of water but not a stream. The target moisture content is 65-70% by weight.
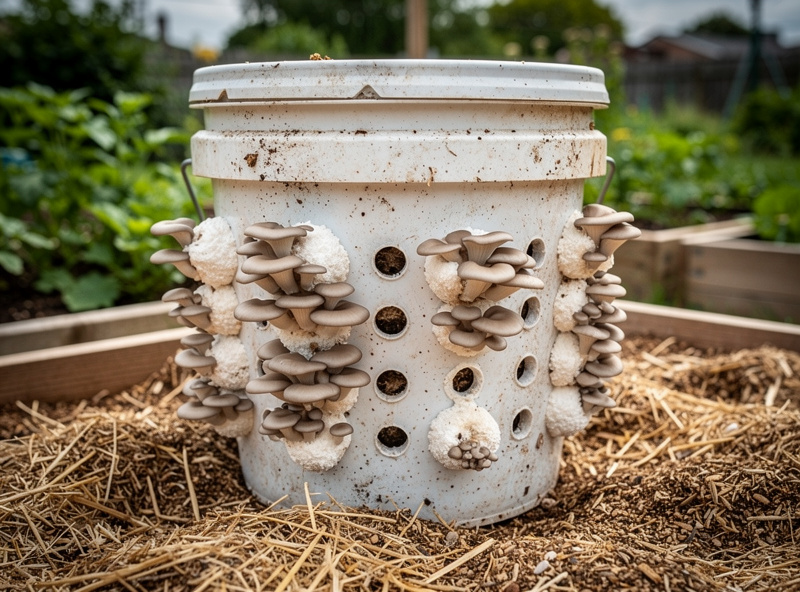
Inoculate with grain spawn at a rate of 5-10% by wet substrate weight. For 5 kg of pasteurized substrate (roughly one 20-liter bucket), use 250-500 grams of oyster mushroom grain spawn. Mix the spawn thoroughly into the substrate in a clean container, pack loosely into fruiting containers (5-gallon buckets with 6mm holes drilled every 15 cm work well for oyster mushrooms), and incubate at 20-24°C in darkness for 14-21 days until the substrate is fully colonized with white mycelium. Move to fruiting conditions: 18-22°C, 85-95% humidity, indirect light for 12 hours per day, and fresh air exchange 4-6 times per hour. First harvest appears 7-14 days after moving to fruiting conditions, and each substrate block produces 2-3 flushes over 4-6 weeks before exhaustion.
For the complete guide to chicken coop bedding management — including which bedding materials produce the best substrate, ammonia control strategies, and deep-litter methods that prepare the bedding for mushroom use without a separate composting step — the chicken manure composting guide on SmartCoopHQ covers the coop side that produces the raw material for the mushroom substrate here.
How Coop-Litter Substrate Compares to Straw and CVG
I run oyster on CVG and pasteurized straw as my default substrates, and coop litter is a different animal from both — not better, not worse, just a different set of tradeoffs worth knowing before you commit a bucket of hens’ bedding to it. Straw and CVG arrive at the pasteurizer clean: you’re not fighting ammonia, and you know exactly what’s in the mix because you built it. Coop litter arrives with an unknown history — how deep the deep-litter method ran, how often the coop got mucked out, whether anyone’s been dosing the flock with antibiotics or dewormers recently (skip a batch of litter from a recently-treated flock; residues can carry through to the substrate). What coop litter has going for it that straw and CVG don’t is the nitrogen already built in — chicken manure’s a genuine fertility source, and a properly hot-composted batch gives the mycelium a nutrient base that plain straw needs supplementing (bran, gypsum) to match. In my own bucket trials the coop-litter batches colonized at roughly the same pace as pasteurized straw once the compost was fully cooked and cooled, but ran slightly more prone to green mold in the first week if the pasteurization step was rushed — which tracks, since hot-composted material still carries live Trichoderma spores the pasteurization step is specifically there to knock back, not eliminate outright.
The other practical difference is moisture control. Composted litter holds water less predictably than straw because the particle sizes are so mixed — fine manure crumbs, chunky shavings, the odd clump of caked bedding — so the squeeze test matters more here than it does on a uniform straw batch. If you’re getting inconsistent colonization block to block, check for pockets of over-wet material before you blame the spawn rate or the inoculation technique; it’s usually a moisture problem, not a contamination problem, on this particular substrate.
Making Your Own Grain Spawn for Continuous Production
Buying pre-made grain spawn works, but it’s the most expensive per-kilogram input in this whole setup relative to what it costs to make yourself from rye berries or wild bird seed — and it requires a pressure cooker capable of 15 PSI (121C) either way, so once you own that piece of gear, making your own grain spawn is the better long-run move. The process: rinse 1 kg of rye berries, soak in water for 12-24 hours, simmer for 10-15 minutes until the grains are hydrated but not burst, drain for 30 minutes, load into quart mason jars with modified lids (a 6mm hole covered with micropore tape or a synthetic filter disc for gas exchange), and pressure-cook at 15 PSI for 90 minutes. Cool to room temperature, inoculate each jar with 1-2 grams of colonized agar or 10-15 grains of colonized grain spawn from a previous batch in a still-air box or in front of a laminar flow hood, and incubate at 24C for 10-14 days until the jar is fully colonized with healthy white mycelium.
One quart jar of colonized grain spawn expands to inoculate approximately 5 kg of pasteurized substrate — the same 5 kg bucket described in the pasteurization section above. With 6 laying hens producing 30-40 kg of bedding per month, you need roughly 6-8 quart jars of grain spawn monthly. A single spore print or liquid culture syringe started on agar produces enough inoculum for years of continuous spawn production through grain-to-grain transfers — each colonized jar can inoculate 8-10 new jars, and the expansion ratio means one initial culture sustains indefinite production. The only recurring cost after the initial gear is the rye berries themselves and the electricity to run the pressure cooker — both minor next to what a comparable weight of retail spawn would run you.
Frequently Asked Questions
Can I grow mushrooms on chicken coop bedding?
Yes. Hot-compost chicken bedding for 14-21 days at 55-65C to kill pathogens and ammonia, then pasteurize at 70C for 90 minutes. Inoculate with oyster mushroom grain spawn at 5-10% rate. Six hens produce 30-40 kg of bedding per month, yielding 6-8 kg of oyster mushrooms worth $80-120 retail.
Does chicken manure need to be composted before mushroom growing?
Yes. Raw chicken manure is strongly ammonia-scented and carries pathogens including Salmonella. Hot-composting at 55-65C, sustained through the full 14-21 day active phase with regular turning, eliminates both (per EPA’s turned-windrow pathogen-reduction standard). The ammonia smell disappears completely when the compost is ready. Never inoculate raw manure — the ammonia kills mushroom mycelium within hours.
What mushroom species grow on chicken bedding?
Oyster mushrooms (Pleurotus ostreatus) are the most aggressive colonizers of composted manure-based substrates. King oysters (Pleurotus eryngii) prefer woodier substrates and perform poorly on manure. Wine cap (Stropharia rugosoannulata) grows directly in outdoor compost beds without pasteurization or inoculation containers.
How do I pasteurize composted chicken bedding?
Hot-water pasteurization: submerge substrate in water at 70C for 90 minutes in a mesh bag. Drain for 30 minutes until a handful squeezed produces only a few drops. Target 65-70% moisture. Alternatively, cold-water lime pasteurization in hydrated lime at pH 12 for 12-24 hours works without heat but requires more preparation time.
How much mushroom grain spawn do I need for chicken bedding substrate?
5-10% grain spawn by wet substrate weight. For a 5 kg bucket of pasteurized substrate use 250-500g of grain spawn. Lower spawn rates (under 5%) risk contamination because the mycelium colonizes too slowly. Higher rates (over 10%) are wasteful — the substrate is fully colonized before the extra spawn provides any benefit.
What do I do with spent mushroom substrate after harvest?
Spent mushroom substrate is a premium soil amendment with a neutral pH, reduced carbon-to-nitrogen ratio, and residual mycelium that suppresses soil-borne plant pathogens. Spread it directly on garden beds as a 2-5 cm mulch layer or mix into compost at 30% by volume. It is the final link in the coop-to-mushroom-to-garden nutrient loop.