
Yes, you can grow mushrooms without a pressure cooker. Oyster mushrooms fruit reliably on cold lime-pasteurized straw, and I have run whole flushes off a $12 tub without ever bolting the lid on a canner. The trick is matching a forgiving species to a substrate that does not need sterilizing.
Here is the part nobody selling you a $150 kit wants to say out loud: the pressure cooker is not the wall between you and your first harvest. Species choice is. Pick oyster, work clean, and pasteurize instead of sterilize, and the canner becomes optional for your first year. Pick something fussy on a nutrified grain jar with a loose lid, and no amount of gear saves you.
I have killed enough jars to green Trichoderma to know exactly where a low-tech grow falls apart — and it is almost never the fruiting step everyone worries about. This is the map: which methods genuinely work without a canner, which ones the internet oversells, and where the honest limits sit. Every low-tech shortcut in this cluster branches off from here.
Do You Actually Need a Pressure Cooker to Grow Mushrooms?
No — not for oyster mushrooms on pasteurized bulk substrate. A pressure canner sterilizes grain and supplemented sawdust to 121°C (250°F) at 15 PSI, which nutrient-dense substrates require. But straw and coir grow oysters just fine after cold or hot pasteurization, a far lower bar you can clear with a bucket and hydrated lime.
The distinction that unlocks the whole low-tech track is sterilization versus pasteurization. Sterilization kills everything — spores, bacteria, mold, all of it — and you need it whenever the substrate is a rich buffet like rye grain or soy-hull Masters Mix, because any surviving contaminant outruns your mushroom to the food. Pasteurization only knocks the competition down far enough that a healthy front of mycelium wins the race. Low-nutrient substrates — straw, coir, hardwood chips — are poor enough that this head start is all oyster needs.
So the honest answer is conditional. If your ambition is oyster on straw or coir this season, skip the canner. If you want to make your own grain spawn from scratch, or fruit lion’s mane on Masters Mix, you eventually want real sterilization — and I will not pretend the shortcuts fully replace it. That is exactly what the grain spawn without a pressure cooker guide gets into: the shortcuts exist, they just come with a contamination tax you pay in tossed jars.
What Can You Grow Without Sterilizing Anything?
Oyster mushrooms — pearl, blue, pink, phoenix, golden — are the entire answer for a first no-canner grow. They colonize aggressively, tolerate a wide temperature band, forgive humidity swings, and fruit on the cheapest substrates on the shelf. In my experience oyster gives a first-time grower something like an 80–90% shot at a real harvest on pasteurized straw, which no other gourmet species matches.
Why oyster and almost nothing else at this level? Speed. A pearl oyster culture I run throws rhizomorphic, aggressive mycelium that colonizes pasteurized straw in 10–14 days at room temperature, slamming the door on contaminants before they establish. Wine cap (Stropharia) is the other genuinely low-tech option, but it lives outdoors on a wood-chip bed and works on a season’s timeline, not a countertop’s — I run one in the garden and it is a slower, more patient relationship.
The species people try to force into a no-canner grow and regret are the nutrient-hungry ones. Lion’s mane, king oyster, and shiitake all reward the effort of real sterilization and clean grain spawn; on cold-pasteurized straw they either stall or lose to mold. I learned that the expensive way early on — a lion’s mane block I tried to shortcut with hot-water-only straw went to cobweb mold inside a week because the substrate was too rich for pasteurization to hold. Match the species to the method, and you skip that entire class of failure. If you want the full realistic read on which claims hold up, the windowsill mushroom growing breakdown separates the real from the hype.
How Does Cold Pasteurization Replace the Canner?
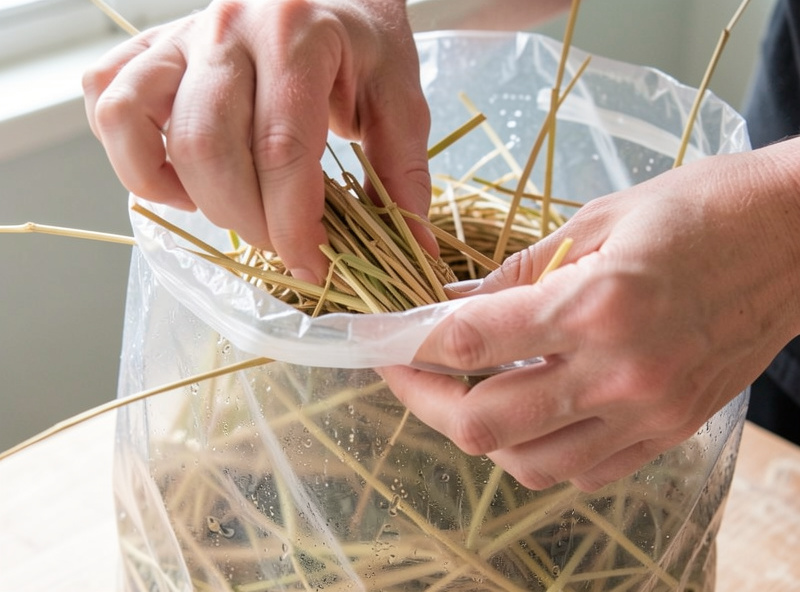
Cold lime pasteurization soaks chopped straw in water raised to roughly pH 12–13 with hydrated lime (calcium hydroxide) for 12–24 hours at room temperature. The high alkalinity suppresses competing bacteria and mold spores without a single watt of heat, leaving the substrate clean enough for aggressive oyster spawn to take over. No stove, no canner, no thermometer babysitting.
Mechanically it could not be simpler: line a bucket or tote, add water, stir in lime to the right dose, submerge the straw with a weight so nothing floats above the waterline, and wait. After the soak you drain to field capacity — squeeze a handful and only a drop or two should release — and mix in spawn. The alkalinity does the work heat normally would. I keep a cheap pool-test strip on the shelf just to confirm the bath actually hit high-pH before I trust it, because under-limed water is the single most common way this method quietly fails.
The hot-water alternative pasteurizes straw at 65–80°C (150–175°F) for 60–90 minutes, holding temperature in an insulated cooler — the classic “cooler tek.” Both routes get you to the same place; lime wins on effort, hot water wins on reliability if your lime source is uncertain. I walk through the dose, the soak time, and the failure signs step by step in cold lime-bath pasteurization, because getting the concentration right is the whole game. Penn State Extension’s mushroom program is a solid primer on why substrate hygiene, not exotic gear, governs your yield (see Penn State Extension).
Sterilization vs. Low-Tech Pasteurization: What Each Method Actually Buys You
Here is the decision laid out. The left-hand methods need no canner; the right-hand ones do. The pattern is consistent — the cheaper and lower-tech the method, the poorer (safer) the substrate it can handle, and the more it leans on a fast, healthy spawn to win.
| Method | Gear needed | Kills | Works on | Best species | Contam risk |
|---|---|---|---|---|---|
| Cold lime bath | Bucket, hydrated lime | Bacteria, most mold spores | Straw, coir | Oyster | Low–moderate |
| Hot-water pasteurization | Cooler, hot water, thermometer | Bacteria, mold, weed fungi | Straw, coir, CVG | Oyster, wine cap | Low |
| Cardboard spawn | Cardboard, container | Nothing (relies on speed) | Clean corrugated cardboard | Oyster only | Moderate |
| Oven/steam “sterilizing” grain | Oven or steamer | Some spores (incomplete) | Grain (marginally) | Oyster | High |
| Pressure canner (15 PSI) | Pressure canner | Everything, including spores | Grain, Masters Mix, sawdust | All gourmet species | Very low |
Read the “Kills” column honestly and the whole low-tech philosophy clicks: nothing left of the canner sterilizes. They all leave survivors and count on your mushroom being faster. That is why species and spawn quality matter more than gear — a fast, aggressive oyster culture is the actual sterilization substitute. Cornell’s small-farms mushroom resources make the same point about matching method to substrate (Cornell Small Farms).
Can You Make Spawn Without a Pressure Cooker?
Partly. You can expand oyster spawn without a canner using the cardboard method — colonizing clean corrugated cardboard from a fresh culture or a store-bought oyster — and it genuinely works for bulking up oyster. What you cannot reliably do is sterilize your own nutritious grain spawn from scratch without pressure; oven and steam “sterilizing” leaves spores that surface as contamination later.
The cardboard method is the purest expression of the low-tech ethos. Corrugated cardboard is cellulose — oyster’s native food — and its layered structure holds moisture and gives mycelium room to run. You lay colonized tissue or spawn between damp cardboard sheets, stack them, and let the mycelium bridge and consume the board. It multiplies your starting material for the cost of a shipping box. I break the whole layered build down in the cardboard spawn method, including the part everyone skips: the cardboard has to be plain corrugated, no glossy print, no tape, no wax.
Grain is the honest limit. Rye or wild-bird-seed grain is a rich, moist, spore-friendly medium — exactly what needs 15 PSI for 90 minutes to fully sterilize. The oven-baking and boiling shortcuts you will read about do lower the contamination load, but they do not eliminate spores, so your grain-to-grain success rate drops and your tossed-jar rate climbs. I lay out precisely how far each shortcut gets you, and where it stops being worth the frustration, in grain spawn without a pressure cooker. Cardboard for oyster: yes. DIY sterile grain without a canner: manage your expectations.
What Substrate Works for a No-Equipment Grow?
Pasteurized wheat straw is the workhorse no-canner substrate for oyster — cheap, widely available, and low enough in nutrients that pasteurization holds. Coir (coconut fiber) blended with vermiculite and gypsum, the CVG mix, is the other reliable bulk option, and coir arrives compressed and effectively clean, so it needs only hot water to hydrate and pasteurize in one step.
Straw is what I reach for first for oyster because it is forgiving and the flushes are generous. Chop it to a few inches so it packs and holds moisture, pasteurize it, drain to field capacity, and layer it with spawn. The one number that matters more than any other here is hydration: too wet and you invite bacterial blotch and a sour, anaerobic smell; too dry and colonization stalls. Field capacity — a firm squeeze yields a drop or two, not a stream — is the target every single time.
CVG is the tidier option and my pick when I want less mess indoors. A standard block of coir plus vermiculite hydrated with near-boiling water in an insulated tote pasteurizes itself as it cools; by morning it is at field capacity and ready to spawn. Both substrates cost a few dollars per grow. Neither needs a canner. What they do need is clean hands, a clean surface, and spawn that outruns whatever survived — the same discipline that protects my sourdough starter and the salami in the curing chamber, pointed at a fruiting block instead. If you want the full parts-list version, the low-budget first grow walkthrough sources every component under $50.
How Do You Fruit Without a Fan, Humidifier, or Controller?
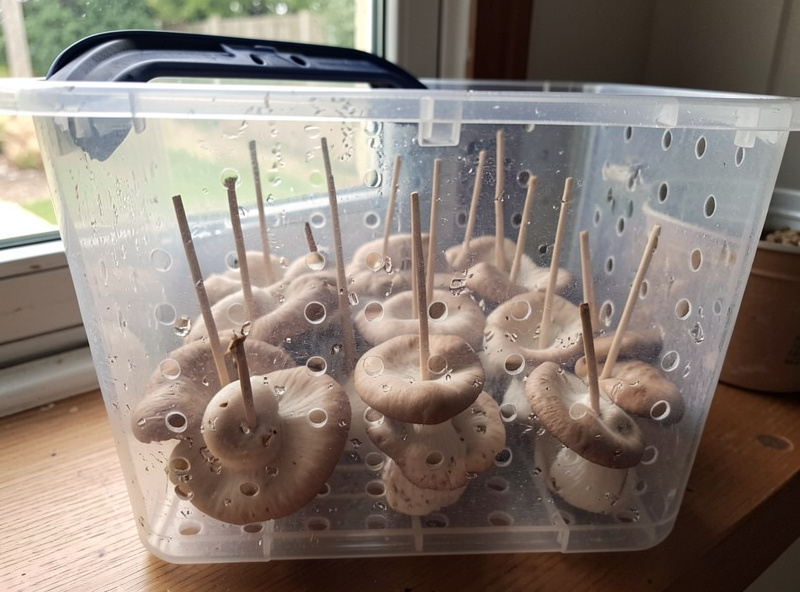
You fruit passively — in a clear tote or a large grow bag with hand-cut holes, misted by hand two or three times a day and fanned by opening the lid. Oyster mushrooms need high humidity and fresh-air exchange to pin and grow properly, but both can be delivered by hand at small scale without an ultrasonic humidifier, a humidistat, or a circulation fan.
The two variables you are managing are humidity and CO₂. A fully colonized block wants roughly 85–95% relative humidity to pin, and it wants that stale, CO₂-heavy air swapped for fresh air several times a day or the pins abort and the stems stretch into leggy, thin-capped “leggy oyster.” A humidifier and fan automate this. A spray bottle and a lid you lift twice a day do the same job on one bag or tub — it just ties you to a schedule. Miss a day and the pins crust over; I have dried out a promising flush by traveling for a weekend and trusting it to hold.
The failure mode nobody warns you about is over-misting directly onto pins, which invites bacterial blotch — those slimy brown spots — and rot. Mist the air and the chamber walls, not the developing mushrooms. This passive approach has real ceilings: it is labor-intensive and it does not scale, but it absolutely produces mushrooms. The full technique — hole placement, misting rhythm, and how to read pins — is in passive FAE fruiting without a fan, and the honest limits of doing it on a kitchen windowsill are covered in windowsill mushroom growing.
What Does a Realistic No-Canner Grow Actually Cost?
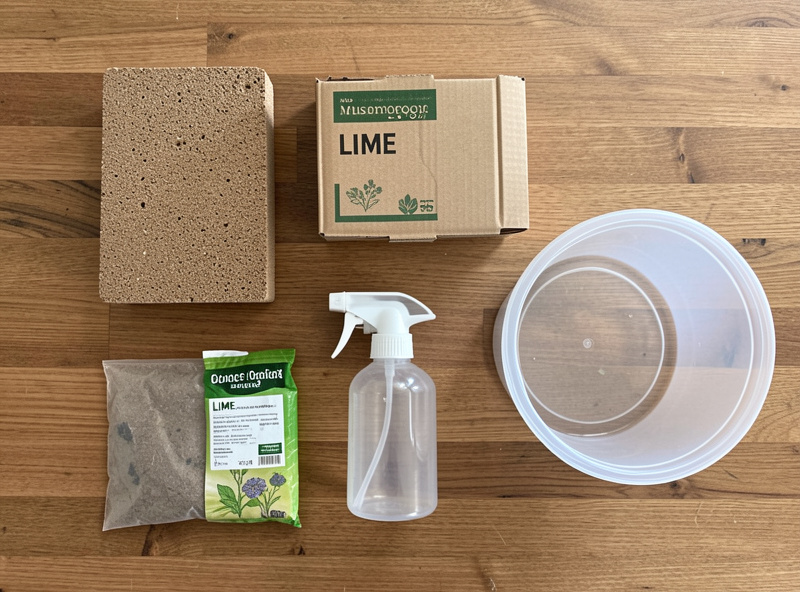
A complete first oyster grow — spawn, straw or coir, hydrated lime, a storage tote, and a spray bottle — comes in around $30–$50 all-in, and most of that is one-time gear you reuse for every grow after. The recurring cost per grow drops to roughly $8–$15 once you own the tub and the bottle, which is the number that actually matters.
The single biggest cost lever is where you get your spawn. Buying a bag of oyster grain spawn (usually $15–$25) is the reliable path and where I steer every beginner; making your own spawn is where the pressure-canner question really bites. The cardboard method sidesteps that by letting you multiply a small amount of spawn, or even a fresh grocery-store oyster, into enough to inoculate a tub — trading cash for time and a bit of contamination risk.
Where beginners overspend is buying automation they do not need yet — a $90 humidifier and a controller for a single tub of oyster that a $2 spray bottle handles fine. Where they under-spend and pay for it is skimping on clean technique and fresh spawn. I break the entire budget down line by line, with the real per-flush yield you can expect, in a low-budget first grow under $50. If you would rather buy pre-made oyster spawn than culture your own, a bag of grain spawn from a reputable supplier is the one purchase I never talk anyone out of.
As an Amazon Associate I earn from qualifying purchases. When I do point at gear, it is the boring, reusable stuff — a bag of hydrated garden lime for the cold bath and a clear storage tote for the fruiting chamber. Both outlast dozens of grows.
The Mistakes That Quietly Waste a Low-Tech Grow
The two failures that kill more no-canner grows than anything else are under-pasteurizing (weak lime dose or too-cool water) and over-hydrating the substrate. Both leave you with a sour, ammonia-or-vinegar-smelling mess and a green or slimy takeover instead of clean white mycelium. Neither is a gear problem — both are technique, and both are fixable for free.
Learn to read a jar or block. Healthy oyster mycelium is bright white, sometimes ropey and rhizomorphic, and it smells faintly of fresh mushroom or clean forest floor. Trichoderma — the green mold that ends more grows than any other — starts as a patch of white fuzz that turns forest-green from the center; the moment you see green, that block goes in the trash, not the fruiting chamber, because its spores travel. Cobweb mold looks wispy and grey and grows fast; bacterial blotch is the slimy brown spotting on the mushrooms themselves. I keep the full visual triage — what to toss, what you can sometimes save — in the contamination work across the site, because forensics is the skill that separates a grower from a kit-buyer.
The last mistake is impatience: opening the chamber constantly to check, which dries the pins and stalls fruiting. Trust the process, mist the air not the mushrooms, and let a fully colonized block sit before you expect pins. Get pasteurization and hydration right, pick oyster, and work clean — that is the whole low-tech game, and none of it requires the canner sitting in someone else’s kitchen.
How Long Does a Low-Tech Grow Take From Start to Harvest?
Budget four to six weeks from spawning to your first oyster harvest on pasteurized straw. Colonization — the mycelium fully consuming the substrate — runs about 10–14 days at room temperature, pinning begins within 3–7 days of introducing fresh air and light, and the pins bulk to harvest size in another 4–7 days. Cardboard-based methods add a week or two on the front end.
The timeline surprises people because most of it is invisible waiting, not work. A tub I spawn sits in a dark cupboard for two weeks doing nothing you can see — then the white front races across the straw, the surface goes from patchy to fully myceliated, and only then does the interesting part start. Rushing that colonization window is the classic beginner error: introduce fresh air and light too early, before the block is fully colonized, and you get weak, scattered pins that abort. Let it finish. A fully colonized block is bright, uniform white with a faint mushroom smell, and it fruits far more reliably than one you opened out of impatience.
Once pins appear, the pace quickens dramatically. Oyster clusters can double in size overnight in the final days, which is the genuinely magical part of the whole process — you go to bed with nubs and wake to a shelf of caps. Harvest just before the caps flatten and the edges start to turn up; that is peak texture and shelf life. After the first flush, mist the block and wait — most oyster substrate gives a second and sometimes third flush over the following two to three weeks, and those bonus harvests are free.
Where Does the Canner Actually Become Non-Negotiable?
The pressure cooker becomes non-negotiable the moment you want to make sterile grain spawn from scratch, grow nutrient-hungry species like lion’s mane or shiitake on supplemented sawdust, or scale past a tub or two where hand-misting stops being practical. For a first-year oyster grower on straw and coir, none of those apply — which is exactly why the canner is optional at the start.
I am blunt about this because pretending the shortcuts scale forever is how the low-tech crowd loses people. Cold pasteurization and cardboard spawn are genuinely excellent for what they are: a cheap, low-risk on-ramp to real cultivation using oyster. But the day you want to fruit lion’s mane for the recovery-tea shelf, or run king oyster on Masters Mix, you are working with substrates rich enough that only sterilization holds — and that means a canner and clean grain spawn. There is no lime bath that fixes a soy-hull block; the nutrients that make it a great fruiting substrate also make it a great home for mold.
Think of the no-canner track as the first rung, not a ceiling. Nearly every serious home cultivator I know started exactly here — an oyster tub, a bag of straw, a spray bottle — proved to themselves they could work clean and read a colonizing block, and only then spent the $80 on a canner when a specific ambition demanded it. Get oyster right the cheap way first. The gear earns its place when a species you actually want to grow requires it, and not one day sooner. Field & Forest Products, a long-running mushroom supplier, is a good place to see where the species ladder eventually leads (Field & Forest Products).
Can you really grow mushrooms without a pressure cooker?
Yes, for oyster mushrooms on pasteurized straw or coir. Pasteurization with cold lime or hot water replaces sterilization for low-nutrient substrates. You only need a pressure cooker for rich substrates like grain spawn or Masters Mix.
What is the difference between pasteurization and sterilization?
Sterilization at 121C and 15 PSI kills everything including spores, which nutrient-rich substrates like grain require. Pasteurization only knocks competitors down far enough that fast oyster mycelium wins the race, and it works on poor substrates like straw and coir with no canner.
Which mushroom is easiest to grow without equipment?
Oyster mushrooms. They colonize aggressively, tolerate humidity swings, and fruit on cheap pasteurized straw or coir. A beginner has roughly an 80 to 90 percent chance of a real harvest with oyster, which no other gourmet species matches at this level.
How much does a no-pressure-cooker mushroom grow cost?
A complete first oyster grow runs about 30 to 50 dollars all-in, most of it reusable gear. The recurring cost per grow drops to roughly 8 to 15 dollars once you own the tub and spray bottle. Buying oyster spawn is the main recurring expense.
Can I make my own grain spawn without a pressure cooker?
Not reliably. Grain is a rich, moist medium that needs full sterilization at 15 PSI. Oven or steam shortcuts lower the contamination load but leave spores, so tossed-jar rates climb. Colonizing clean cardboard is the low-tech way to multiply oyster spawn instead.
How do you fruit mushrooms without a humidifier or fan?
Use a clear tote or grow bag with hand-cut holes, mist the air two to three times daily, and fan by opening the lid for fresh-air exchange. This delivers the high humidity and air swaps oyster needs at small scale, though it ties you to a daily misting schedule.
Keep Building
Every method above has its own deep dive. Start where your setup is thinnest:
- Cold Lime-Bath Pasteurization: No Stove, No Pressure Cooker — the dose, the soak, and the failure signs.
- The Cardboard Spawn Method — multiply oyster spawn for the price of a shipping box.
- Grain Spawn Without a Pressure Cooker — the honest limits of the shortcuts.
- Passive FAE: Fruiting Without a Fan or Controller — humidity and air by hand.
- Windowsill Mushroom Growing — what’s realistic and what’s hype.
- A Low-Budget First Grow — real results under a tight spend.